Configuring Monitoring and Alerting for Azure Data Factory
- Print
- DarkLight
- Download PDF
Configuring Monitoring and Alerting for Azure Data Factory
- Print
- DarkLight
- Download PDF
Article summary
Did you find this summary helpful?
Thank you for your feedback!
#ServerlessTips - Azure Data Factory
Author: Dave McCollough, CTO, Geokey
In this article, we will configure Azure Data Factory monitoring and alerting.
Prerequisites
- Active Azure Subscription. If you don’t have a subscription, you can sign up for a free one here.
- Azure Data Factory Instance. You can learn how if you’ve never created an Azure Data Factory instance.
Configure the Pipeline
- Open Azure Data Factory Studio
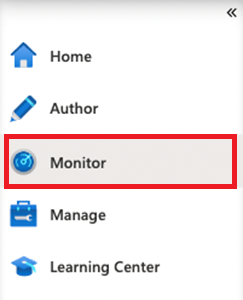
- Select Monitor from the side navigation bar
3. Select Alerts & Metrics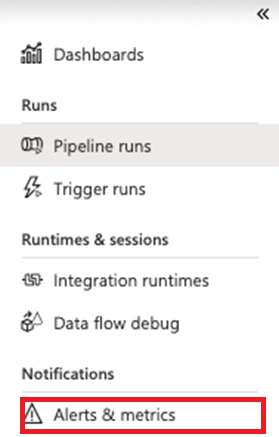
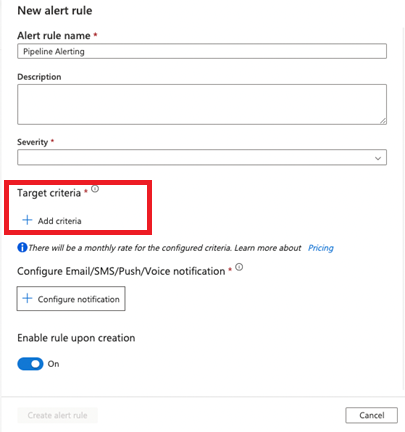
4. Select New alert rule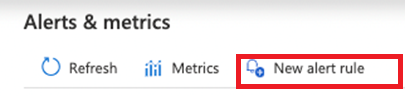
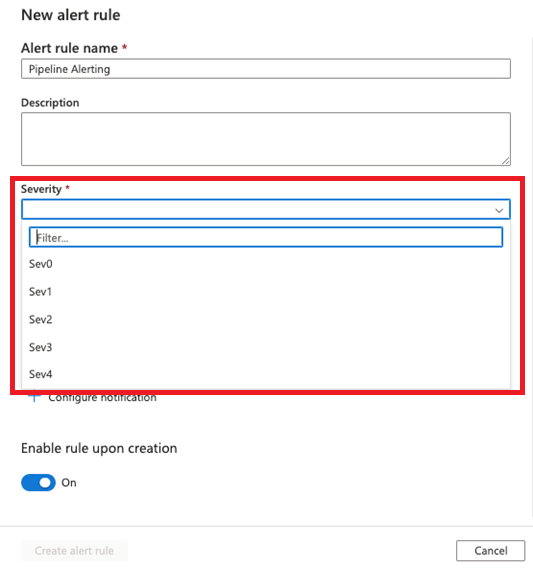
5. Enter Alert rule Name

6. Select the Severity
Severity levels defined by Microsoft are as follows:
0 = Critical
1 = Error
2 = Warning
3 = Informational
4 = Verbos
7. Select Target criteria by clicking the + Add criteria button
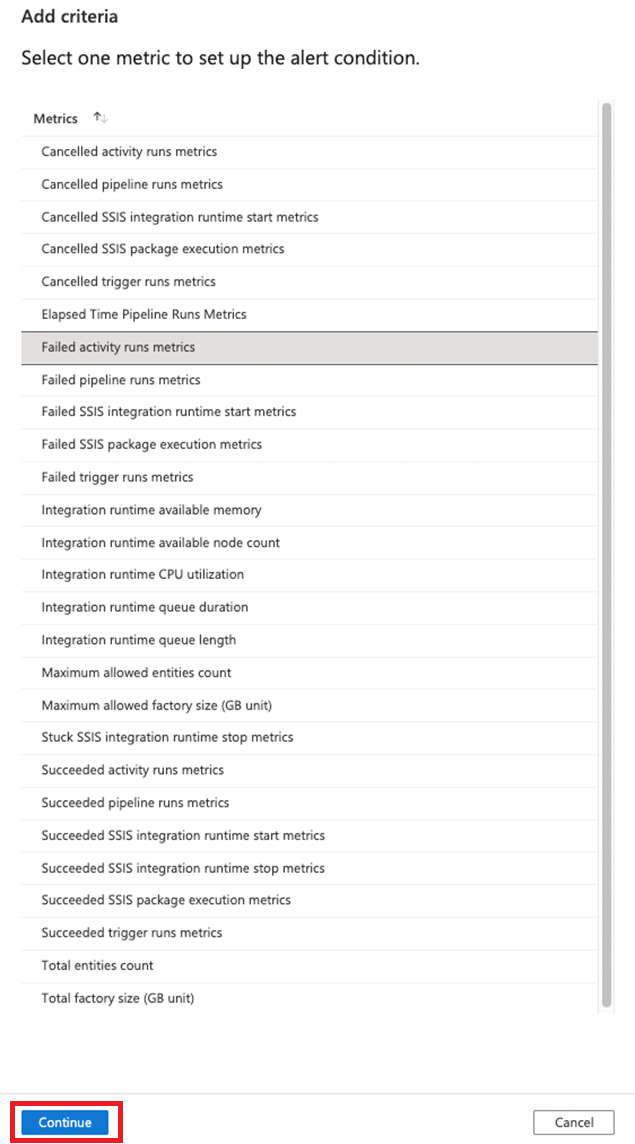
8. Select the criteria you want to alert on and click the Continue button
9. Configure the alert logic and click the Add Criteria button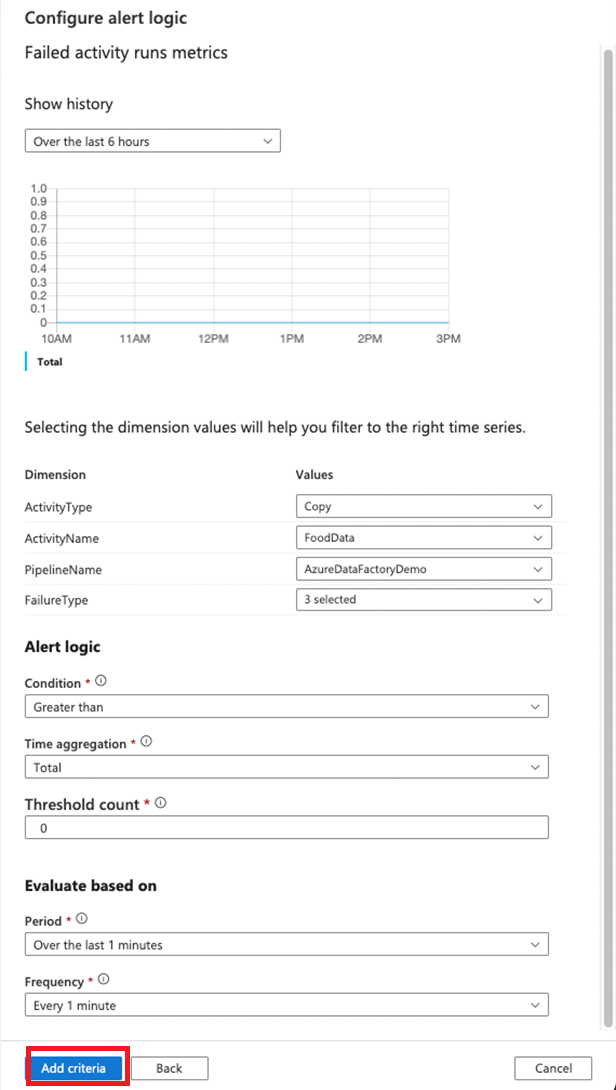
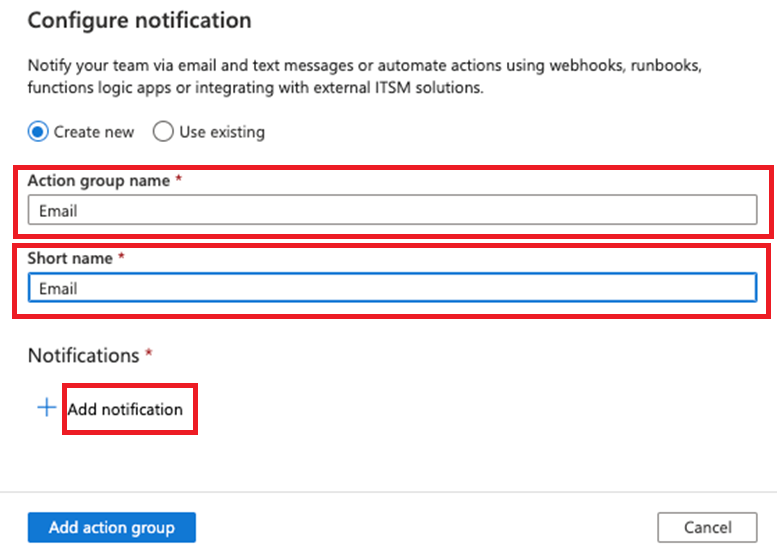
10. Click Configure notification to configure your notification.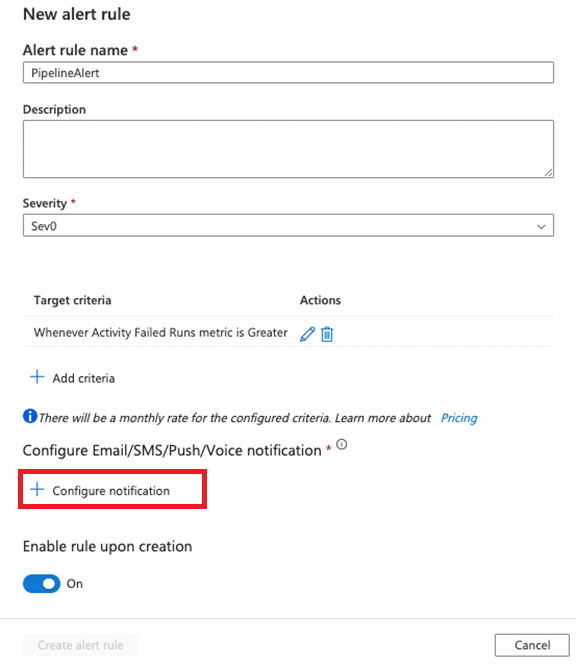
11. Enter an Action group name and Short name
Click + Add Notification.
12. Enter the Action name
Select the type of notifications you would like to receive (Email, SMS, Azure App Notifications, and Voice)
Enter the specific details related to your selection.
When complete, click the Add notification button.

13. Verify your notification information is correct and click the Add action group button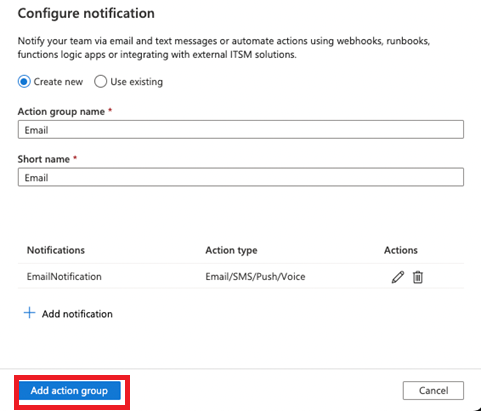
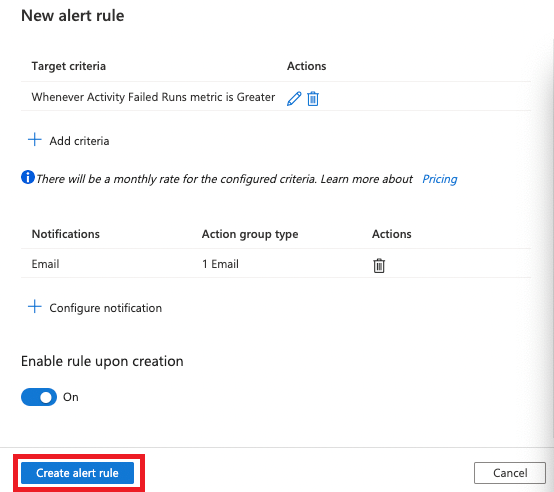
14. Verify that your alert rule information is correct and click the Create alert rule button.
15. Your alert rule will now appear on the Alerts & Metrics page. You can disable, edit, or delete your rule from this page.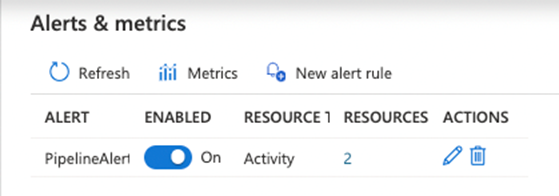
Summary
In this article, we configured alerting and monitoring for Azure Data Factory.
Was this article helpful?