Connecting Azure Cache for Redis to Azure Storage using Managed Identity
- Print
- DarkLight
- Download PDF
Connecting Azure Cache for Redis to Azure Storage using Managed Identity
- Print
- DarkLight
- Download PDF
Article summary
Did you find this summary helpful?
Thank you for your feedback!
#ServerlessTips - Azure Storage Account
Author: Rahul Rai Microsoft MVP
Azure Cache for Redis is a fully managed service that provides high-performance caching and data processing capabilities. One of the features of Azure Cache for Redis is that it can use a managed identity to connect with a storage account which can be helpful in two scenarios:
- Data Persistence: You can schedule data backups in your cache through an RDB or AOF file. RDB and AOF files are two different formats for persisting data in Redis. RDB stands for Redis Database, performing point-in-time snapshots of your dataset at specified intervals. AOF stands for Append Only File, which logs every write operation the server receives. These operations can then be replayed at server startup, reconstructing the original dataset.
- Import or Export: You can save snapshots of cache data or import data from a saved file.
A managed identity is an identity that is automatically created and managed by Azure Active Directory (AAD). It can be either system-assigned or user-assigned. A system-assigned identity is tied to the lifecycle of a specific resource, such as an Azure Cache for Redis instance. A user-assigned identity is created as a standalone resource and can be assigned to multiple resources.
To use managed identity with Azure Cache for Redis, you need to follow these steps:
- Enable system-assigned managed identity on your cache instance.
- Assign a role to your cache instance that grants it access to the storage account.
- Configure your cache instance to use managed identity when connecting to the storage account.
Here is an example of how to enable system identity on an existing cache instance and grant it Blob read and write access to an existing Azure Storage account using the Azure CLI:
# Enable system-assigned managed identity on your cache instance
az redis identity assign --name "<cache-name>" --resource-group "<resource-group-name>" --mi-system-assigned

# Get the principal ID of your cache instance
principalId=$(az redis show --name "<cache-name>" --resource-group "<resource-geoup-name>" --query "identity.principalId" -o tsv)

# Assign a role to your cache instance that grants it access to the storage account
az role assignment create --assignee $principalId --role "Storage Blob Data Contributor" --scope "/subscriptions/<subscription-id>/resourceGroups/<resource-group-name>/providers/Microsoft.Storage/storageAccounts/<storage-account-name>"
After the permissions are in place, please navigate to the cache resource in Azure Portal and select the "Data persistence" option from the "Settings" section. Here you can provide the following required details to enable the persistence of RDB or AOF files in Azure Storage:
- Backup file: The type of backup file you wish to use. This option should be set to RDB.
- Authentication method: Managed identity.
- Backup frequency: 15 minutes.
- Storage account: Select the same storage account you configured in the previous command.
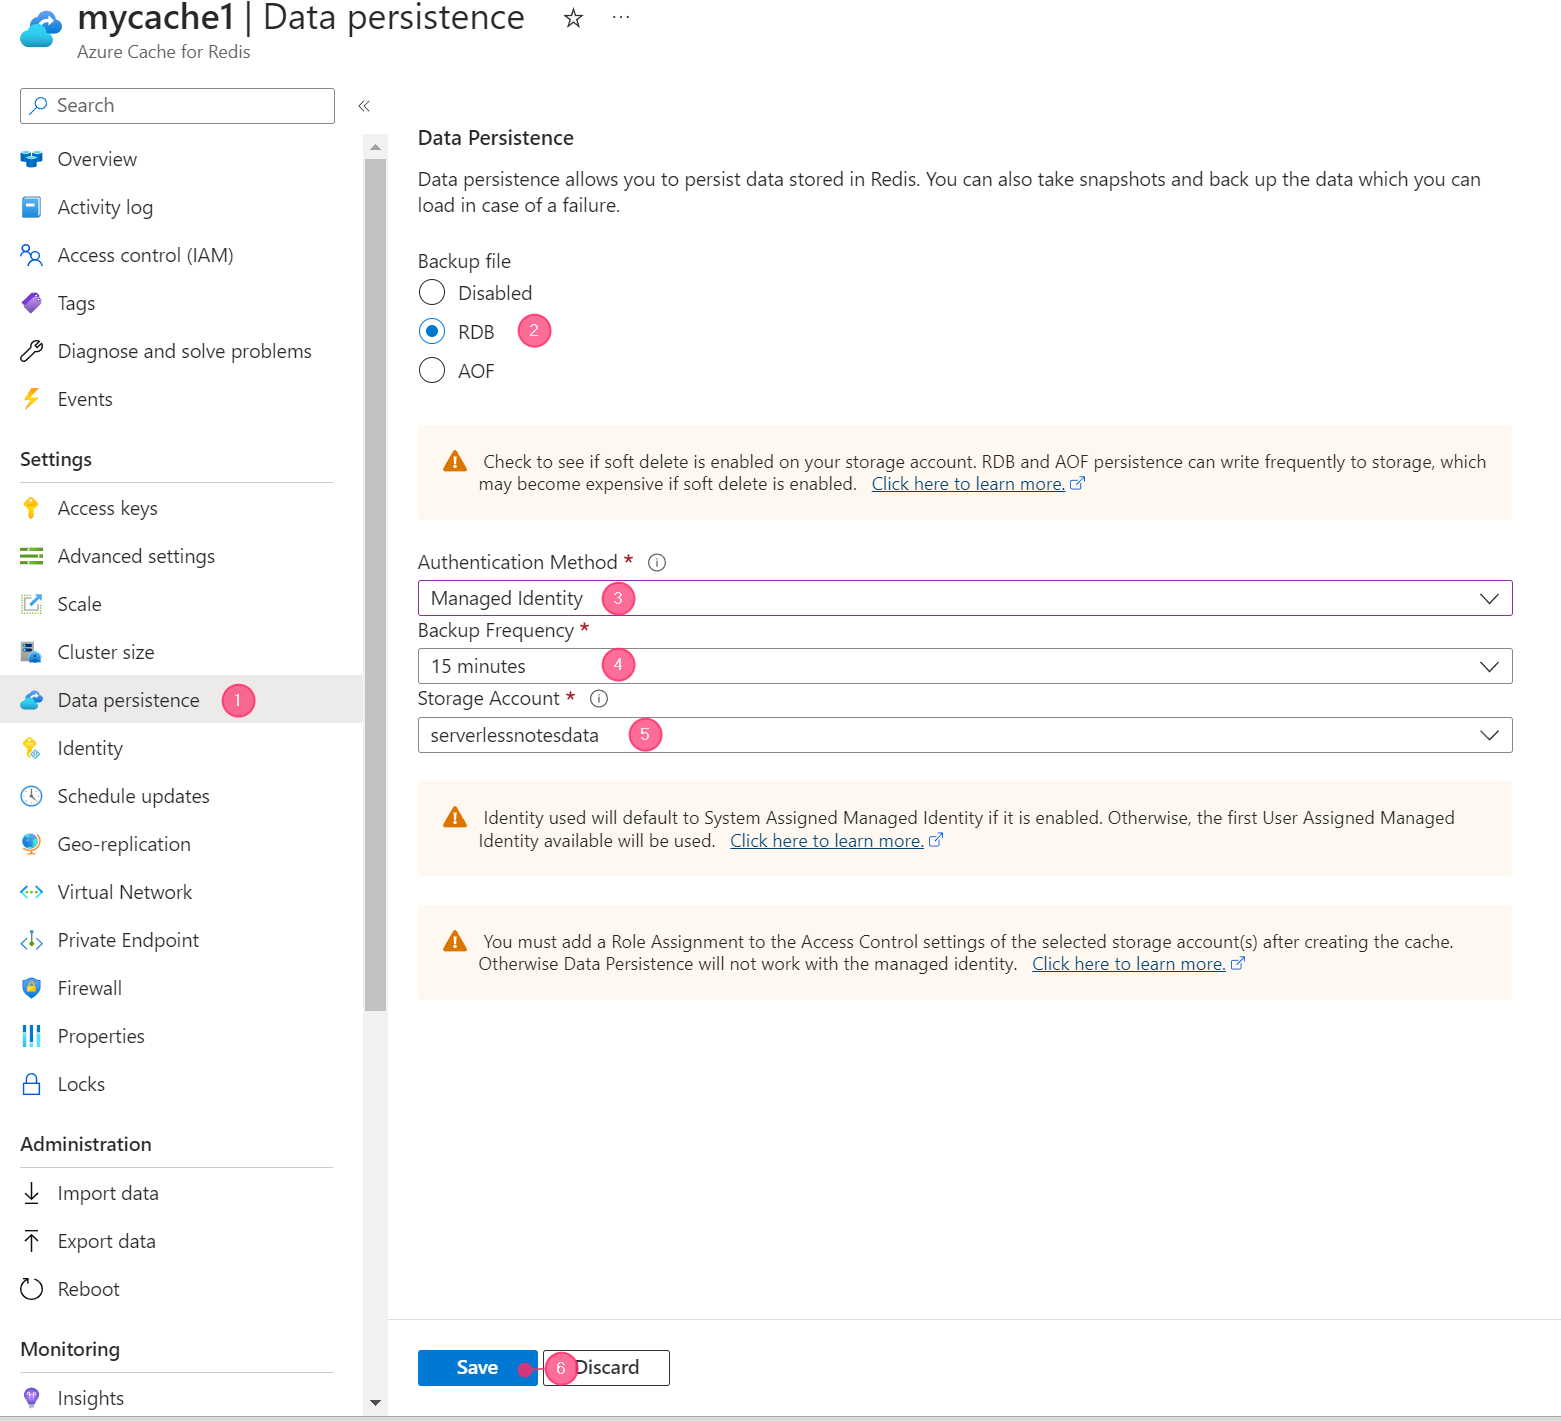
Fig1.Set data persistence settings
Save your preferences by clicking the "Save" button.
Following the setup, you can access the backup files created by Azure Redis in your storage account. An example of backup files in the container after data persistence is configured can be seen in the following screenshot.
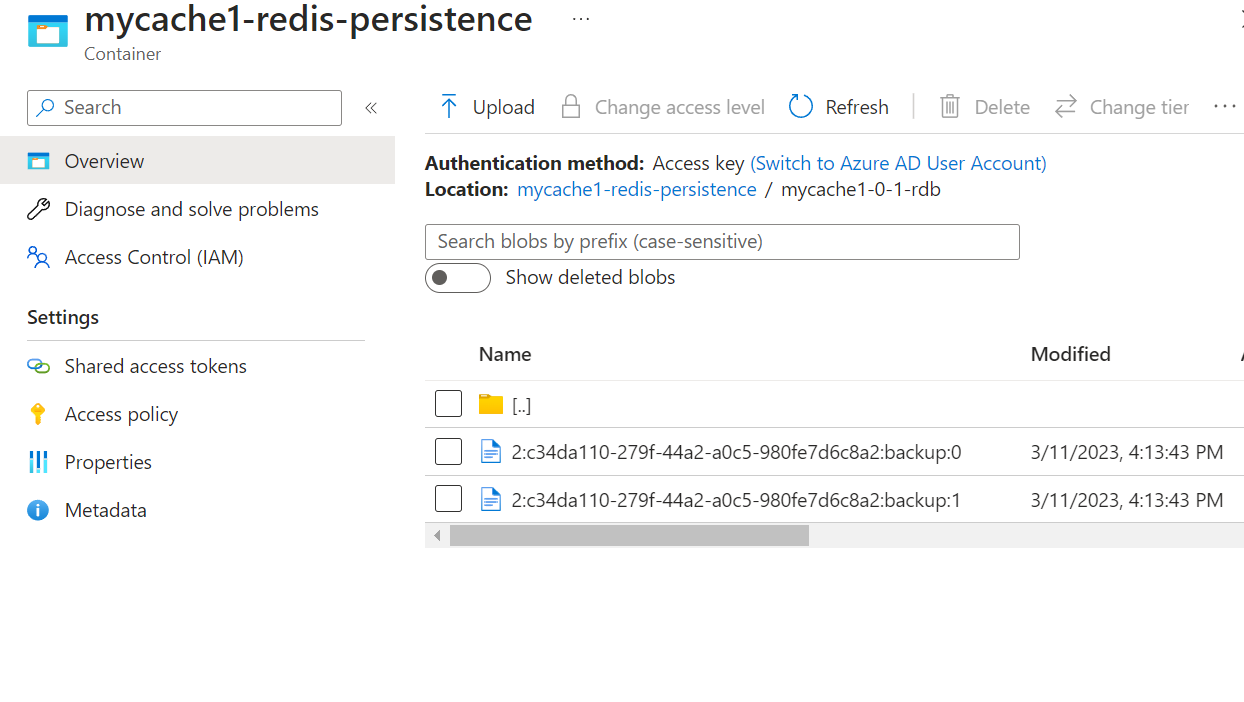
Fig2.Backup files in the storage container
You can learn more about managed identity for data persistence in Azure Redis cache on the Microsoft documentation site.
Was this article helpful?