Create a Custom Connector from Postman Collection
- Print
- DarkLight
- Download PDF
Create a Custom Connector from Postman Collection
- Print
- DarkLight
- Download PDF
Article summary
Did you find this summary helpful?
Thank you for your feedback!
#ServerlessTips - Azure Logic Apps
Author: Kent Weare Integration MVP
Creating custom connectors for Azure Logic Apps (and Microsoft Flow) is an extremely useful capability. While the library of connectors continues to grow, it just isn’t feasible to have support for every API. In some circumstances, it could be your own API that you have built internally and would like to plug it into Azure Logic Apps.
In a previous Turbo360 (Formerly Serverless360) blog post, we discussed creating a custom connector by using an OpenAPI definition. But, what happens if we don’t have an OpenAPI file? One option is to use a Postman collection. Postman is a useful tool for testing and exploring an API. In this case, we can capture all of our interactions as a collection that we can export as a file and then use this file to create a custom connector. The Postman website provides an in-depth walkthrough of creating a collection which is available here.
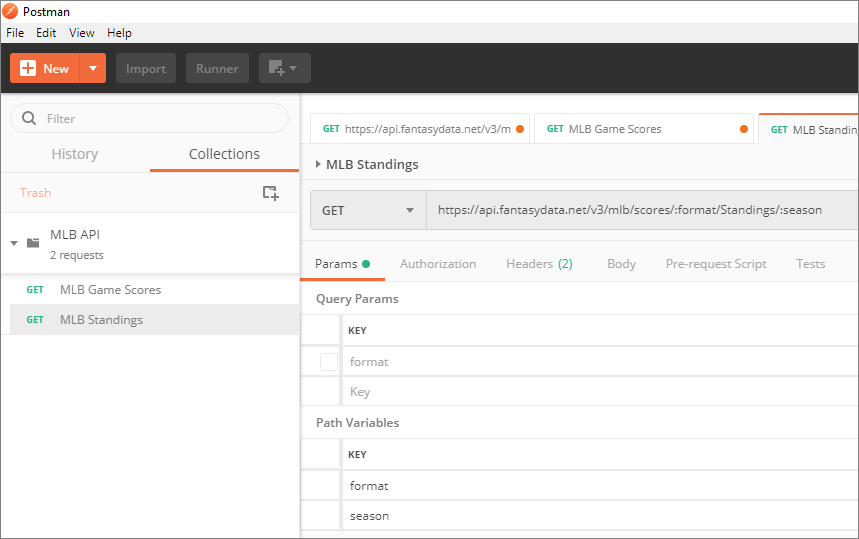
For the purposes of this tip, we are going to leverage a Major League Baseball API provided by fantasydata.com.
In order to create a custom connector, we need to export our Postman collection and can do so by clicking on Export.
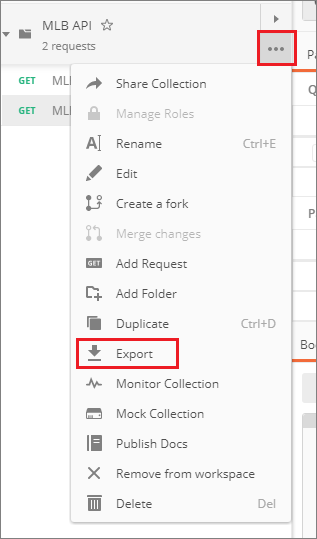
When exporting our Postman collection, we need to ensure we export it as a v1 Collection which is currently deprecated. We will now create our custom connector inside the Azure Portal.
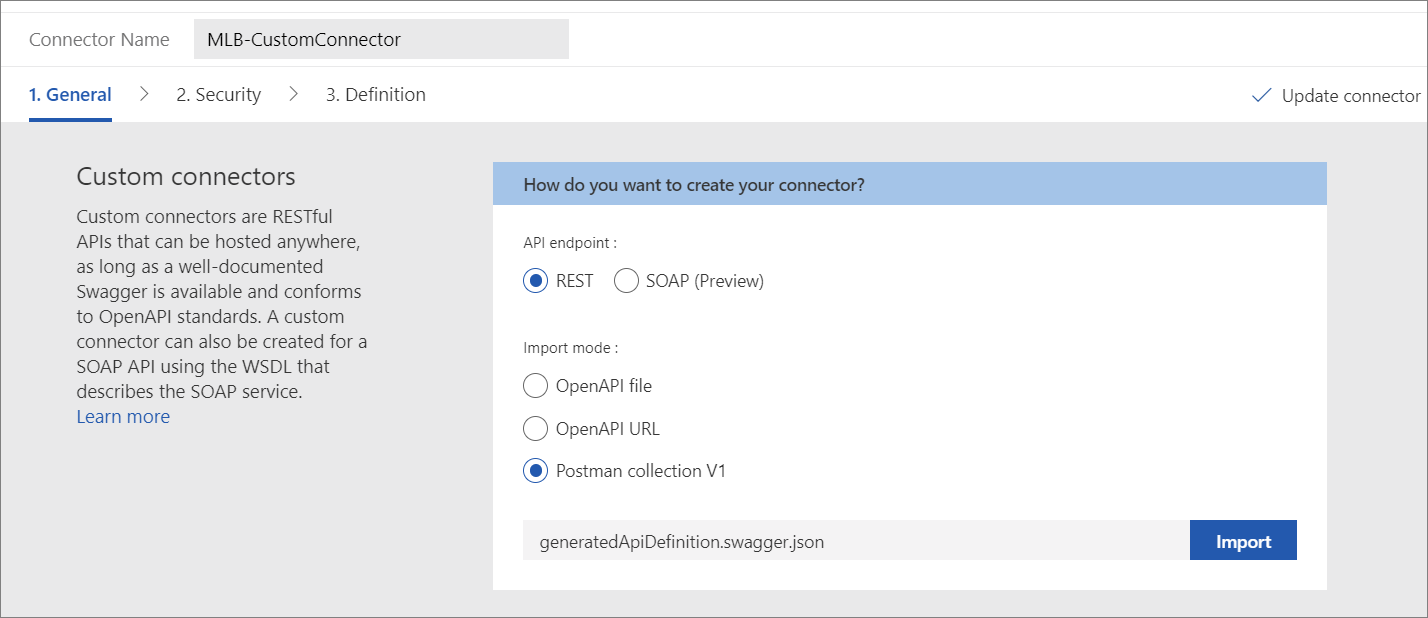
Next, we need to edit our custom connector and are prompted to provide an Import mode. In our case we are going to select Postman collection V1. We can provide additional information such as our own icon and description if we wish, but we do need to provide a Host.
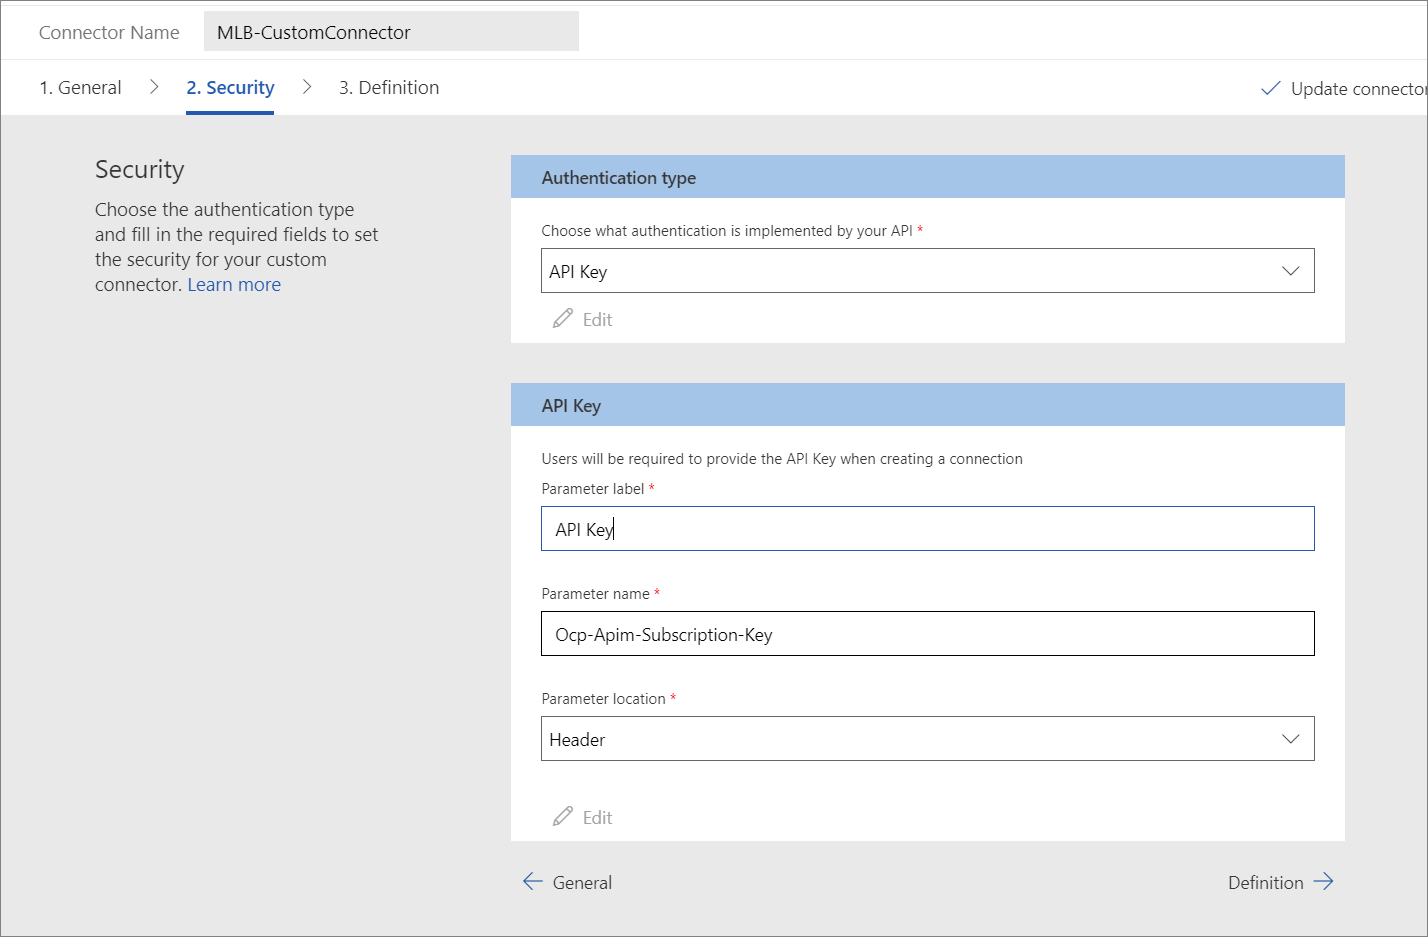
In the case of the fantasydata.com MLB API, there is no additional authentication beyond an API Key. So, we need to provide the Parameter label, Parameter name and our Parameter location.
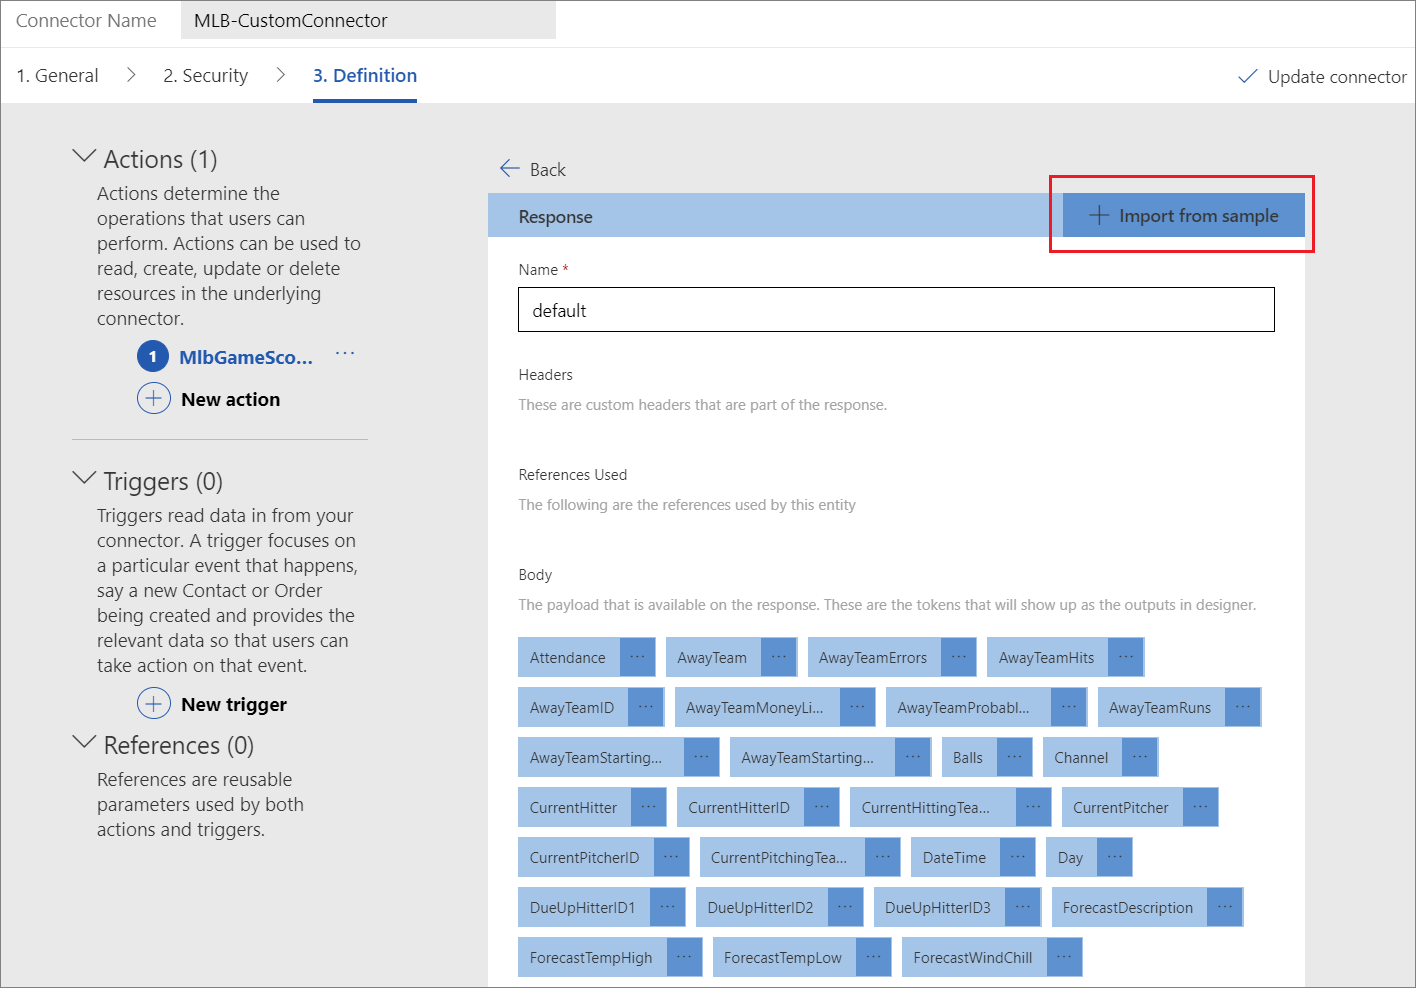
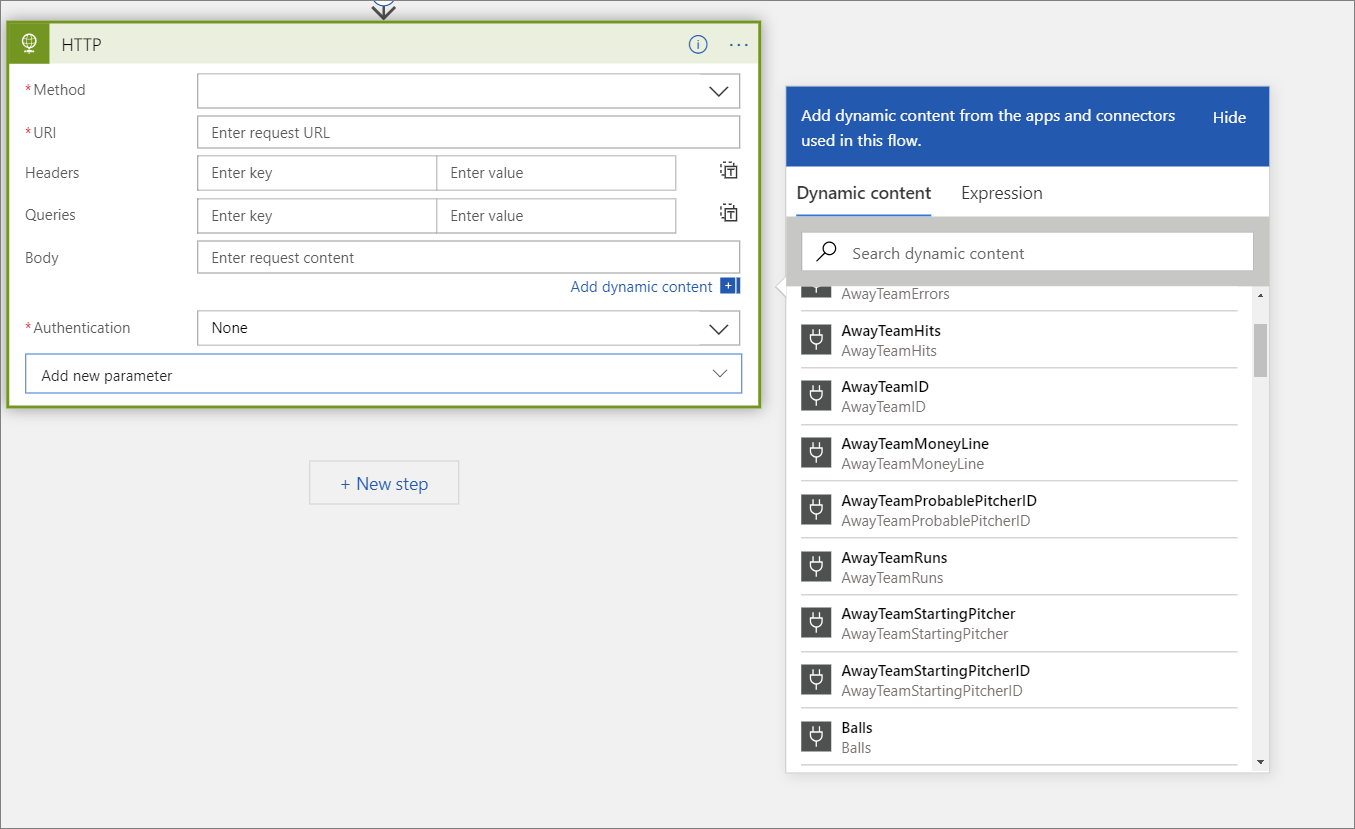
The next area that we need to focus on is the Definition section. Within this area, we can provide query, path or header parameters.

In addition, we can now provide sample responses based upon some of the testing we did in Postman. This will allow us to have typed responses within our logic app, in order to have a better dev experience. Once we have completed our configuration, we can click on the Update connector label to publish our custom connector.
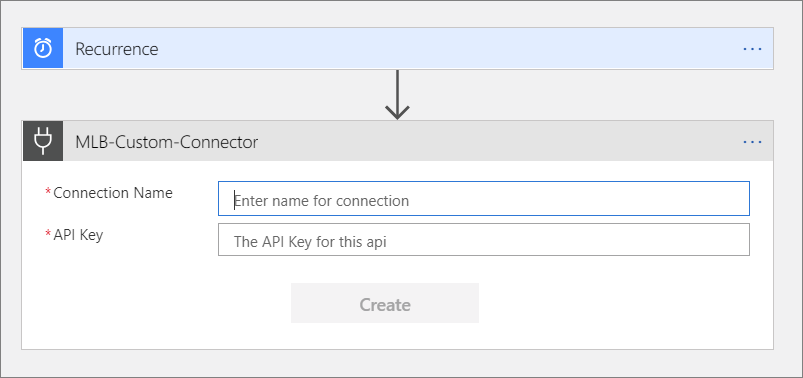
Within Logic Apps, we can now search for our custom connector. Since our Authentication mechanism was based upon an API Key, we will get prompted to provide it as part of our configuration.
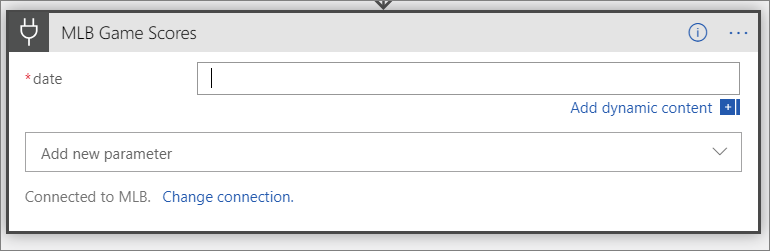
In our custom connector, we provided a date path parameter. As a result, we will now be prompted for this value within our configuration.
Testing
If we go ahead and run our logic app, we will discover that we are able to successfully call the MLB API and receive a response.
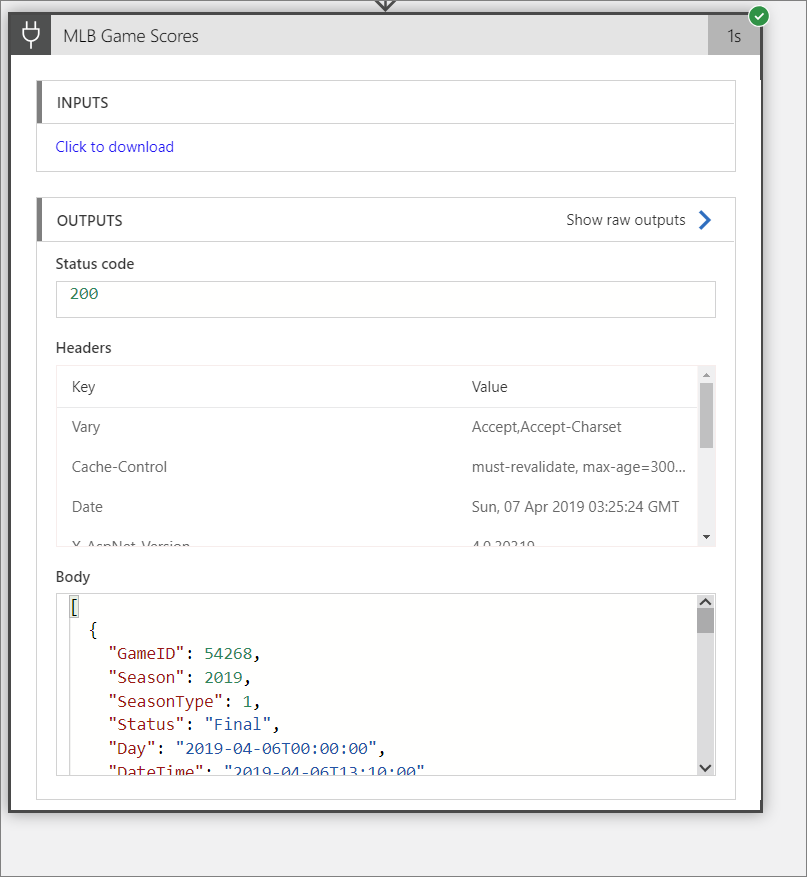
Since we did include a sample response message, we do have a typed response that we can leverage if we choose.
In this post we discovered that we don’t always need to write code in order to create a custom connector. In this case, we simply needed access to an existing API and could take advantage of a Postman collection to simplify the creation of our custom connector so that calling it from within Azure Logic Apps is quite simple.

Was this article helpful?