Create a Local Azure Function using TypeScript
- Print
- DarkLight
- Download PDF
Create a Local Azure Function using TypeScript
- Print
- DarkLight
- Download PDF
Article summary
Did you find this summary helpful?
Thank you for your feedback!
#ServerlessTips - Azure Functions
Author: Dave McCollough Technical Consultant
In this post we will demonstrate how to create an Azure Function using TypeScript
TypeScript is a strongly typed programming language built on JavaScript. It adds additional syntax to your JavaScript to help you and your team catch errors earlier. TypeScript code compiles to JavaScript and runs anywhere JavaScript runs.
Prerequisites
- Active Azure Subscription
- Node.js. You can install Node.js for your platform here.
* Please make sure you have Active LTS or Maintenance LTS version installed (10.14.1 recommended). - Visual Studio Code. You can install Visual Studio Code for your platform here.
- Azure Functions Extension for Visual Studio Code.
Create a TypeScript function
1.Open Visual Studio Code and Click the Azure icon in the left-hand navigation bar.

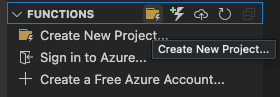
2.In the Azure Functions section, click the Create New Project icon
3.Select or browse to the location to save your function project.

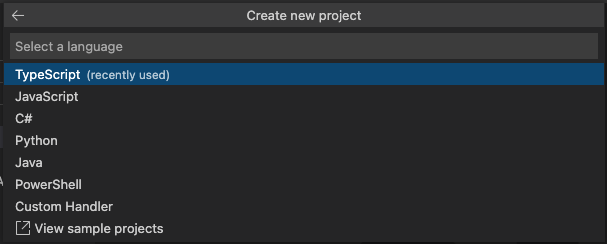
4.Select the language. For this example, we will use TypeScript.
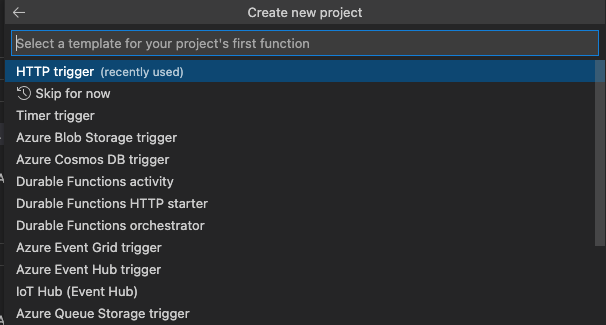
5.Select HTTP Trigger as the template for your function.
6.Provide a name for your function and press the Enter key.

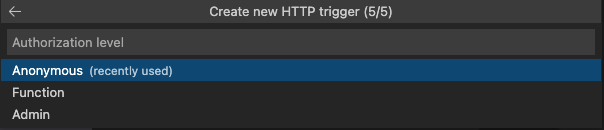
7.Select an Authorization Level. For this example, we will use Anonymous.
8.Visual Studio Code will generate your TypeScript Azure Function.
9.Once this is complete, press F5 to run your function.
10.ShapeYou can either copy/paste the URL into your browser or cmd or ctrl + click to open the URL in a browser.


11.To verify that your function is working, append a question mark and name parameter to the URL as shown below:
http://localhost:7071/api/typescript-sample-function?name=Dave
12.After modifying the URL, the function will respond and update the browser.

Summary
In this post we reviewed how to create and test a TypeScript Azure Function in your local environment.
Was this article helpful?