Create an Azure Function with Python
- Print
- DarkLight
- PDF
Create an Azure Function with Python
- Print
- DarkLight
- PDF
Article summary
Did you find this summary helpful?
Thank you for your feedback!
#ServerlessTips - Azure Functions
Author: Dave McCollough Vice President - Information Technology
In this article, we will demonstrate how to create an Azure Function using Python.
Python is a general-purpose, high level programming language known for its readability and flexibility. Python can be used for scripting, backend web development, Data Science, AI and Machine Learning, IoT, etc.
Python is used across several Azure Services including web apps, functions, storage, databases, AI, etc.
Prerequisites
- Active Azure Subscription
- Visual Studio Code with Azure Functions Core Tools and Azure Functions extension installed
- Python version 3.6 or greater
Create a local function project
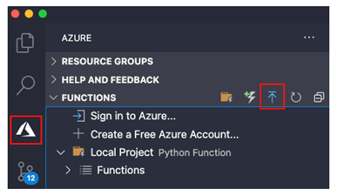
Open Visual Studio Code and click the Azure icon
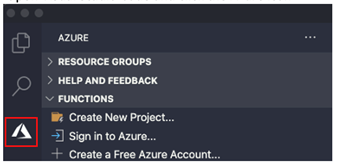
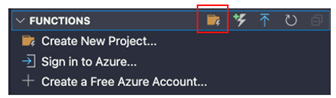
Click the folder icon to create your new project
You will be prompted to select a location to save your project.
Select Python from the Create New Project dropdown.
Select the version of Python or Python environment you want to run your Azure Function project in.
Select HTTP trigger as your project template.
You will be prompted to create a function name. You can use the default (HTTPTrigger1) or change it based on your preference
You will be prompted to select an Authorization level. For this example, you can choose Anonymous (choosing Anonymous means your function can be called without an API access key).
You will be prompted to choose how you want to open your project, select Add to workspace (choosing Add to workspace means any configuration settings will apply only to this folder).
Visual Studio will create your project
Once your project is created, press the F5 Key to run your function
Azure Functions Core tools will display output in the Terminal tab. This will allow you to access the URL of your function app.
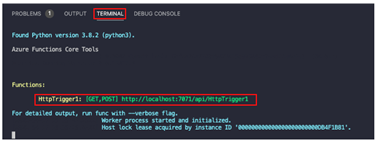
You can either copy/paste the URL into your browser or cmd or ctrl + click to open the URL in a browser
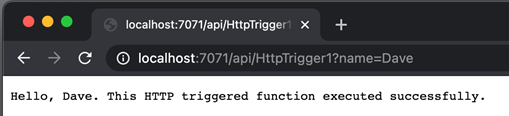
To verify that your function is working, append a question mark and name parameter to the URL as shown below:
http://localhost:7071/api/HttpTrigger1?name=DaveAfter modifying the URL, the function will respond and update the browser
Publish your function to Azure
Click the Azure icon followed by the deploy to Azure icon
If you are not already signed into Azure, you will be prompted to sign in.
Click Create new Function App in Azure.

Enter a globally unique name for your function app.
Select your runtime stack. This should be the version of Python you are running locally.
Select the region for your resources.
The resources to support your function app will be created in Azure.
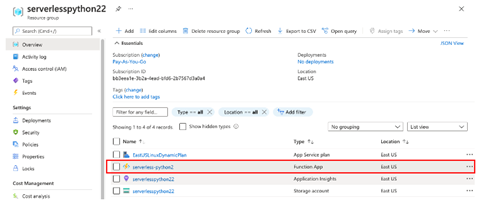
Login to the Azure Portal.
Navigate to the resource groups page and select the resource you created in step 4.
Select the function app from the list of resources.
Click Functions in the left-hand navigation bar
Click on your function
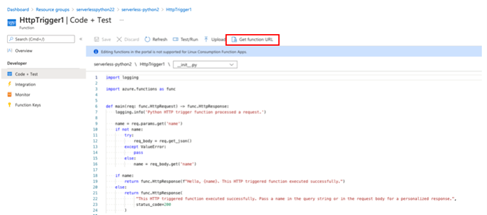
Click on Code + Test in the left-hand navigation bar
You can now view your function code. If you want to test your function, click Get function URL.
Copy and paste the URL into your browser.
Append the question mark and name parameter to the URL.
?name=DaveAfter modifying the URL, the function will respond and update the browser.
Summary
In this article we reviewed how you can create and publish a Python function project from your local environment to Azure.
Was this article helpful?