Deploy the Azure Event Grid viewer and Create an Event Grid subscription
- Print
- DarkLight
- PDF
Deploy the Azure Event Grid viewer and Create an Event Grid subscription
- Print
- DarkLight
- PDF
Article summary
Did you find this summary helpful?
Thank you for your feedback!
#ServerlessTips - Azure Bicep
Author: Dave Rendon Microsoft MVP
This article will show you how to leverage the Azure Event Grid viewer application to display notifications from Event Grid near-real time in your environment using Infrastructure-as-Code with Azure Bicep.
The web app that will be deployed should refresh as messages are received, providing the user with the experience of a real-time feed.
Azure Bicep is a domain-specific language (DSL) that uses a declarative syntax to deploy Azure resources.
The Bicep is an abstraction on Azure Resource Manager (ARM) templates to define Azure resources using declarative Infrastructure as Code.
Prerequisites
• An Active Azure account: You can create an account for free.
• Azure Bicep is installed on your local machine.
• Azure PowerShell. See: Install Azure PowerShell.
• A resource group in your Azure subscription
Let's get started!
1. Solution Overview
We will author a Bicep template that creates a web app that deploys the Azure Event Grid Viewer application from a Docker container and an Event Grid Topic and the Event Grid Subscription.
The solution will include the following files:
• 📄 main.bicep: This is the Bicep template that will deploy the resources.
• 📄 azuredeploy.parameters.json: This parameter file contains the values for deploying your Bicep template.
2. Azure Bicep Template — parameters and variables
Please create a new file in your working directory and name it main. Bicep. We will define the following parameters and variables:
param webAppPrefix string = 'azinsidr' // Generate unique String for web app name
param sku string = 'F1' // The SKU of App Service Plan
param location string = resourceGroup().location // Location for all resources
var appServicePlanName = toLower('AppServicePlan-${webAppPrefix}')
var webAppName = toLower('wapp-${webAppPrefix}')

@description('The name of the Event Grid custom topic.')
param eventGridTopicName string = '${webAppPrefix}-topic'

@description('The name of the Event Grid custom topic\'s subscription.')
param eventGridSubscriptionName string = '${webAppPrefix}-sub'

@description('The webhook URL to send the subscription events to. This URL must be valid and must be prepared to accept the Event Grid webhook URL challenge request.')
param eventGridSubscriptionUrl string = 'https://wapp-${webAppPrefix}.azurewebsites.net/api/updates'
3. Azure Bicep Template — resources
We will define the following resources:
resource appServicePlan 'Microsoft.Web/serverfarms@2020-06-01' = {
  name: appServicePlanName
  location: location
  properties: {
    reserved: true
  }
  sku: {
    name: sku
  }
  kind: 'linux'
}

resource webApp 'Microsoft.Web/sites@2021-01-01' = {
  name: webAppName
  location: location
  tags: {}
  properties: {
    siteConfig: {
      appSettings: []
      linuxFxVersion: 'DOCKER|microsoftlearning/azure-event-grid-viewer:latest'
    }
    serverFarmId: appServicePlan.id
  }
}

resource eventGridTopic 'Microsoft.EventGrid/topics@2020-06-01' = {
  name: eventGridTopicName
  location: location
}

resource eventGridSubscription 'Microsoft.EventGrid/eventSubscriptions@2020-06-01' = {
  name: eventGridSubscriptionName
  scope: eventGridTopic
  dependsOn:[
    webApp
  ]
  properties: {
    destination: {
      endpointType: 'WebHook'
      properties: {
        endpointUrl: eventGridSubscriptionUrl
      }
    }
  }
}
4. Parameters file
You can optionally create a new file named azuredeploy.parameters.json. The code below shows the definition of an empty parameters file:
{
    "$schema": "https://schema.management.azure.com/schemas/2015-01-01/deploymentParameters.json#",
    "contentVersion": "1.0.0.0",
    "parameters": {

    }
}
5. Azure Bicep Template — Deployment
We will use the command below to deploy our Bicep template:
$date = Get-Date -Format "MM-dd-yyyy"
$rand = Get-Random -Maximum 1000
$deploymentName = "AzInsiderDeployment-"+"$date"+"-"+"$rand"

New-AzResourceGroupDeployment -Name $deploymentName -ResourceGroupName azinsider_demo -TemplateFile .\main.bicep -TemplateParameterFile .\azuredeploy.parameters.json -c
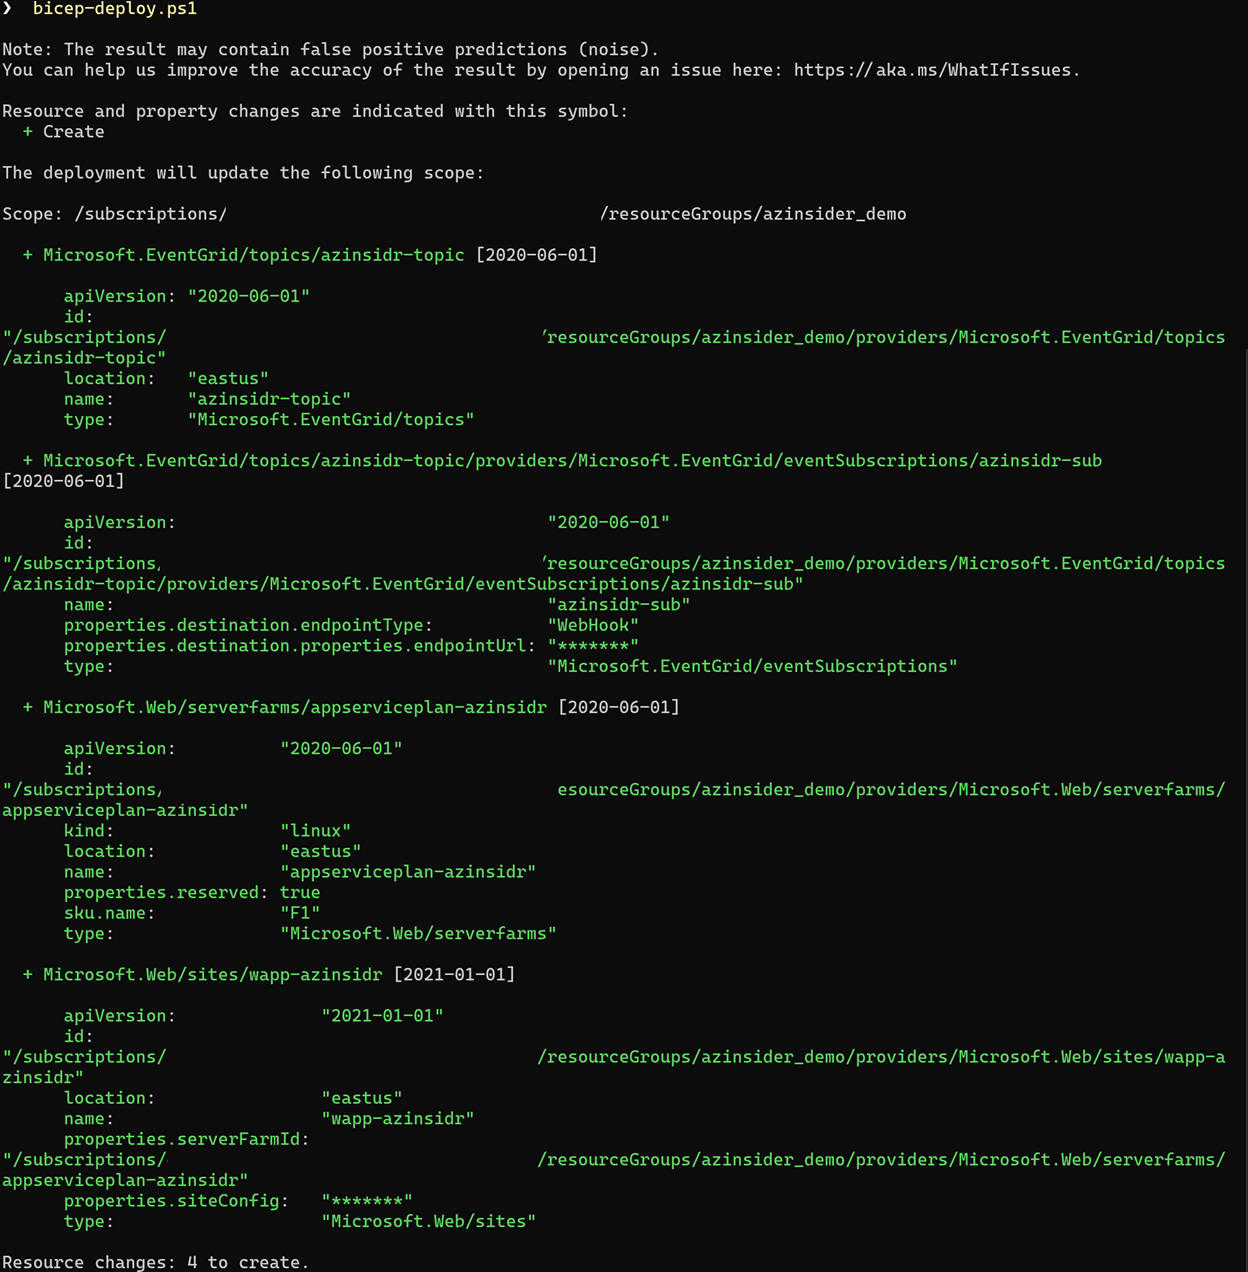
The image below shows the preview of the deployment:
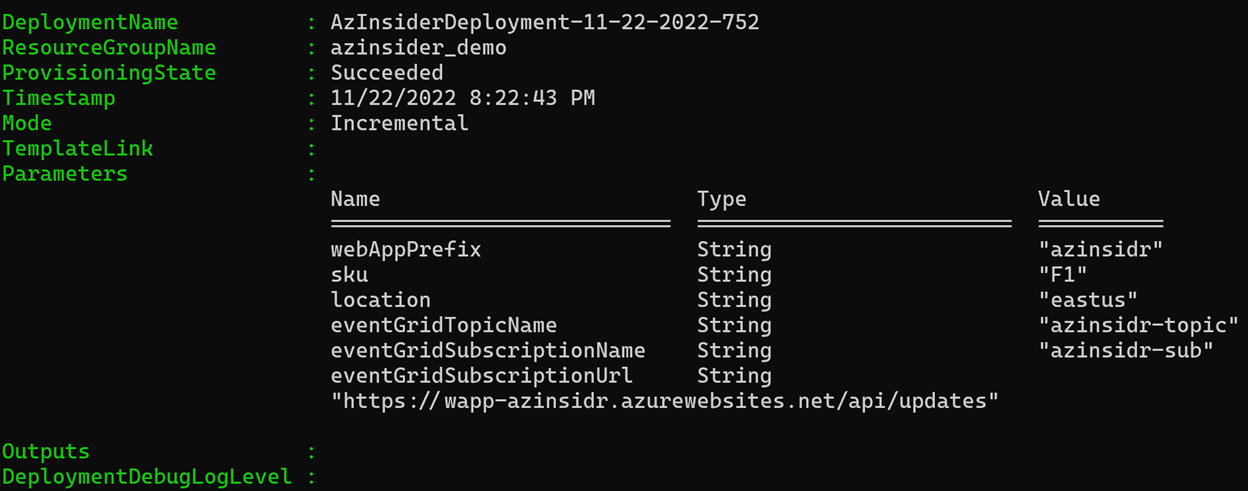
Then we will execute the deployment. The image below shows the deployment output:
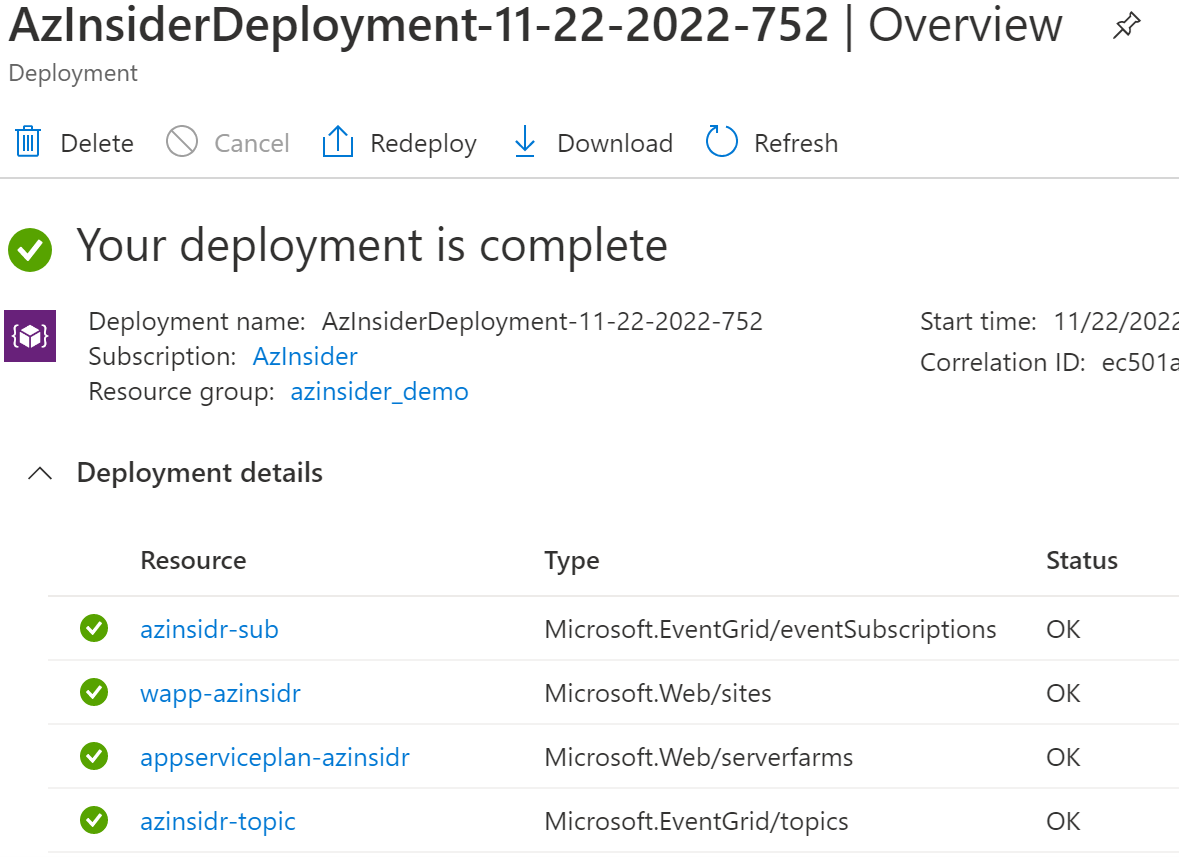
Once the deployment completes, you can verify the deployment using the Azure Portal:
Go to the URL of the web app and see the event subscription that was recently created, as shown below:
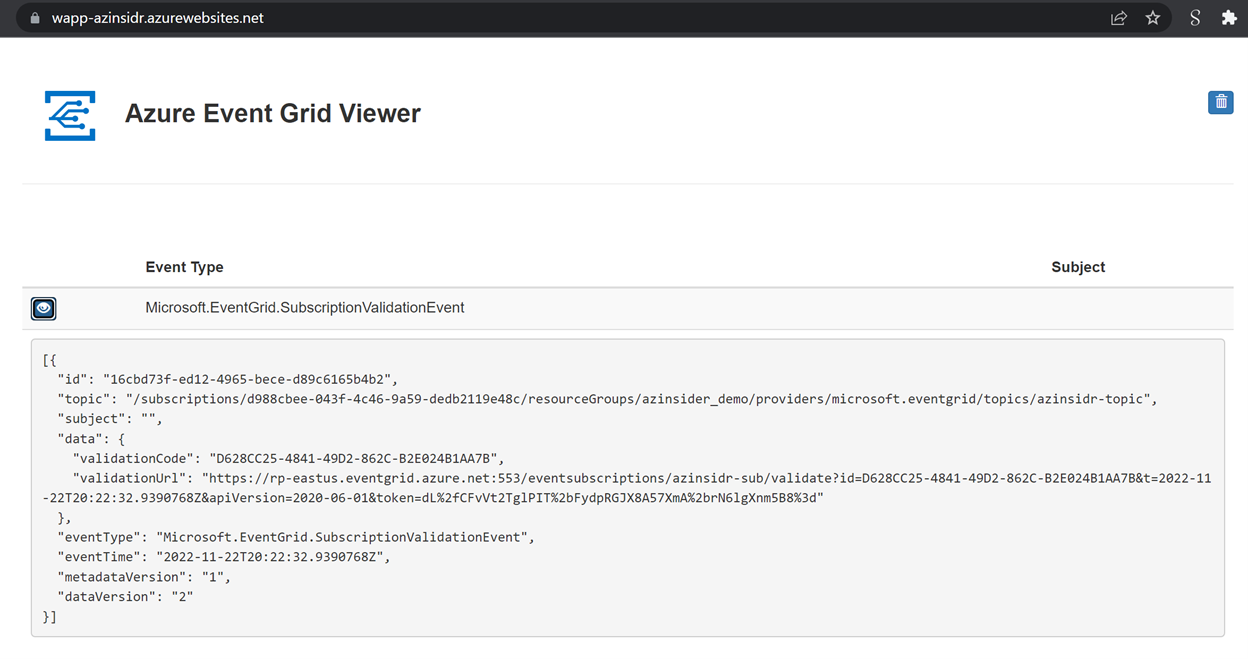
Note you can expand to see the details of the event.
Source Code
You can find the code of this solution in the following URL. Feel free to contribute!
https://github.com/daveRendon/azinsider/tree/main/application-workloads/azure-event-grid-viewer
Was this article helpful?