Deploying Applications on Azure Container Instances with and without an External IP Address Using Docker CLI
- Print
- DarkLight
- Download PDF
Deploying Applications on Azure Container Instances with and without an External IP Address Using Docker CLI
- Print
- DarkLight
- Download PDF
Article summary
Did you find this summary helpful?
Thank you for your feedback!
#ServerlessTips - Azure Container Instances
Author: Rahul Rai Azure MVP
Azure Container Instances is a great option for running basic applications that can be isolated to a set of containers. Some of the critical features of ACI are:
- Container access: Developers can expose containers to the internet with an IP address and an optional Fully Qualified Domain Name (FQDN).
- Custom sizes: Developers can specify the CPU and memory resources required to run the container.
- Persistent storage: Stateful containers can use mounted Azure File shares backed by Azure Storage.
- Container groups: Developers can deploy multiple containers as a group that is hosted on the same virtual machine. It helps developers segregate the components of the applications across containers, such as a container hosting the application and another container monitoring it.
This article will discuss how you can use the Docker CLI to run the containers accessible over the internet (e.g., web apps) and containers without an IP address (e.g., background jobs and headless apps).
Setup
- Log in to Azure with the following command and enter your credentials when prompted:
docker login azure
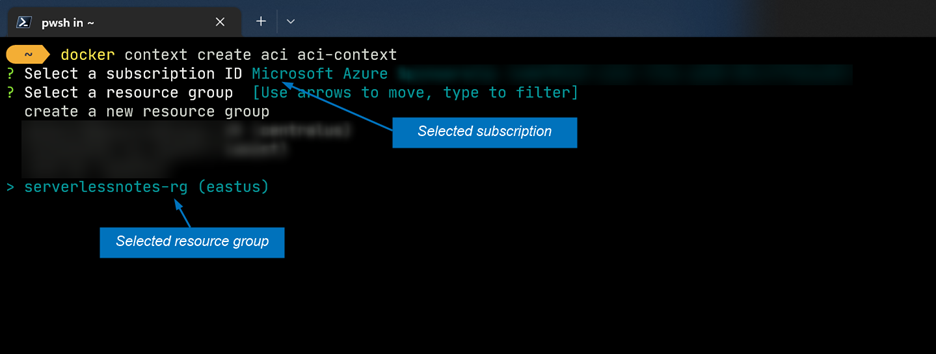
- Execute the following command to create an ACI context that associates Docker with your Azure subscription and resource group. You can use an existing resource group or have one created for you. Any containers you make afterward will be available in the resource group that you use.
docker context create aci aci-context
- Use the following command to set the current Docker context to the one that you just created:
docker context use aci-context
You can use the command docker context ls to view the contexts available in Docker.
Create an Internet Accessible Container
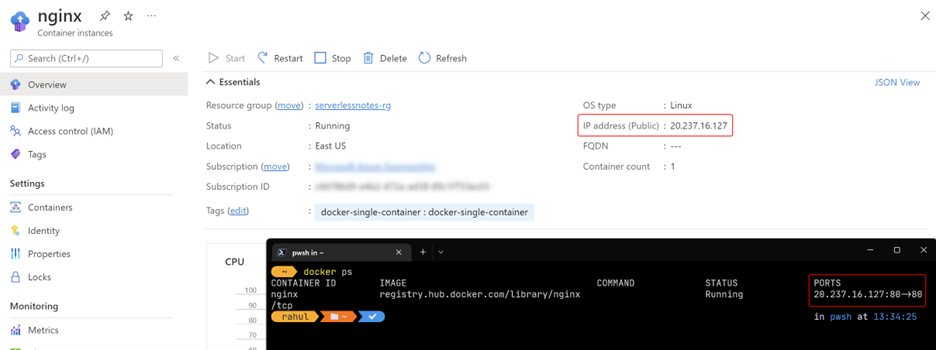
Use the following command to create a container based on the NGINX image on Docker Hub. The NGINX container exposes port 80 on the container by default which you can use to access it with your browser:
docker run --name nginx -p 80:80 registry.hub.docker.com/library/nginx
Exit the terminal after the container, reaches the ready state. You can find the public IP address of the container from the Overview panel of the container instance on Azure Portal or by using the command docker ps as follows:
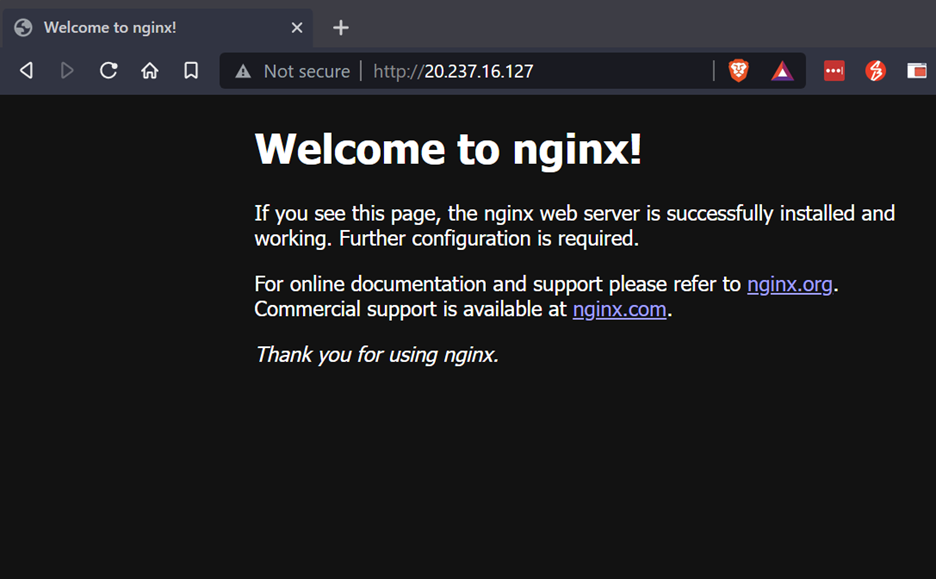
You can access the default page hosted in NGINX container by navigating to the IP address as follows:
Create a Private Container
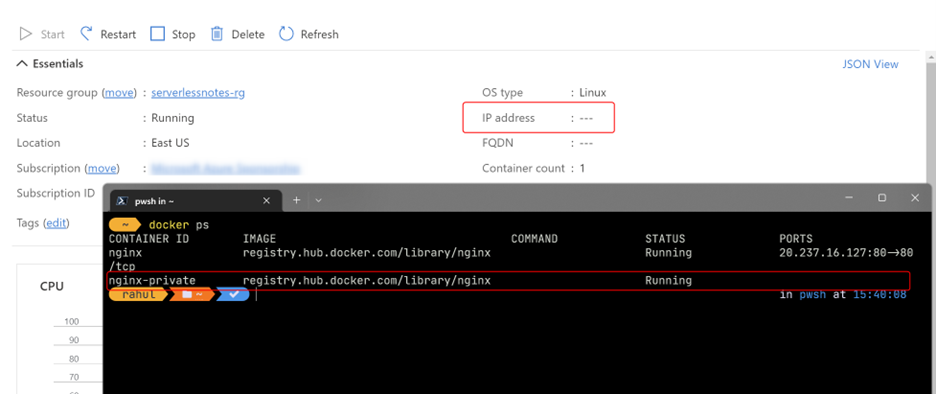
Use the following command to create another container based on the NGINX container image without specifying the port mapping as follows:
docker run --name nginx-private registry.hub.docker.com/library/nginx
This container is not assigned a public IP address. We can verify this from the Azure Portal and the docker ps command as follows:
Was this article helpful?