Detecting a Line in Excel Worksheet Using Power Automate Desktop and VBA
- Print
- DarkLight
- Download PDF
Detecting a Line in Excel Worksheet Using Power Automate Desktop and VBA
- Print
- DarkLight
- Download PDF
Article summary
Did you find this summary helpful?
Thank you for your feedback!
I recently ran into a situation where there as an RPA process that needed to detect where a line was placed within a spreadsheet. The spreadsheet is used to help calculate risk and is something that has been in use for quite some time. Instead of a human interpreting the results, automation should be able to capture the results. For a human to determine where a line exists is completely reasonable. However, for a computer to detect this is more difficult.
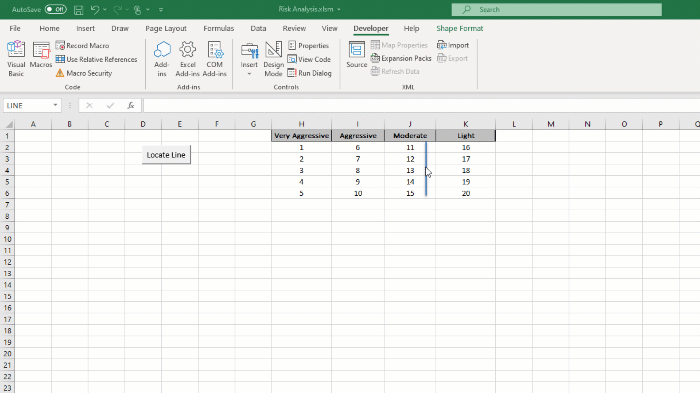
The following image further describes what the spreadsheet looks like. A macro will create the line after it analyzes a large dataset. Our job is to detect where the line is so that we can classify the risk: Very Aggressive, Aggressive, Moderate or Light.
Since Power Automate Desktop supports calling macros, we can create our own macro that will help us detect this line. We can subsequently call this macro and have the macro write the risk value (Very Aggressive, Aggressive, Moderate or Light) to a new tab which will make it easy to retrieve this value.
Our macro will look for any line objects within the spreadsheet and then we will check to see what column it starts in. If they are outside our table, we will exclude them. Otherwise, we will then detect which column it is in and then assign appropriate value to our cell in our Result worksheet.
Public Sub LocateRiskLine()

Dim myDocument As Worksheet
Set myDocument = Sheets("Main")
Dim resultDocument As Worksheet
Set resultDocument = Sheets("Result")
Dim objLine As Line

With myDocument 'Change here
For Each objLine In myDocument.Lines
If objLine.TopLeftCell.Column > 7 And objLine.TopLeftCell.Column < 12
            Select Case objLine.TopLeftCell.Column
               Case 8
                 resultDocument.Range("A1").Value = "Very Aggressive"
               Case 9
                 resultDocument.Range("A1").Value = "Aggressive"
               Case 10
                 resultDocument.Range("A1").Value = "Moderate"
               Case Else
                 resultDocument.Range("A1").Value = "Light"
                End Select
            End If
         Next
    End With
End Sub
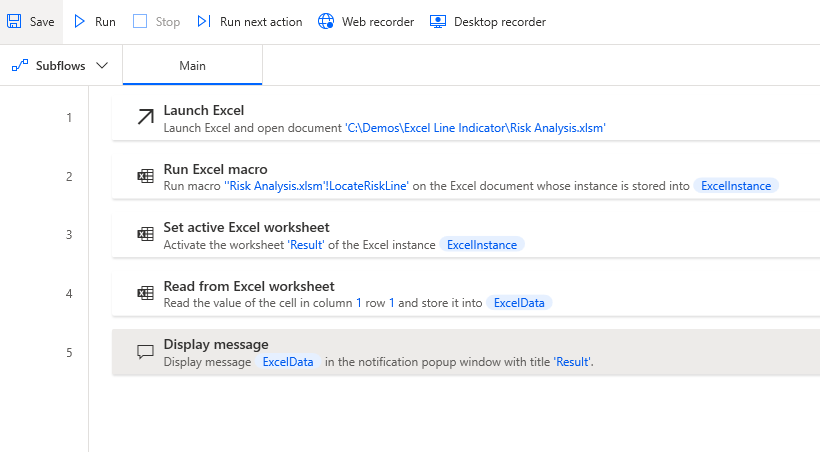
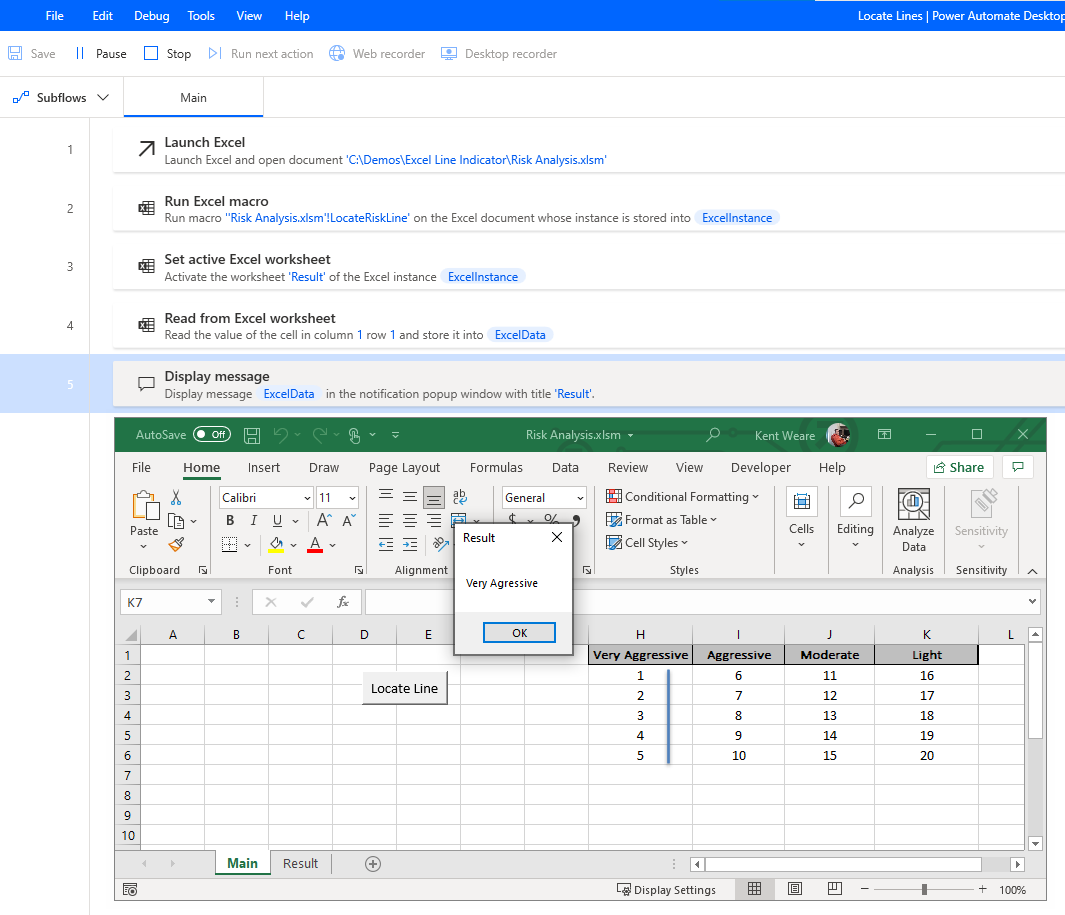
The following image demonstrates how our macro works.
Our Power Automate Desktop process involves launching our excel spreadsheet and then running our Excel macro. Once that step is completed, we will set our active worksheet to be our Result worksheet where we can read out the value from the first cell. We will subsequently display this message for debugging purposes.
Testing
Conclusion
Excel macros are naturally very powerful, hence their popularity. But, they become even more powerful when we can call them from Power Automate Desktop. Combine both technologies to reach new levels of automation.
Was this article helpful?