Delete Excel Row Using Power Automate Desktop
- Print
- DarkLight
- Download PDF
Delete Excel Row Using Power Automate Desktop
- Print
- DarkLight
- Download PDF
Article summary
Did you find this summary helpful?
Thank you for your feedback!
In this post, we are going to discuss how we can delete a row inside of an Excel spreadsheet using Power Automate Desktop based upon some criteria.
Inside of Power Automate Desktop, an action called Delete row from Excel worksheet exists. However, it requires a row number to be provided to delete that row. But, there is some work that is required to determine what row we want to delete. There are generally two approaches that we can take here:
- Try to use the Find feature inside of Microsoft Excel to find a specific row. Technically this approach will work, but will be cumbersome. Especially when you can’t find a value you will need to use computer vision to detect dialog boxes. This approach is bound to create anomalies.
- Alternatively, we can use a brute force method that will iterate through a series of rows looking for the value we are interested in. At this point, we will also know what row we are currently on and can pass that value into our delete action. This approach may be slower than the previously one but will be more reliable.
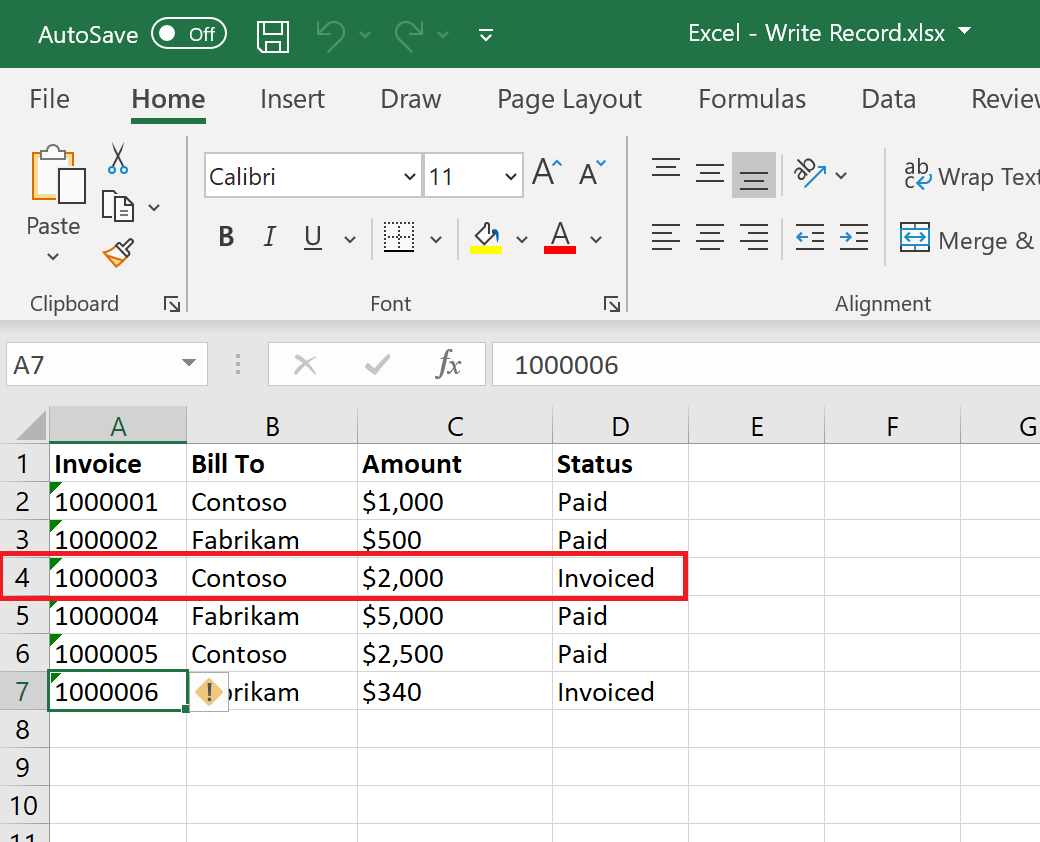
Here is the spreadsheet that we are going to use to demonstrate our use case. We want to delete row 4 that contains Invoice 100003.
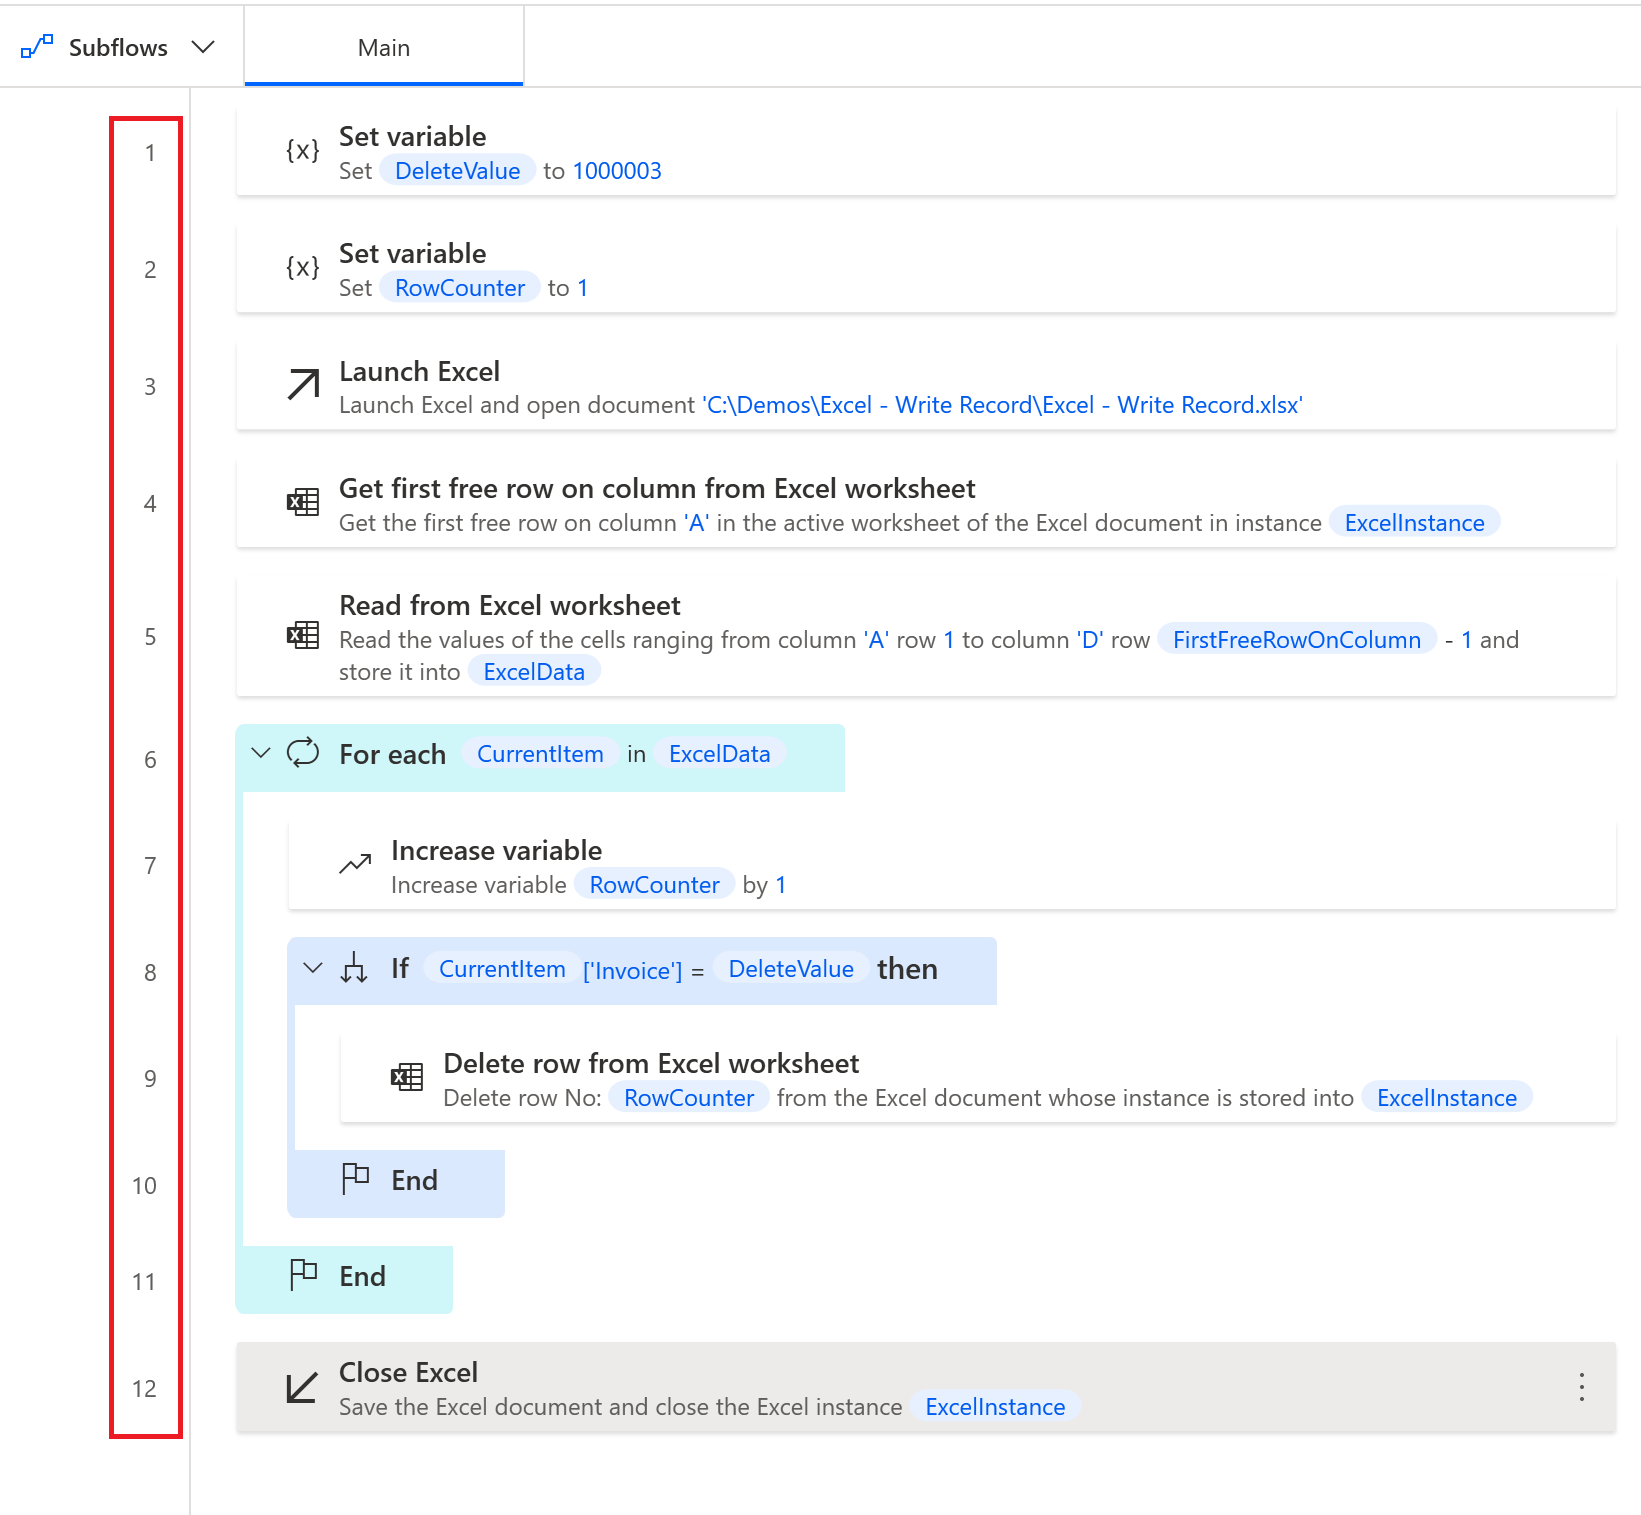
Here is the design of our Desktop flow that will remove any rows that have an Invoice number of 1000003.
Steps:
- Add a Set variable action and create a variable called DeleteValue and set it to 1000003. This represents the invoice that we want to delete.
- Create another variable called RowCounter and set it to 1. This represents our row counter so we can pass in the value to our Delete Row action.
- We will now Launch Excel and open our spreadsheet.
- Since we are going to loop, we only want to loop where there is data. We can use the Get first free row on column from Excel worksheet which represents where we want to stop, as there is no longer data.
- We can now read from the Excel spreadsheet by providing a range that starts in the first row, column A and ends in column D and the row before the first free row on column from Excel worksheet.
- We now will include a loop that will iterate through our collection that was created in the previous step.
- Will now increment our RowCounter variable by 1
- As we are looping, we want to compare the CurrentItem[‘Invoice’] against our DeleteValue to see if the invoice number that we are looking for is in our Invoice column.
- If our invoice is found, we will then go ahead and Delete row from Excel worksheet and pass in our RowCounter which represents our current row.
- This step contains our condition close
- This step contains our loop close
- In our last step, we will close and save our Excel spreadsheet.
Testing
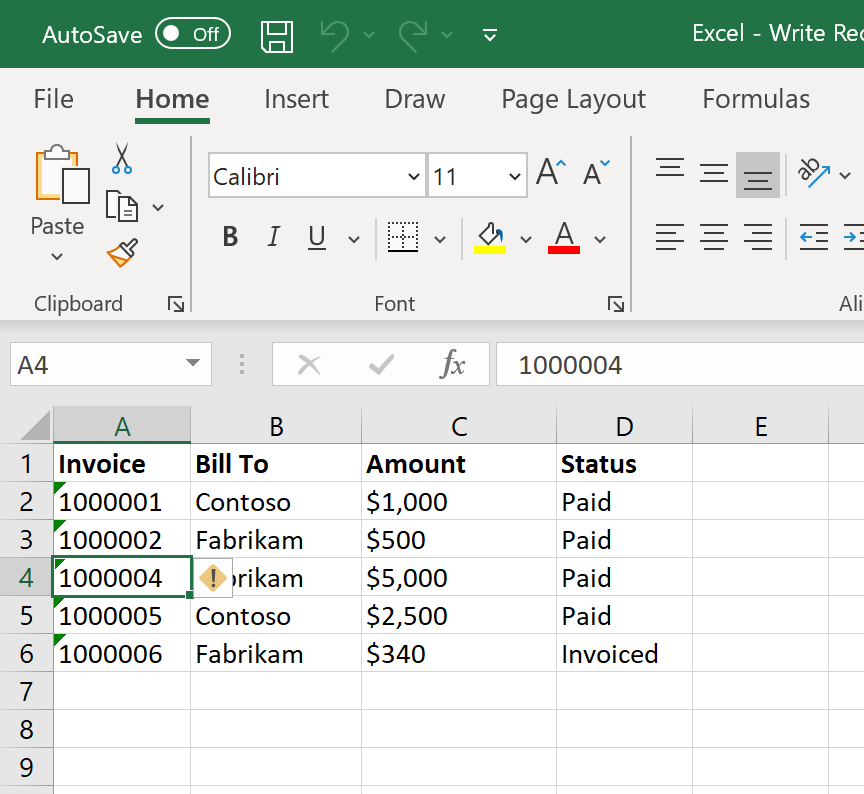
We can now go ahead and test our Desktop flow. When we do, we will discover that our row that contains our target invoice 1000003 has been deleted.
Conclusion
In this post, we learned how to read a list of rows and then find specific invoices, based upon a column name. This allowed us to detect what row it is in and subsequently delete it.
Was this article helpful?