Filter Data Events using Trigger Conditions
- Print
- DarkLight
- Download PDF
Filter Data Events using Trigger Conditions
- Print
- DarkLight
- Download PDF
Article summary
Did you find this summary helpful?
Thank you for your feedback!
Power Automate provides a rich set of triggers that allows flow makers to subscribe to data events in upstream systems. For example, we can subscribe to a SharePoint list for any create or update events made to a list through the SharePoint connector and the When an item is created or modified trigger. The problem with this approach is that we will receive all create and modified events. In the situation when we are only interested in a subset of those records, we can naturally filter these records out inside of our flow by using a condition action.
When we filter using the condition action, we will consume a flow run, which will impact our consumption quota, but also makes things more difficult to support. The reason why it will be more difficult to support is a result of more runs being included in our run history.
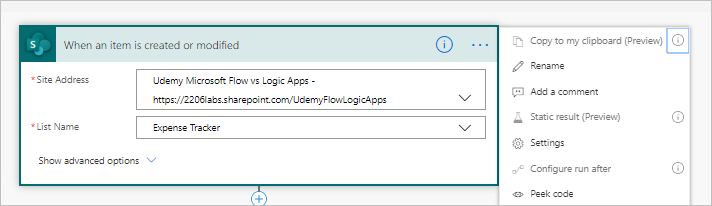
An alternative to filtering via condition is to filter in our trigger. To illustrate this capability, let’s walk through an example. Let’s take a situation where we have an expense tracker SharePoint list and we are only interested in records that have been created or updated that have an Amount greater than $100.
We can subsequently create a flow that uses the SharePoint connector and the When an item is created or modified trigger. If we access the Settings feature in this trigger, we will have the ability to setup a filter that will run prior to data entering our flow and thus avoiding unnecessary processing.
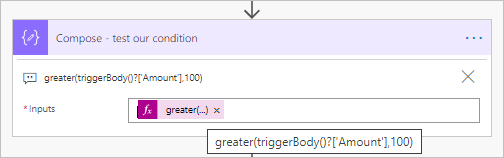
In the Trigger Conditions textbox, we can provide an expression that will evaluate the Amount field from our trigger message to see if it is greater than 100. If this expression evaluates to true, then our flow will proceed. If the expression does not evaluate to true, then our flow won’t get instantiated and we won’t experience a flow run.
Note: When using this experience include a ‘@’ character at the beginning of your expression. When you use expressions in your flow in the expression editor, you do not include this value.

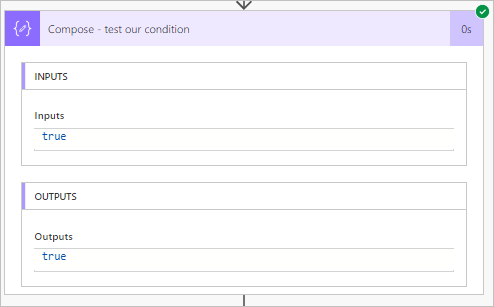
Something that I like to do when testing my expressions is to put my expression in a Compose action before I include it in my trigger. This simplifies my testing and then I can be more confident when a configure my trigger to include this condition.
We can now go ahead and test our flow by creating a new record that has an Amount of $200.
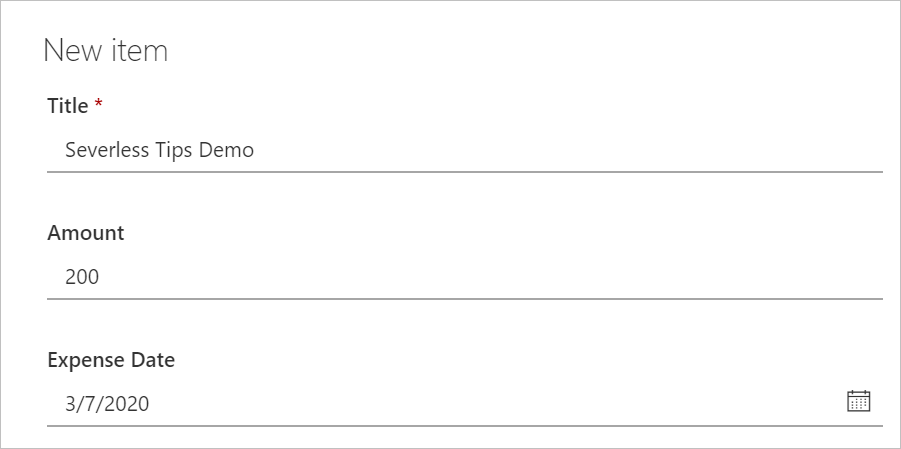
When our trigger fires, we will determine that our flow does run and that our expression evaluates to true.
Now if we create a SharePoint record that has an amount of $15, our flow will not run because our trigger condition was not satisfied.
Conclusion
Using Trigger conditions not only saves your flow run consumption, but it also simplifies troubleshooting by not processing records that you are not interested in.
Was this article helpful?