Formatting Dates from Power Virtual Agents using Power Automate
- Print
- DarkLight
- Download PDF
Formatting Dates from Power Virtual Agents using Power Automate
- Print
- DarkLight
- Download PDF
Article summary
Did you find this summary helpful?
Thank you for your feedback!
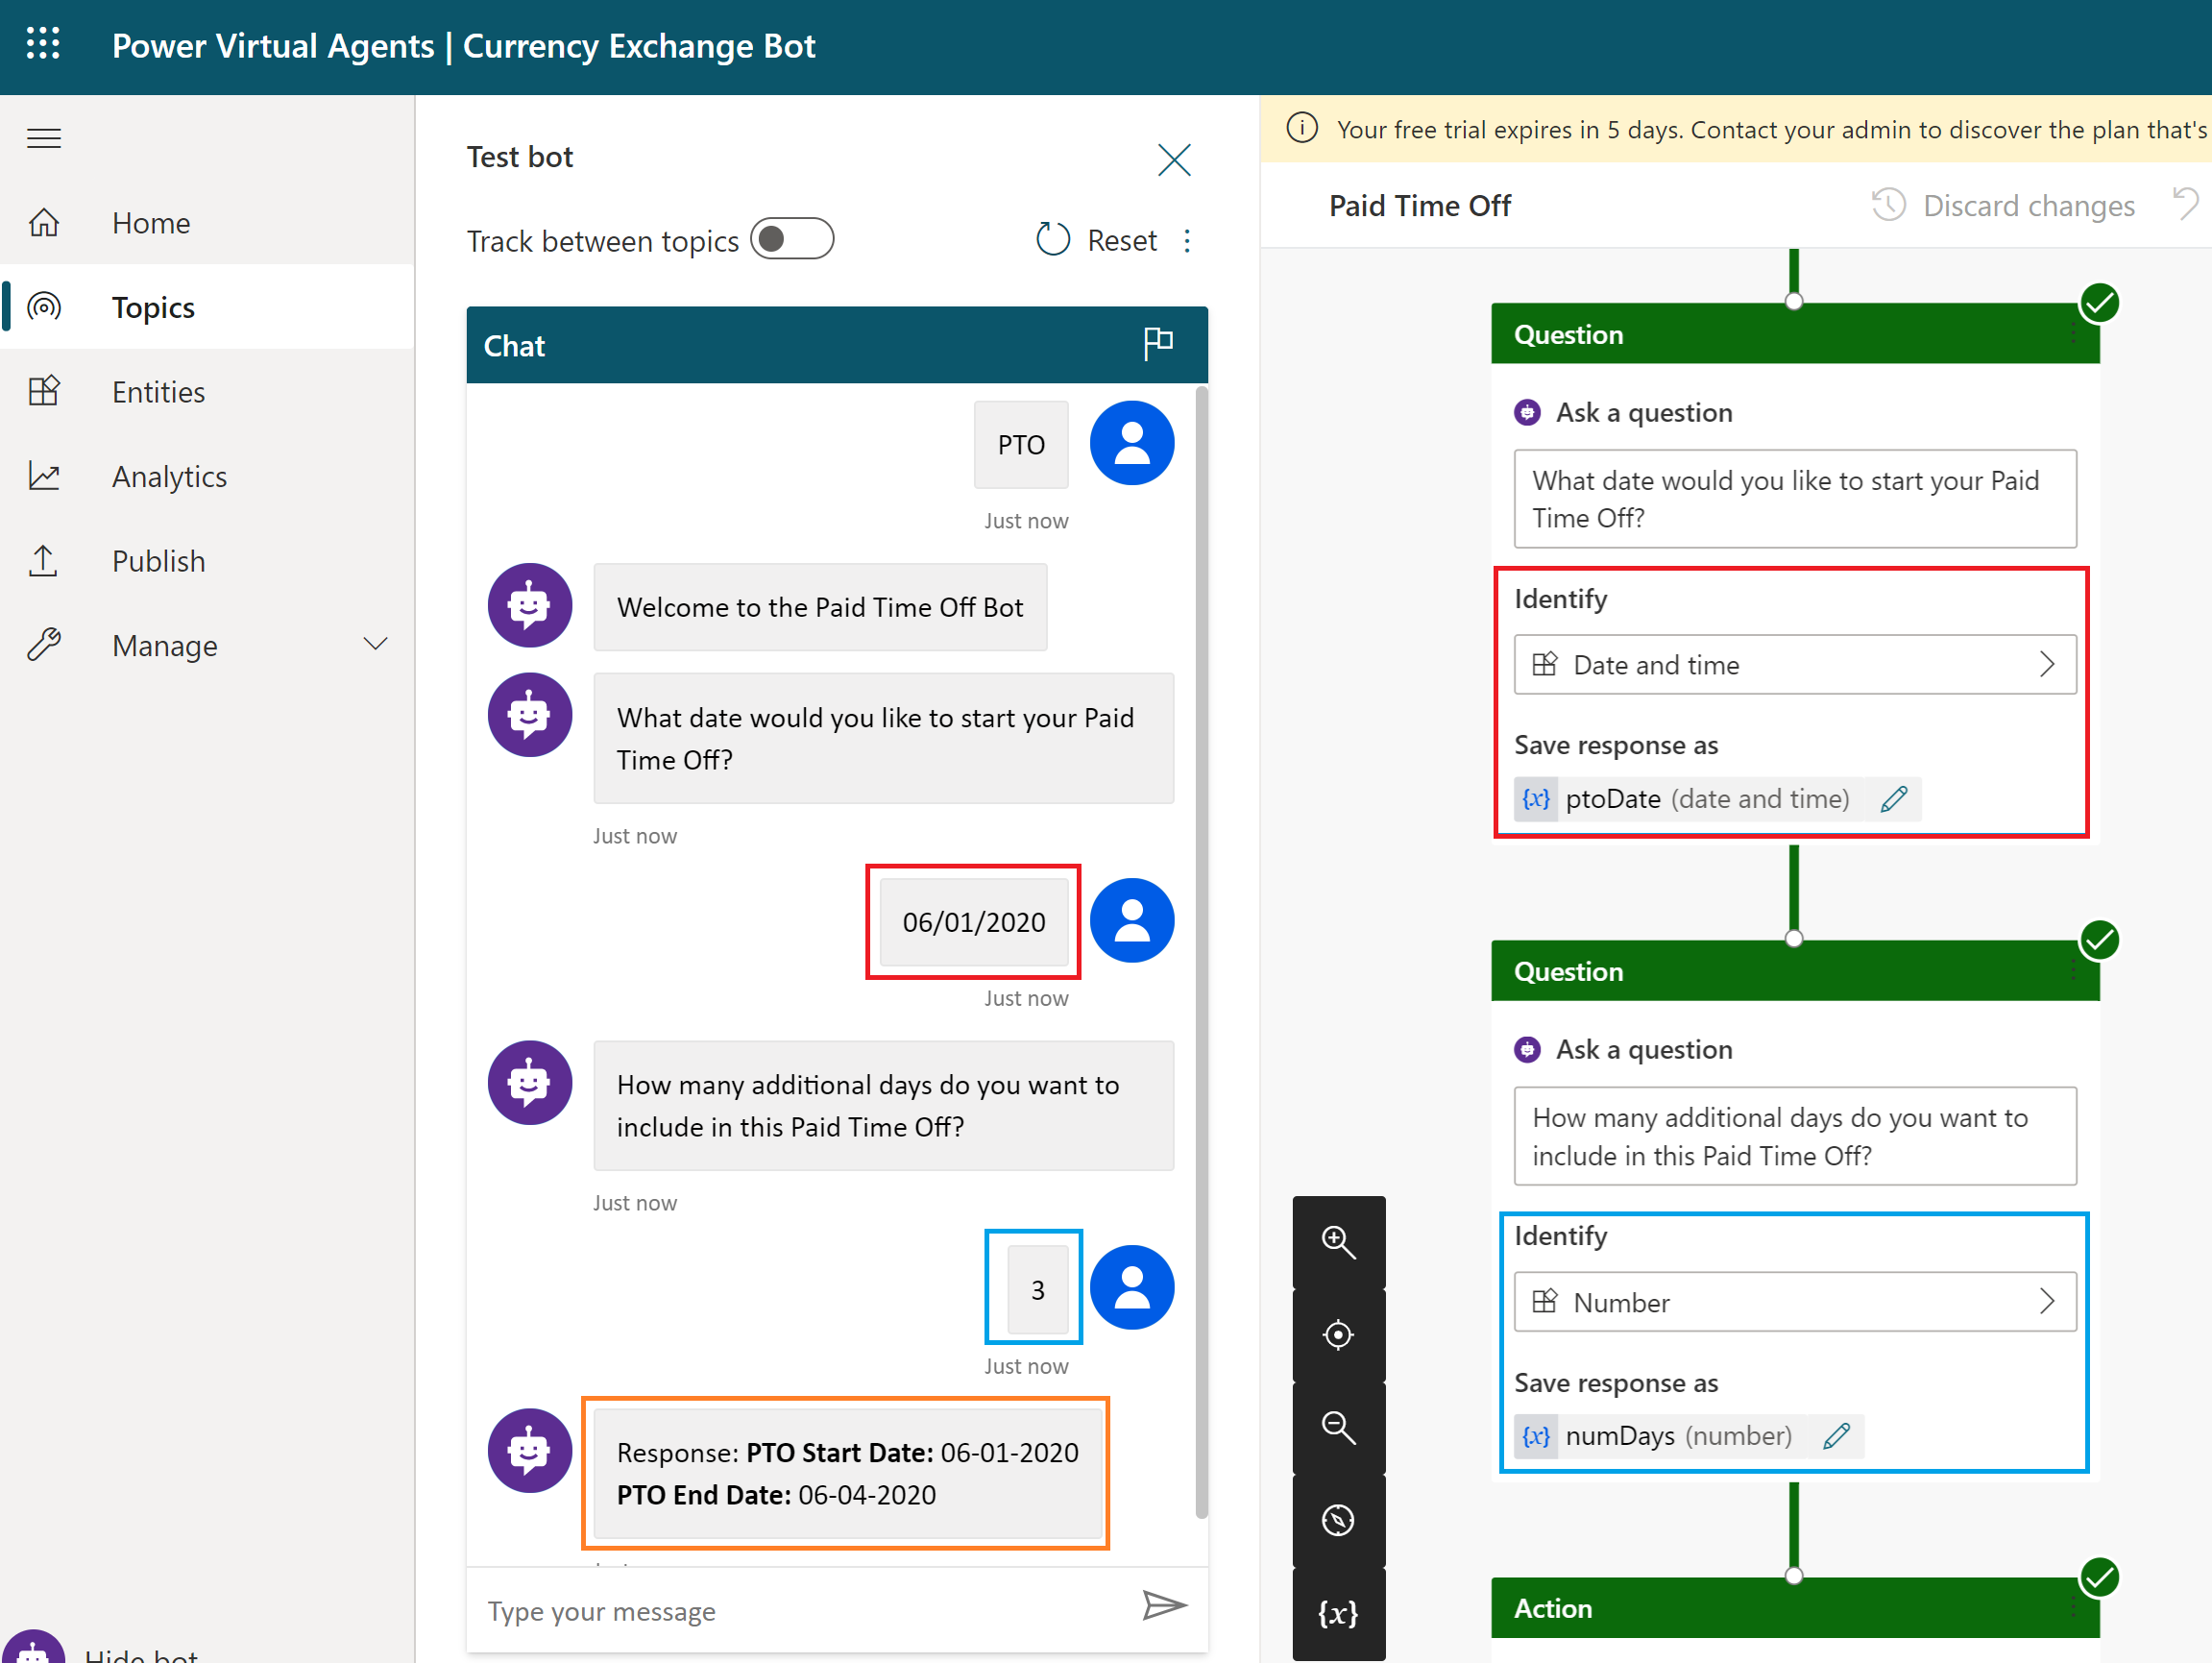
Inside of Power Virtual Agents, an entity exists called date and time. Using this entity allows an end user to provide a date and it can be stored a variable as this data type. When this value is stored, it will also include the timestamp. Even if the timestamp is not provided, it will be captured as 05/30/2020 00:00:00. If a downstream is only expecting the date portion of this value, it will fail. There is no way to control this in Power Virtual Agents, but we can do so using Power Automate.
Another scenario we will cover in this post is allowing a user to provide an additional number of days beyond their initial date and we will calculate that end date for them. For example, suppose an end user wants to take Paid Time Off (PTO), we can capture the date for when they want to start this PTO. We can then ask them for how many more days they want to include in this PTO and calculate the end date for them.
Our Power Virtual Agent will ask the following questions:
- What date would you like to start your PTO?
- How many days do you want to include in this PTO?
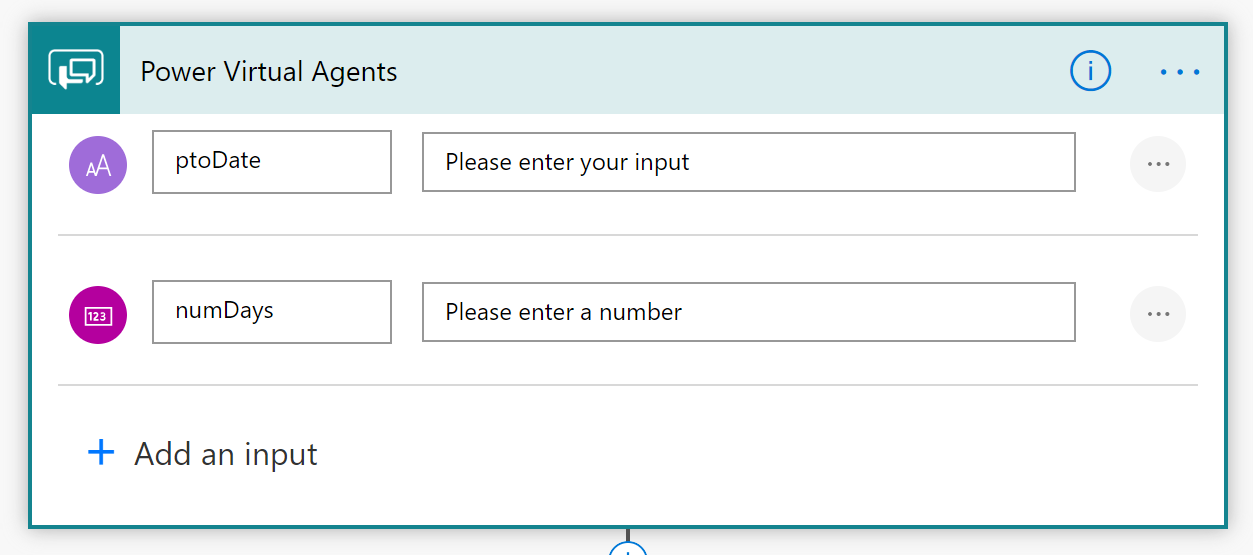
From a Power Automate perspective, we will expose a Power Virtual Agents trigger that will include 2 inputs including our ptoDate and numDays.
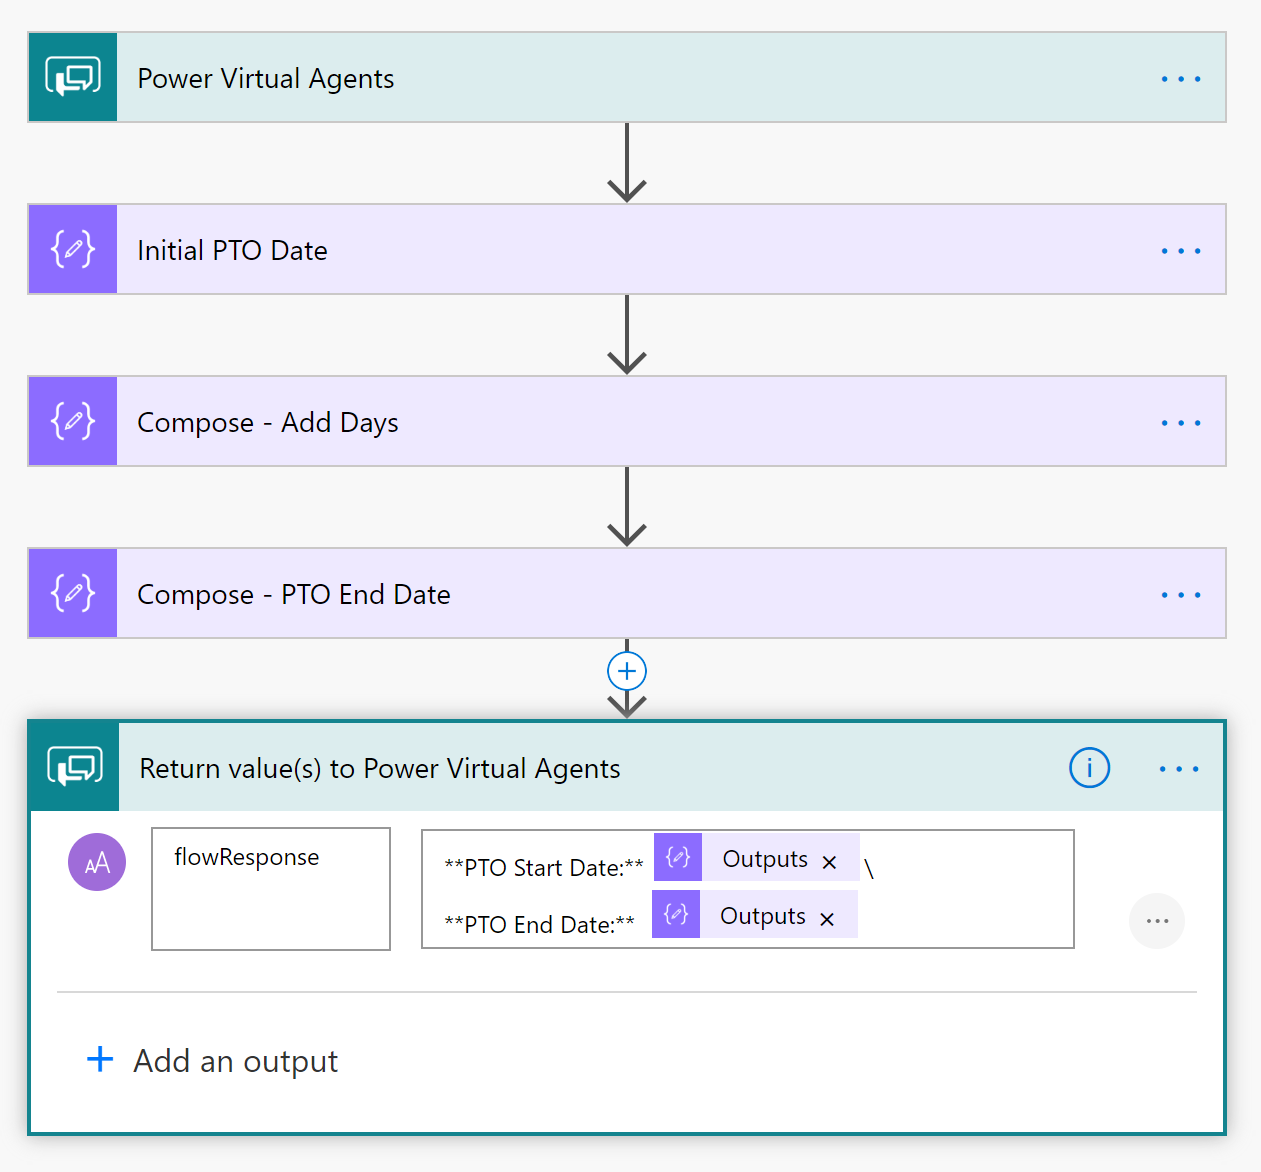
Power Automate includes expressions that allow us to manipulate dates. To illustrate the concept, I have included three Compose actions where we can see our values being manipulated through our run history. Let’s break the larger problem down into smaller pieces.
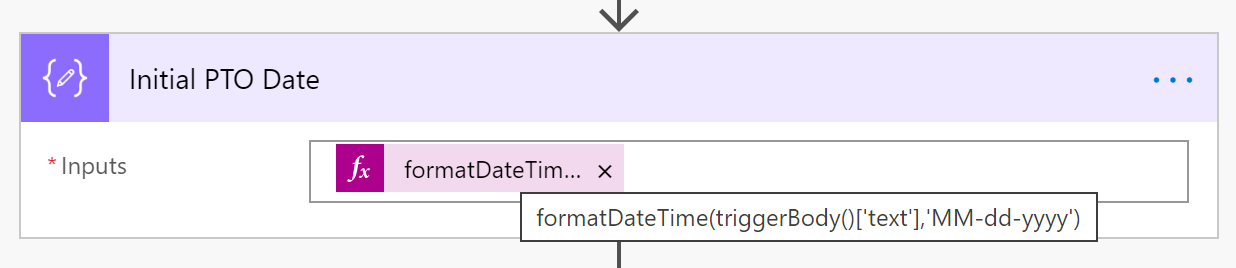
## Remove trailing 00:00:00
As discussed earlier, when a date is passed in from Power Virtual Agents, the trailing timestamp is included. We can remove it by using the formatDateTime expression that will not include the timestamp. We will pass in the date from our trigger that was provided in our chat session.
formatDateTime(triggerBody()['text'],'MM-dd-yyyy')
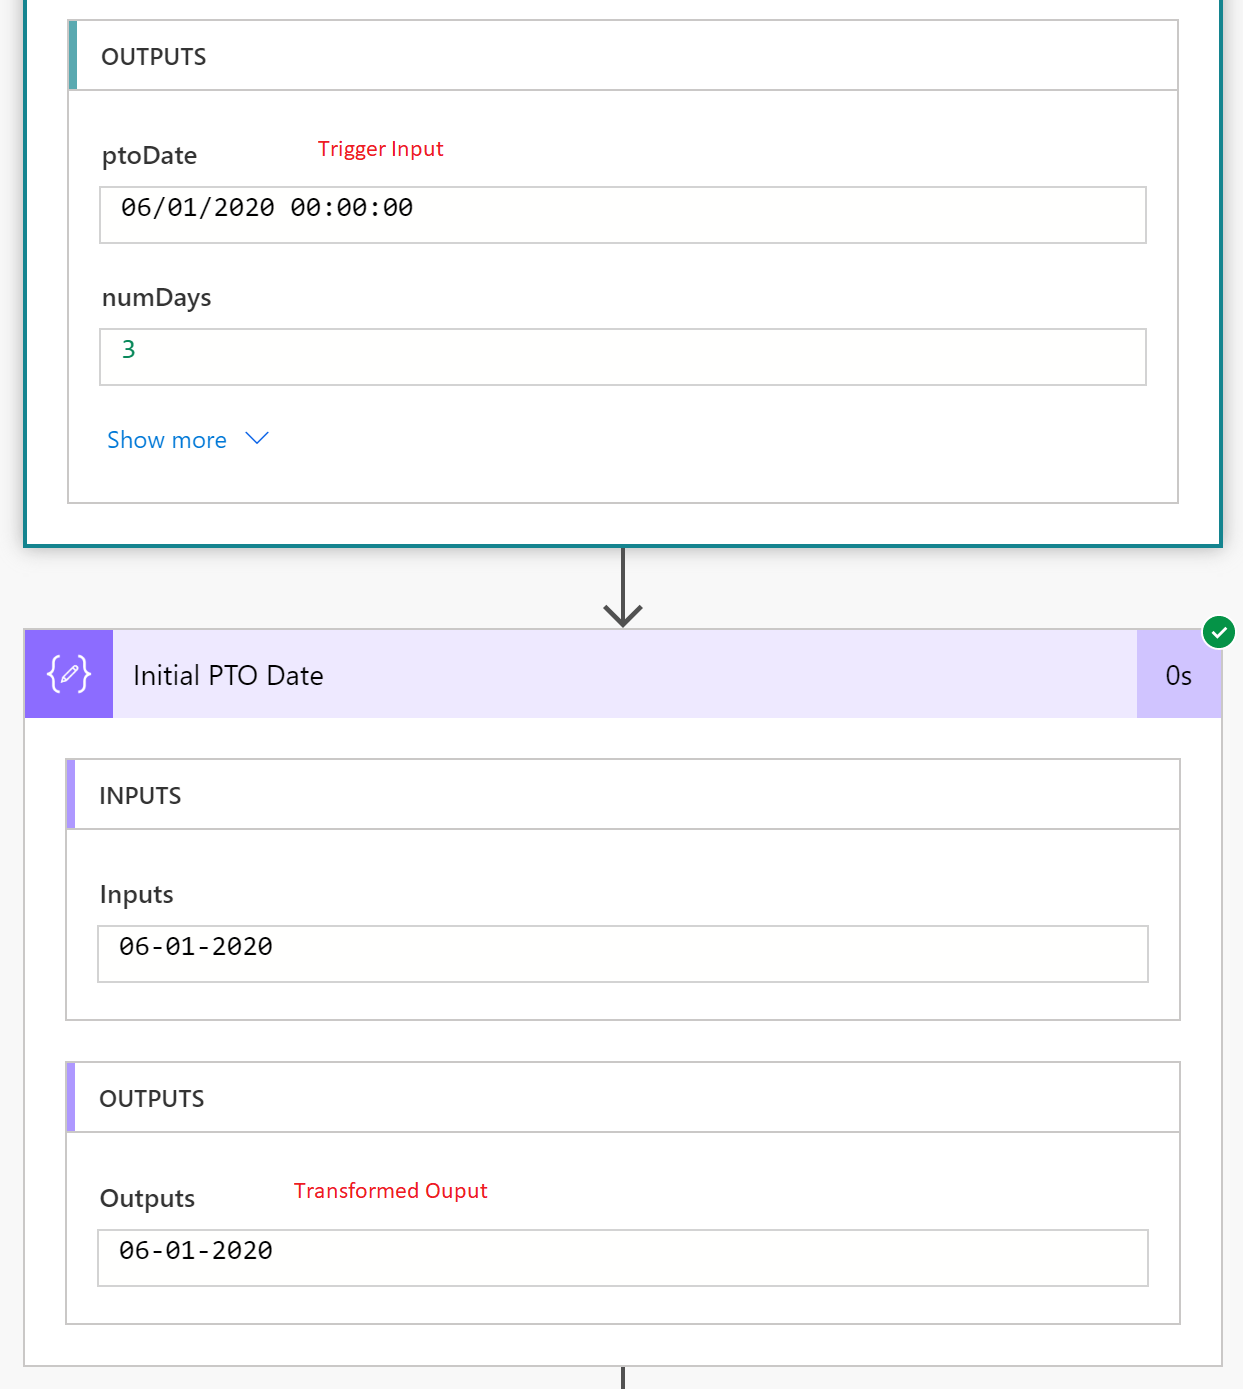
We can see the impact of this function by viewing our Run History.
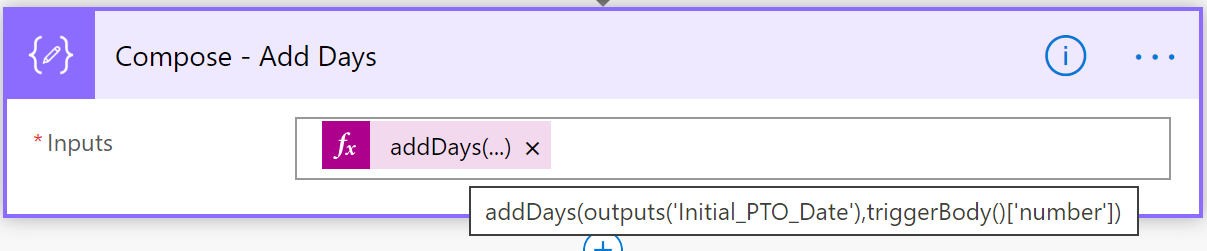
Our next requirement is to add 3 days to this value. We can do so by using the addDays expression where we can pass in our transformed PTO date and then add the number of days supplied to our trigger.
addDays(outputs('Initial_PTO_Date'),triggerBody()['number'])
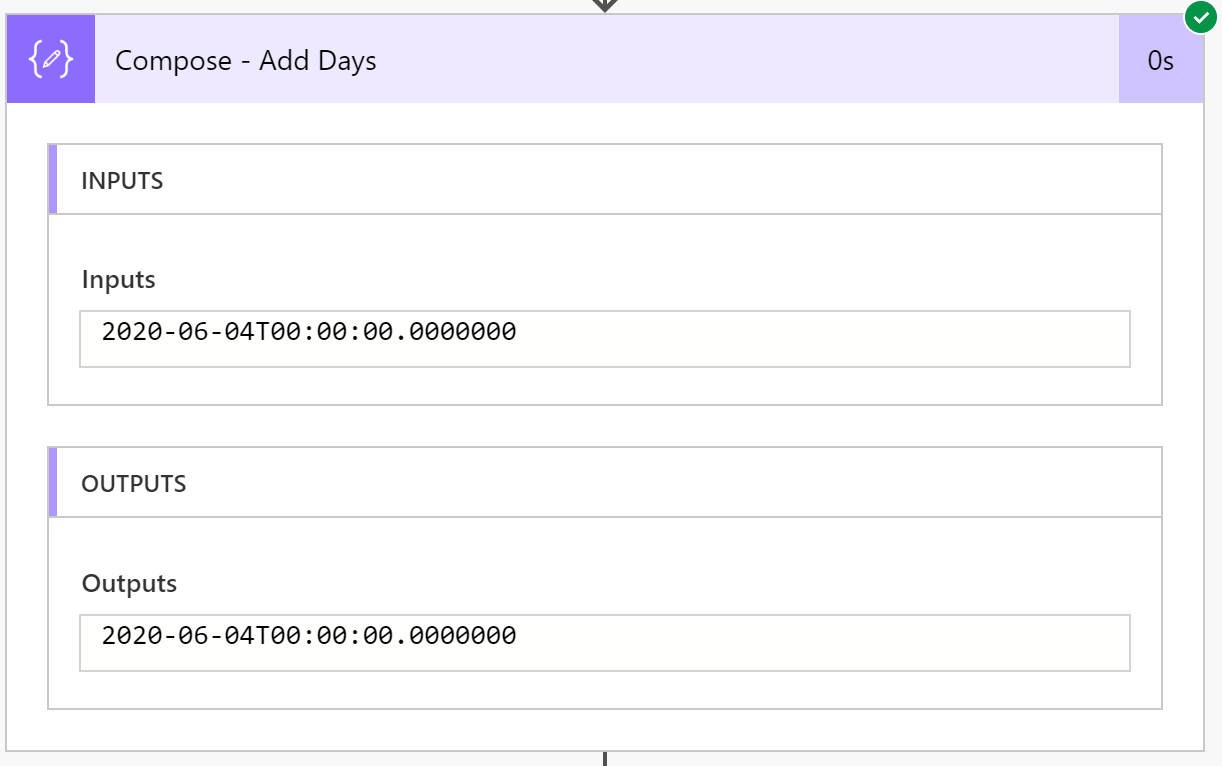
As we can see from the output, we have been able to increment out date, but we do have a problem. We now see a trailing timestamp again. To address this problem, we will once again apply a formatDateTime expression: formatDateTime(outputs('Compose_-_Add_Days'),'MM-dd-yyyy').

Lastly, we will add a Return value(s) to Power Virtual Agents action so that we can return our response to our end users. In order to provide formatting, we will include Markdown for a better user experience.
Conclusion
Power Automate is part of the Power Virtual Agent’s extensibility story. By offloading these requirements to Power Automate, we have a lot of capabilities that we can take advantage of to address a variety of use cases.
Was this article helpful?