Integrate your PowerShell Azure Function with Azure DevOps
- Print
- DarkLight
- Download PDF
Integrate your PowerShell Azure Function with Azure DevOps
- Print
- DarkLight
- Download PDF
Article summary
Did you find this summary helpful?
Thank you for your feedback!
#ServerlessTips - Azure Functions
Author: Dave Rendón Microsoft Azure MVP
This article will show you how to work with PowerShell Azure Functions in Azure DevOps. It is recommended to check first the article “Working with PowerShell Azure Functions locally”
Pre-requisites:
- An Azure subscription
- An Azure DevOps account with an organization configured
- Git
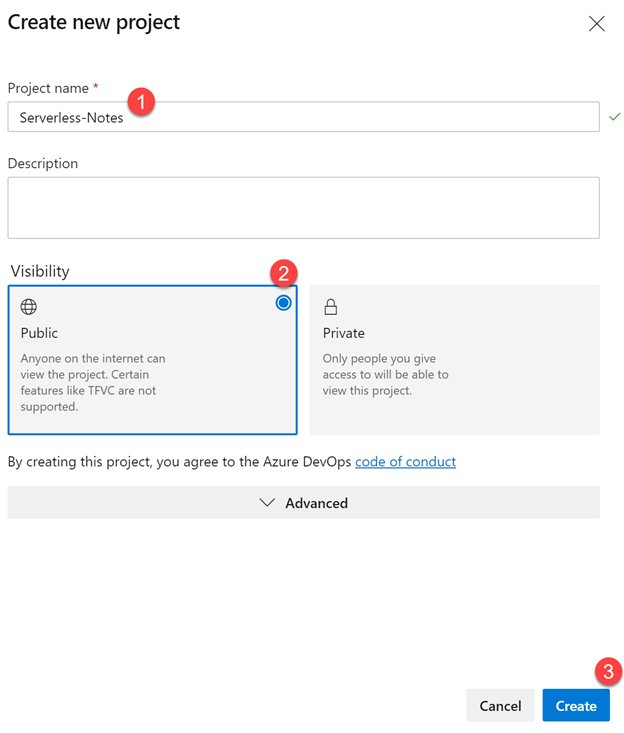
Setup a new project in Azure Devops
Let's create a new project in Azure DevOps, in this case we will configure a public project as shown below:
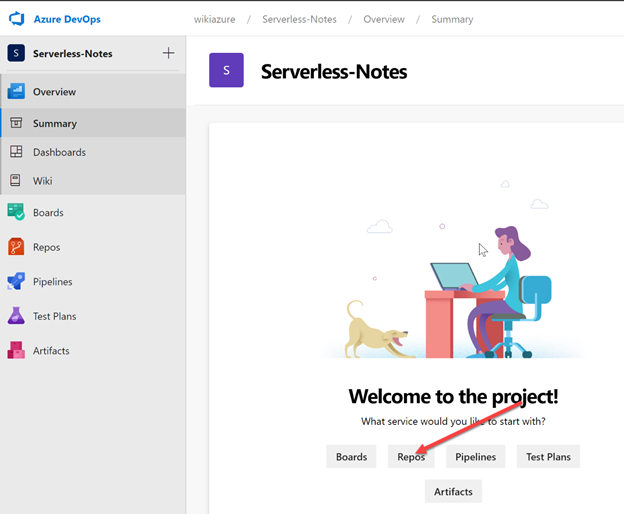
Once you create the project, let's go to Azure Repos:
Note: Azure Repos is a set of version control tools that you can use to manage your code.
Connect your local Azure Functions project to Azure Repos
Go to Visual Studio Code and open you PowerShell Functions project, then open a new terminal within Visual Studio Code:
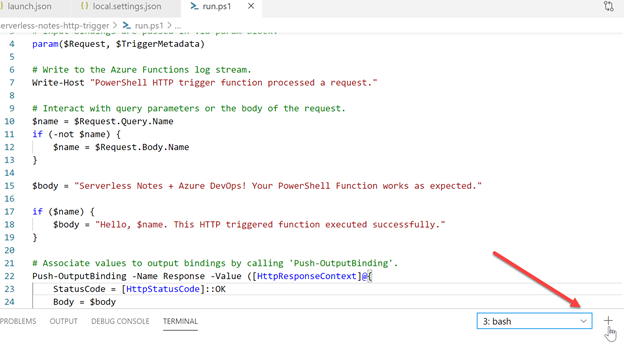
This will prompt a new terminal with Git.
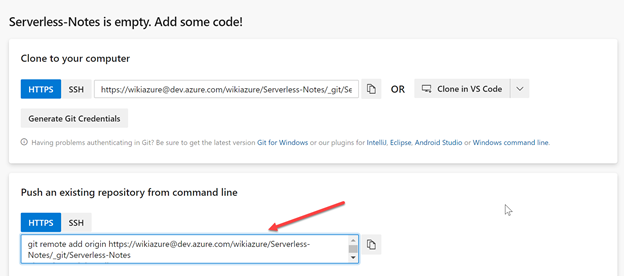
Now, go back to Azure Repos and copy the command to push and existing repository:
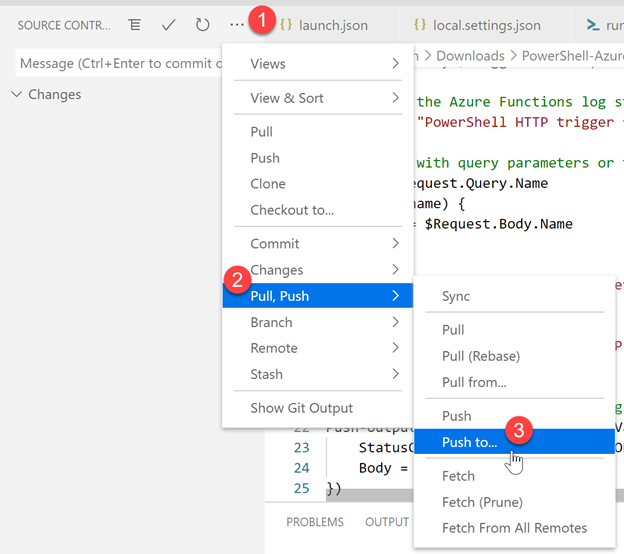
Now, push the repository from Visual Studio Code, click on Source Control options then select Pull, Push and then select the "Push to" option, then you should see the origin as shown below:

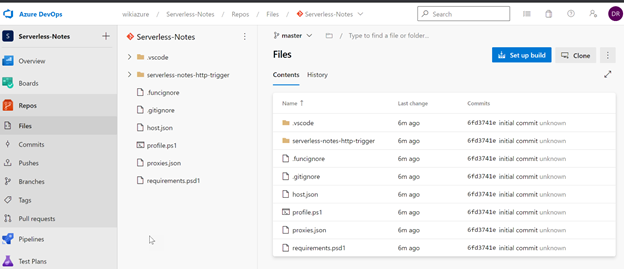
Now, go back to Azure Repos and you should see your project listed:
Setup Build Pipeline
Once you published your local project in Azure Repos, let's setup the build pipeline. Click on "set up build":

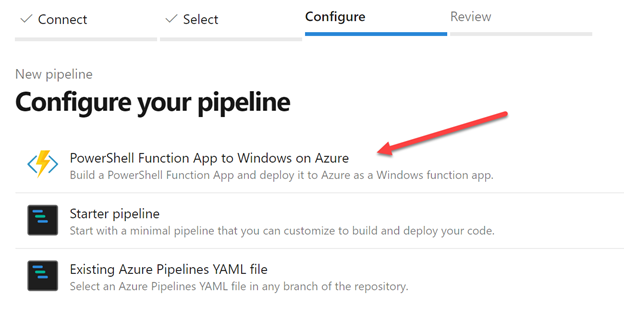
Now, choose the PowerShell Function app to Windows on Azure:
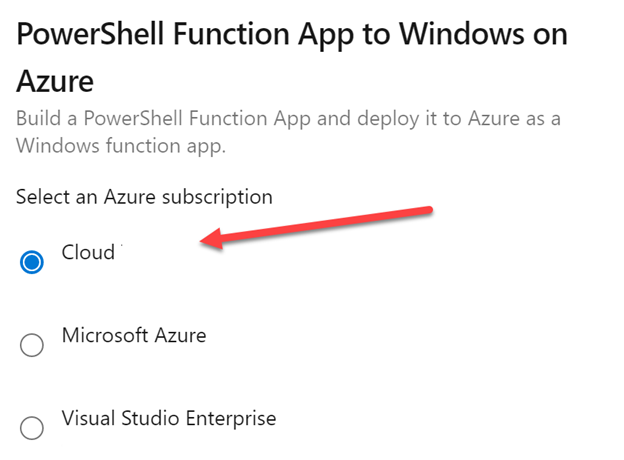
Then select the subscription you want to work with and click continue:
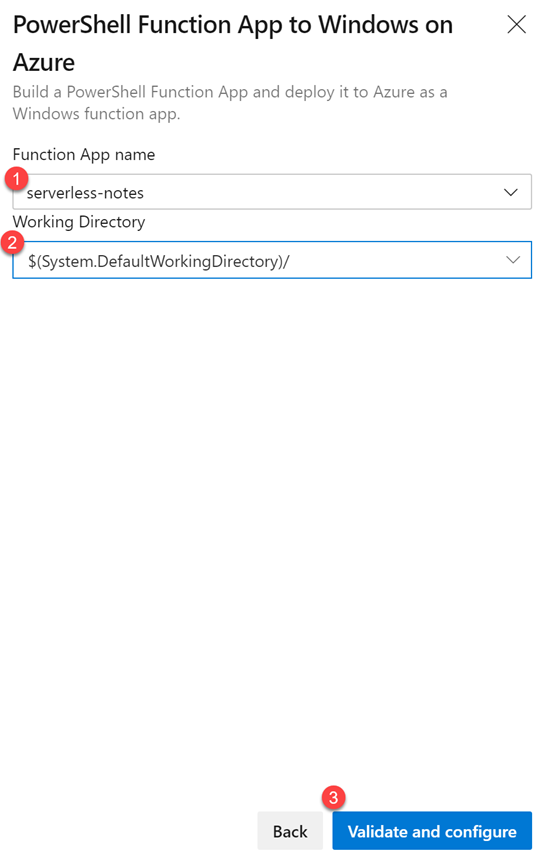
Now, select the Function App Name and the Working Directory, then click Validate and Configure:
Now, Azure will start configuring resources and generating the YAML file. Once completed you should see a YAML file like below:
# PowerShell Function App to Windows on Azure
# Build a PowerShell Function App and deploy it to Azure as a Windows function app.
# Add steps that analyze code, save build artifacts, deploy, and more:
# https://docs.microsoft.com/en-us/azure/azure-functions/functions-reference-powershell
trigger:
- master
variables:
  # Azure Resource Manager connection created during pipeline creation
  azureSubscription: 'Your-Azure-Subscription'
  # Function app name
  functionAppName: 'serverless-notes'
  # Agent VM image name
  vmImageName: 'vs2017-win2016'
  # Working Directory
  workingDirectory: '$(System.DefaultWorkingDirectory)/'
stages:
- stage: Build
  displayName: Build stage
  jobs:
  - job: Build
    displayName: Build
    pool:
      vmImage: $(vmImageName)
    steps:
    - powershell: |
        if (Test-Path "extensions.csproj") {
            dotnet build extensions.csproj --output ./$(workingDirectory)/bin
        }
      displayName: 'Build extensions'
    - task: ArchiveFiles@2
      displayName: 'Archive files'
      inputs:
        rootFolderOrFile: $(workingDirectory)
        includeRootFolder: false
        archiveType: zip
        archiveFile: $(Build.ArtifactStagingDirectory)/$(Build.BuildId).zip
        replaceExistingArchive: true
    - publish: $(Build.ArtifactStagingDirectory)/$(Build.BuildId).zip
      artifact: drop
- stage: Deploy
  displayName: Deploy stage
  dependsOn: Build
  condition: succeeded()
  jobs:
  - deployment: Deploy
    displayName: Deploy
    environment: $(functionAppName)
    pool:
      vmImage: $(vmImageName)
    strategy:
      runOnce:
        deploy:
          steps:
          - task: AzureFunctionApp@1
            displayName: 'Azure functions app deploy'
            inputs:
              azureSubscription: '$(azureSubscription)'
              appType: functionApp
              appName: $(functionAppName)
              package: '$(Pipeline.Workspace)/drop/$(Build.BuildId).zip'
Now, click on Save and Run:
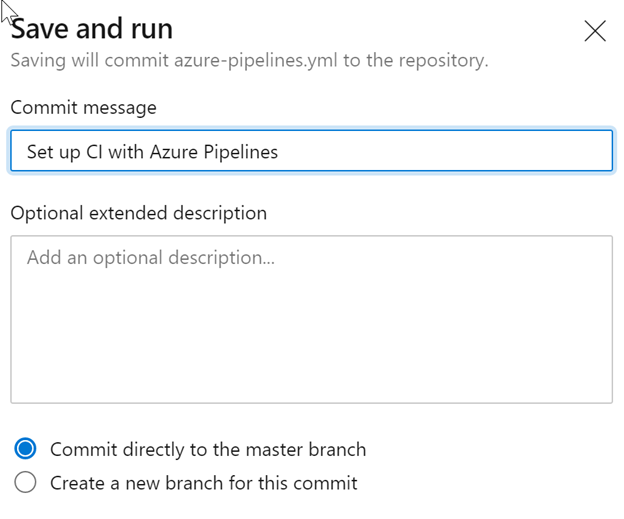
You will see a prompt, provide a commit message and description and the click on Save and Run:
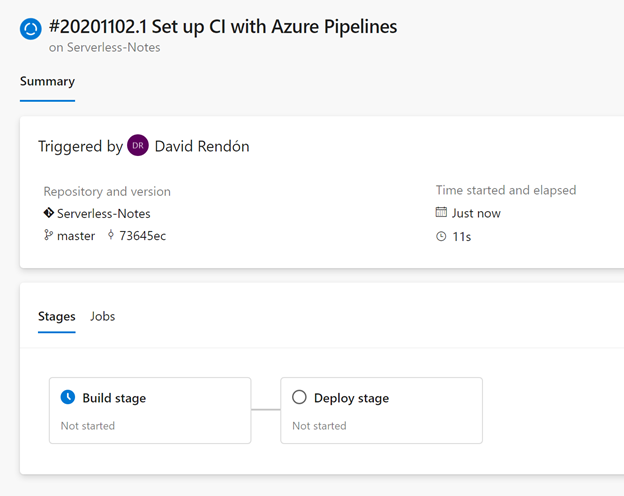
Now, you will see the Build stage:
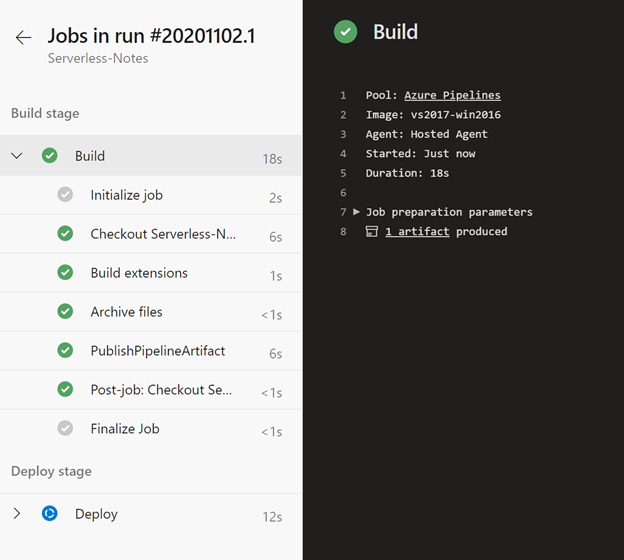
And, the progress on the job:
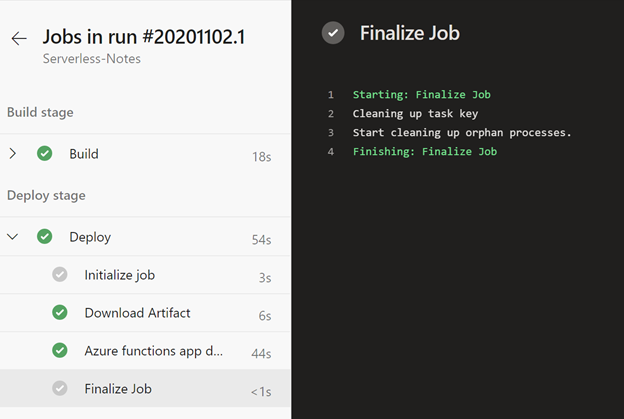
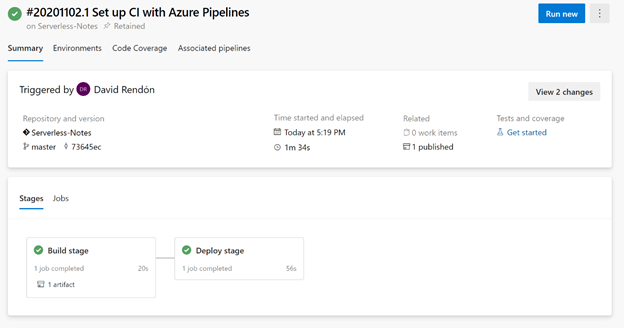
After a few seconds you will see the outcome:
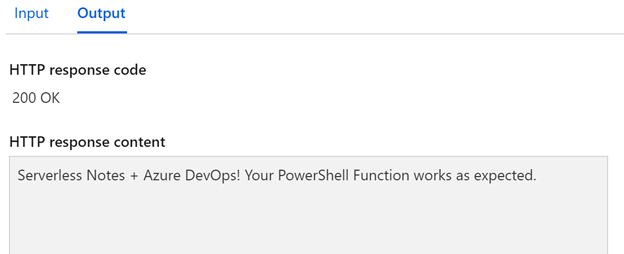
You can also verify your PowerShell Function in the Azure Portal:
Along this article we reviewed how you can publish your local PowerShell Function project to Azure Repos and deploy from Azure Devops your PowerShell Function.
Was this article helpful?