Mounting File Shares on Linux Azure Function Apps
- Print
- DarkLight
- Download PDF
Mounting File Shares on Linux Azure Function Apps
- Print
- DarkLight
- Download PDF
Article summary
Did you find this summary helpful?
Thank you for your feedback!
#ServerlessTips - Azure Functions
Author: Rahul Rai Microsoft MVP
Azure Functions is a powerful platform for building event-driven applications. Among its features is the ability to mount an existing file share to a Linux function app, making it possible to access and manipulate files from your code. Functions running on Linux have access to this feature, but not those running on Windows. This screenshot shows how to create a Linux function app using the Azure Portal:
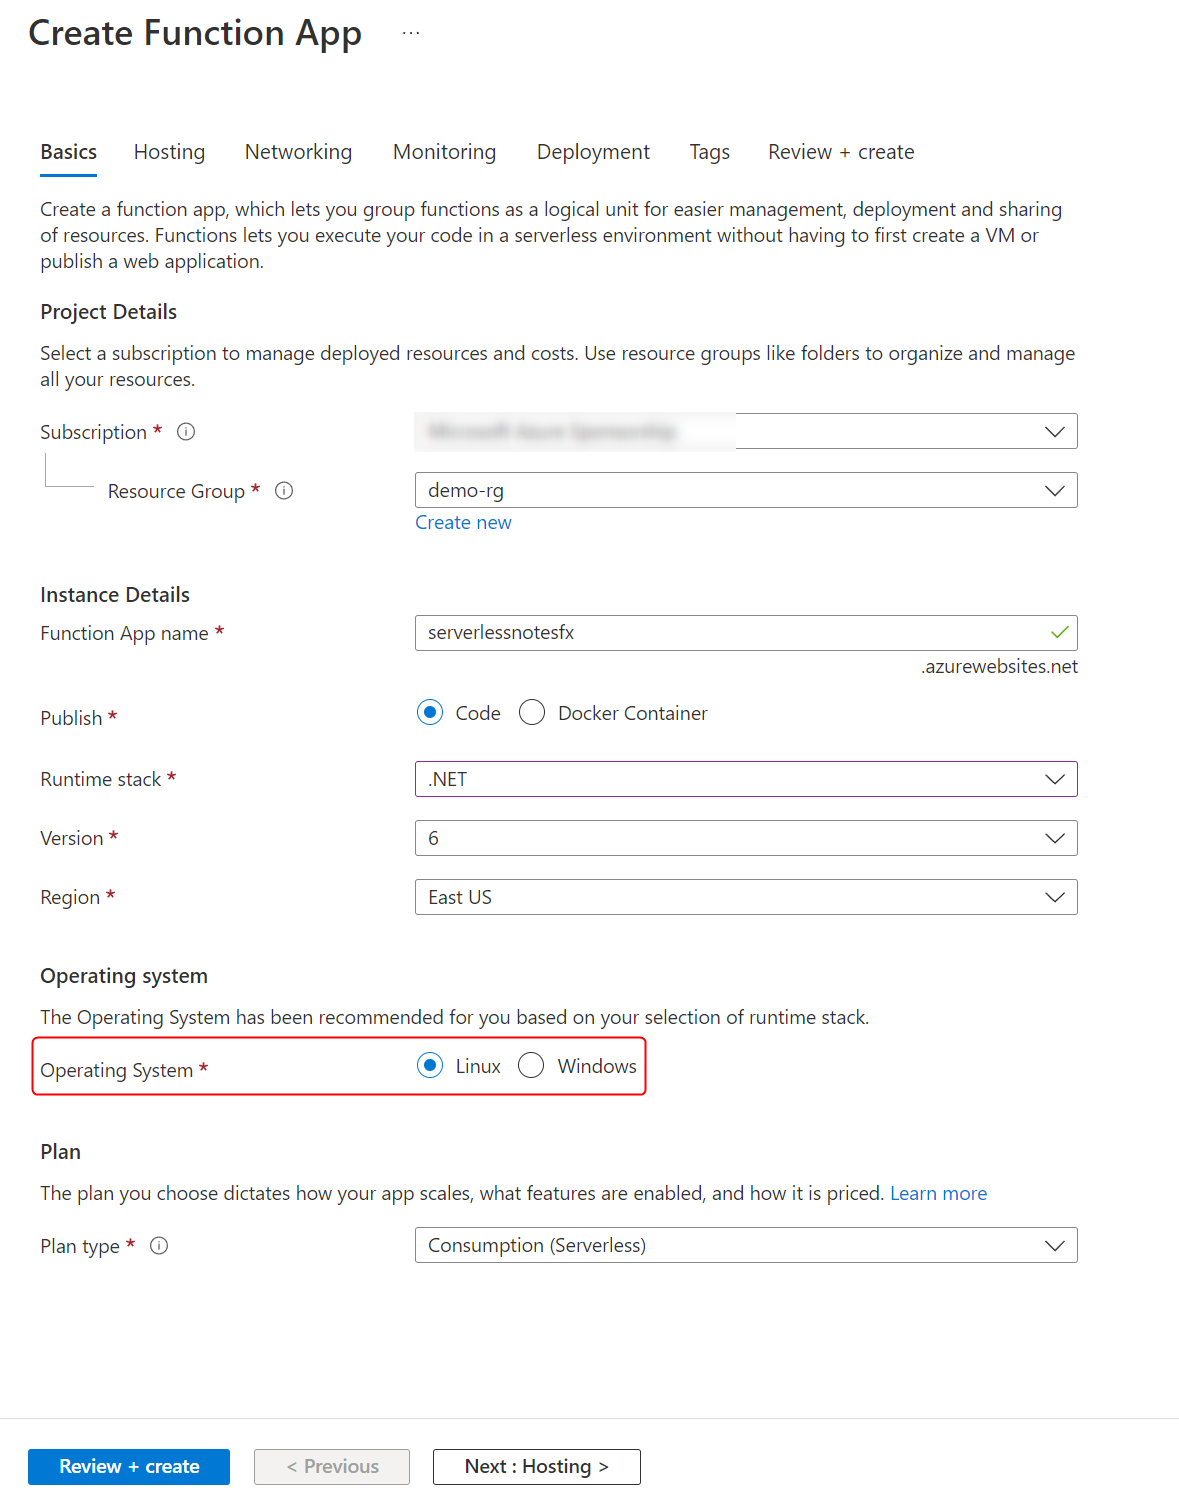
Figure 1 Create a Linux function app
The next step is to create an Azure file share which you can mount to the function app. You can refer to the Microsoft Quickstart guide for instructions on how to do this. Next, add a few test files to the file share you created so that our function can enumerate them.
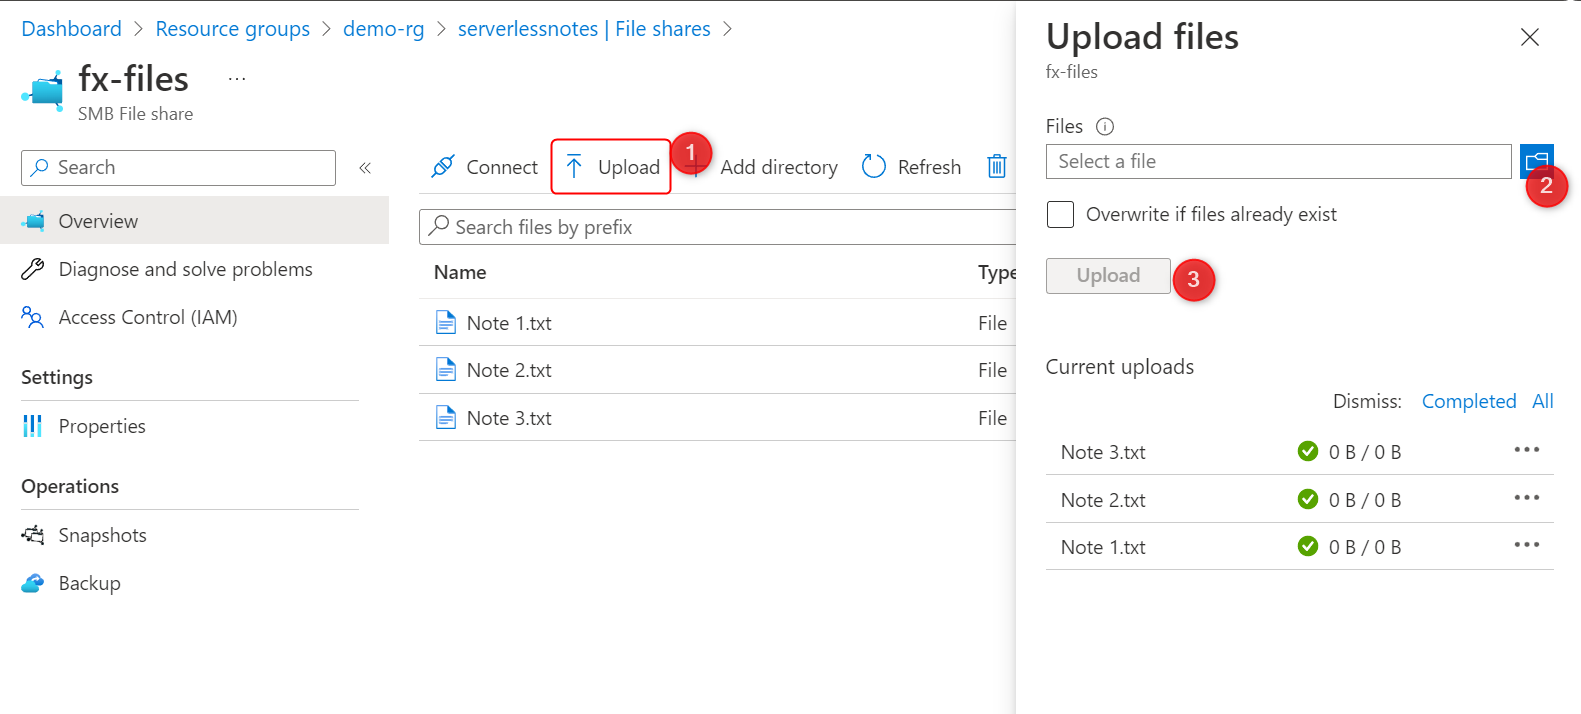
Figure 2 Add test files to the file share
To mount a file share on a Linux Function App, you will need to provide the connection details for the storage account that contains the file share. Once the file share is mounted, you can access and manipulate files directly from your function code. Mount your file share on the function app you created earlier by running the following command:
az webapp config storage-account add \
--resource-group <resource-group> \
--name <function-app-name> \
--custom-id az-files-001 \
--storage-type AzureFiles \
--account-name <storage-account-name> \
--share-name <file-share-name> \
--access-key <storage-account-access-key> \
--mount-path /fx-files
In the command, share-name is the name of the existing Azure Files share, and custom-id is any string that uniquely identifies the share when mounted to the function app. Also, the mount-path is the path from which your function app accesses the share. It must be in the format /dir-name and not start with /home. Here, we made the file share available at the "/fx-files" path to the function.
Now, use Visual Studio Code as an editor and the Azure Functions quickstart guide as a reference to write an HTTP-triggered function that enumerates the files in the "/fx-files" directory as follows:
using System.IO;
using System.Threading.Tasks;
using Microsoft.AspNetCore.Mvc;
using Microsoft.Azure.WebJobs;
using Microsoft.Azure.WebJobs.Extensions.Http;
using Microsoft.AspNetCore.Http;
using Microsoft.Extensions.Logging;

namespace Company.Function
{
    public static class HttpTrigger1
    {
        [FunctionName("HttpTrigger1")]
        public static async Task<IActionResult> Run(
            [HttpTrigger(AuthorizationLevel.Anonymous, "get", "post", Route = null)] HttpRequest req,
            ILogger log)
        {
            string[] filePaths = Directory.GetFiles(@"/fx-files");
            return new OkObjectResult(filePaths);
        }
    }
}
Follow the deployment instructions in the guide to deploy the function to your function app. Once the deployment has been completed, the function can be tested. To test the function, navigate to the function app on the Azure portal and click on the function to see its details as follows:
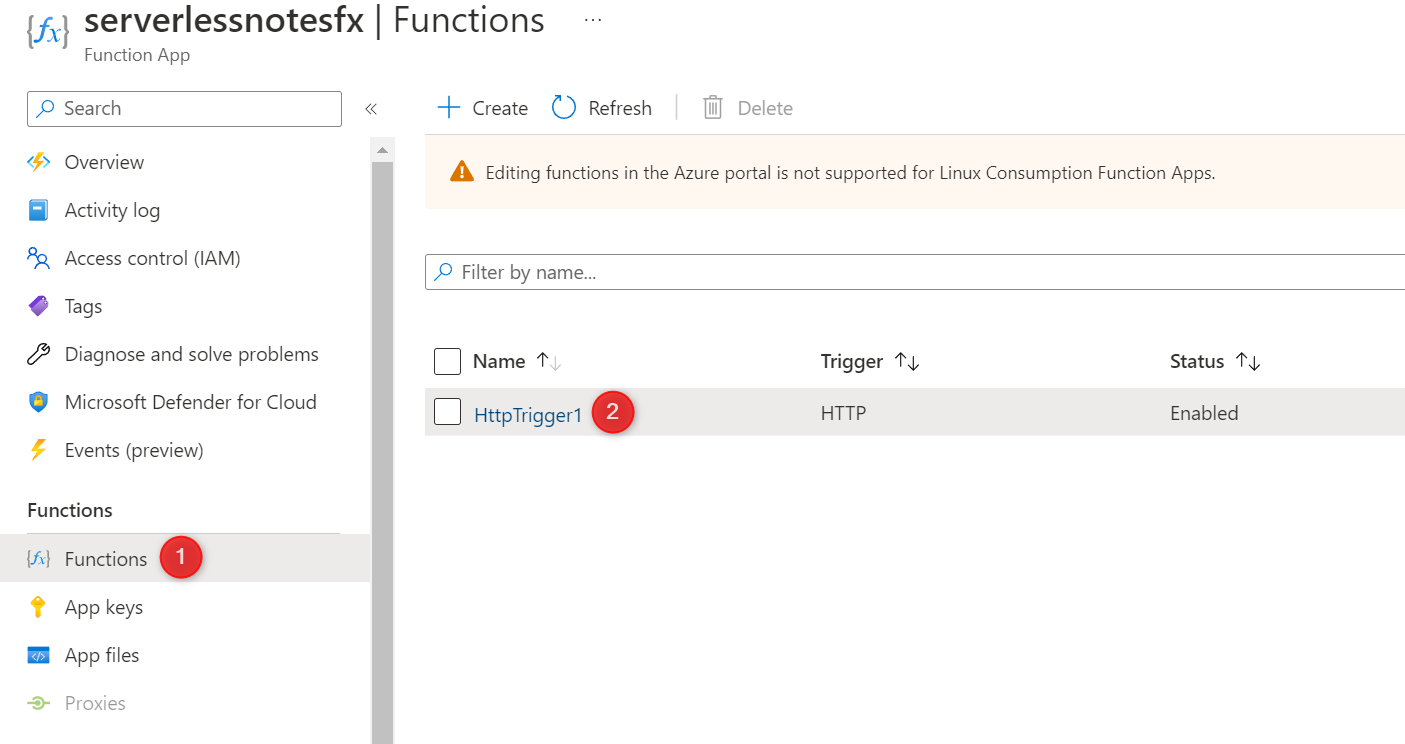
Figure 3 Navigating to the function details page
Using the "Code + Test" console, send an HTTP request to the function as follows:
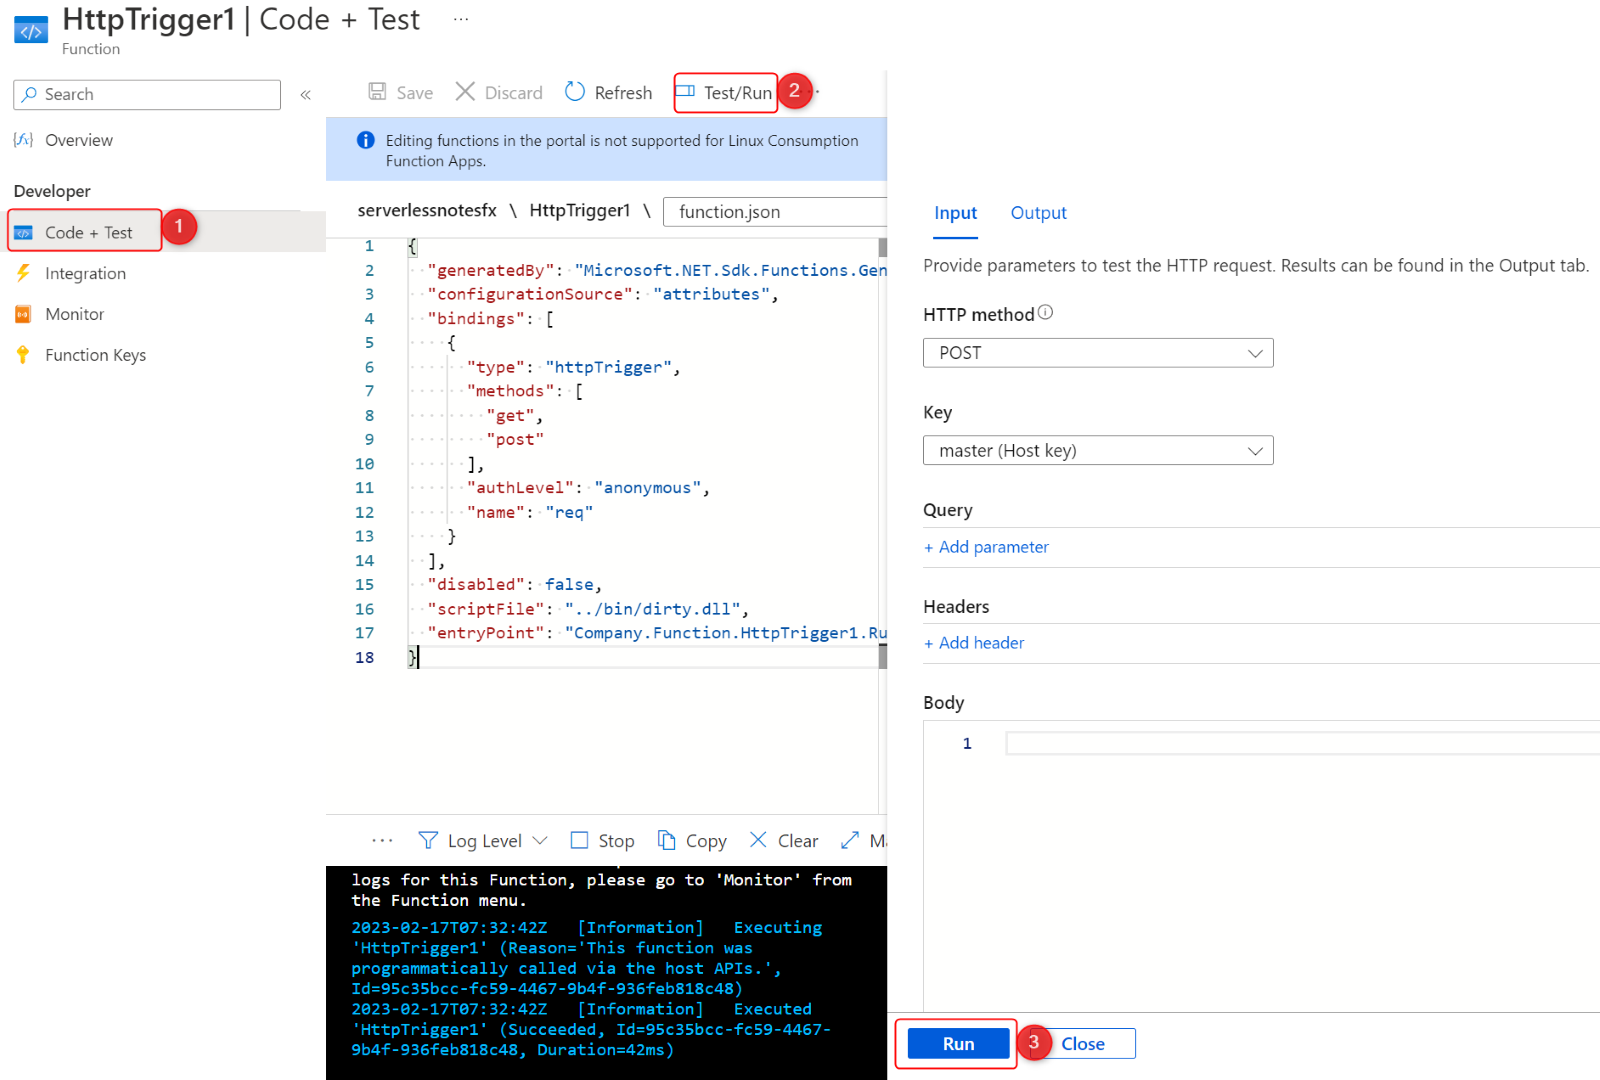
Figure 4 Send HTTP request to the function
The following screenshot shows the response from the function listing the files it found in the directory:
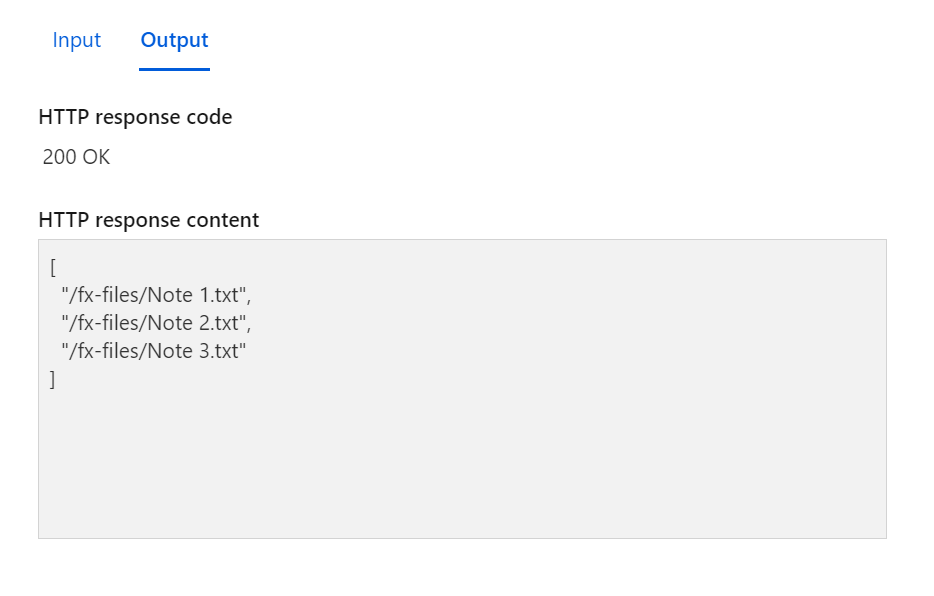
Figure 5 Function output
Our demonstration showed how easy it is to mount a file share on Azure functions, making it easier to develop and deploy complex workflows using serverless applications.

Was this article helpful?