Programmatically Cancel a Cloud Flow Run
- Print
- DarkLight
- Download PDF
Programmatically Cancel a Cloud Flow Run
- Print
- DarkLight
- Download PDF
Article summary
Did you find this summary helpful?
Thank you for your feedback!
We may have circumstances where we need to programmatically cancel a flow execution. One way to do this is to cancel a run through a custom connector. However, there are some prerequisites that we need to address before we can create a custom connector. More specifically we need to create trust between our custom connector and the Power Automate service.
In this post we will build a custom connector that allows us to cancel a flow run instance.
Create Azure AD App Registration
To perform these steps, you will need a Global/Tenant Administrator to provide consent. The reason for this is we will be able to cancel any flow within an environment and as a result this privilege should only be granted where it is warranted.
Access the Azure portal and then Azure Active Directory. Click on App registrations and then click on New registration.
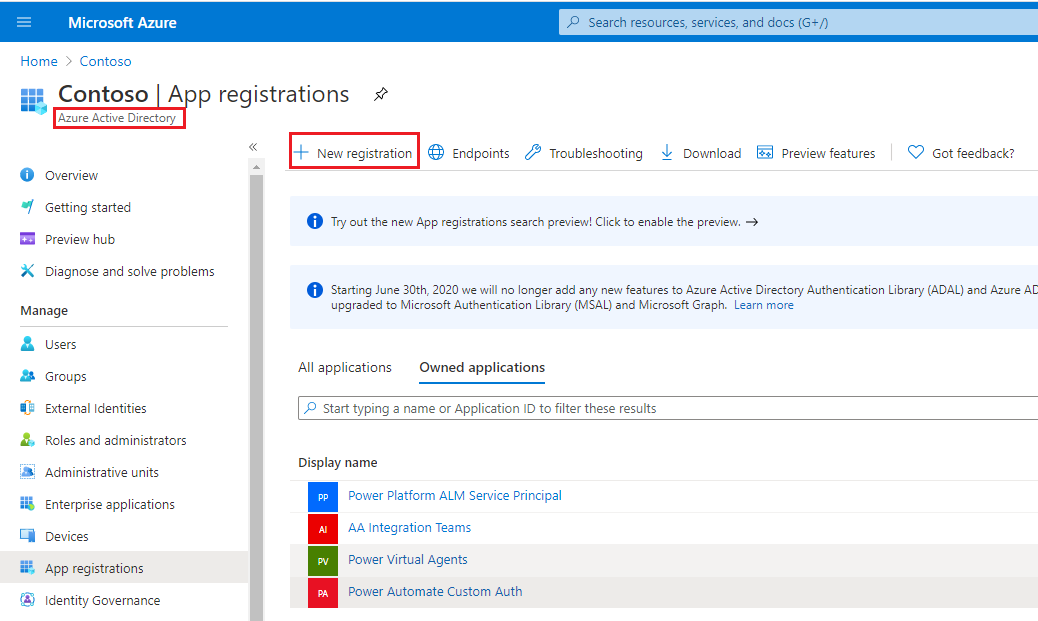
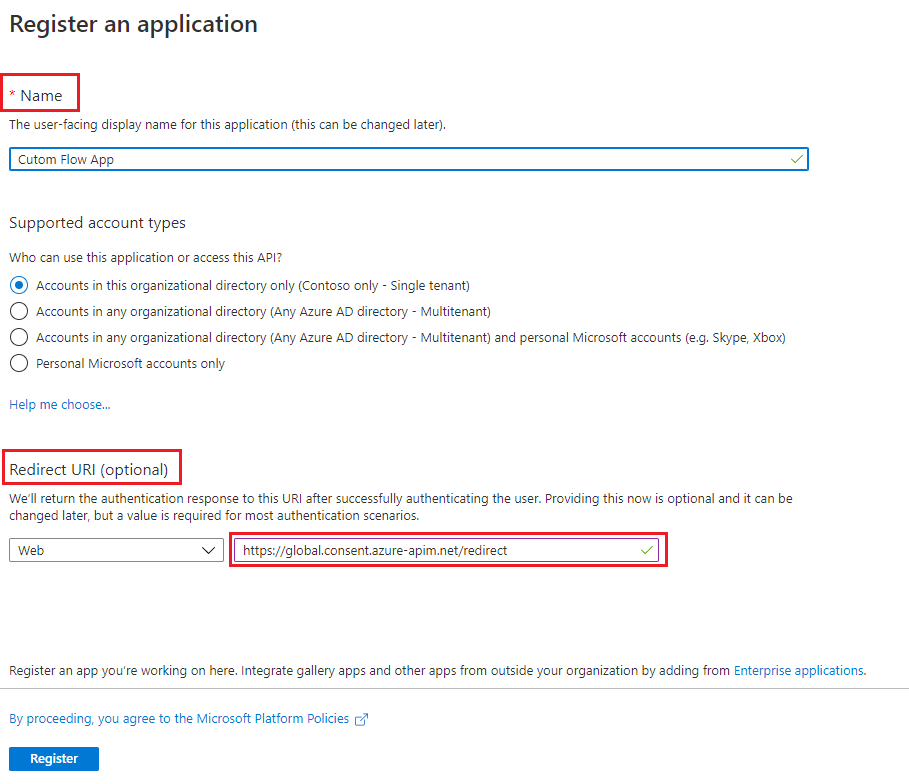
Provide a name for your app registration that is meaningful and something that you will remember in the future. In addition, provide https://global.consent.azure-apim.net/redirect as your Web redirect value.
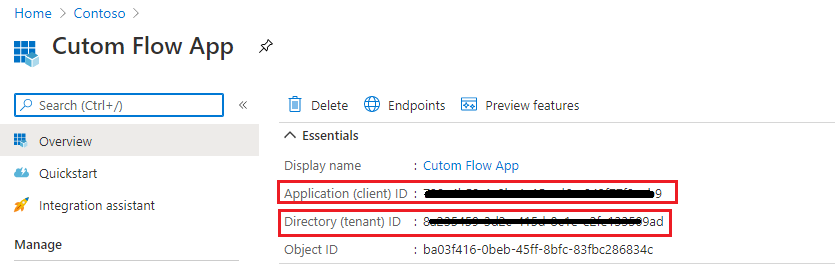
When your app registration completes, there are values that we need to record for use in our custom connector. Copy your client Id and tenant Id and paste them into a text editor.
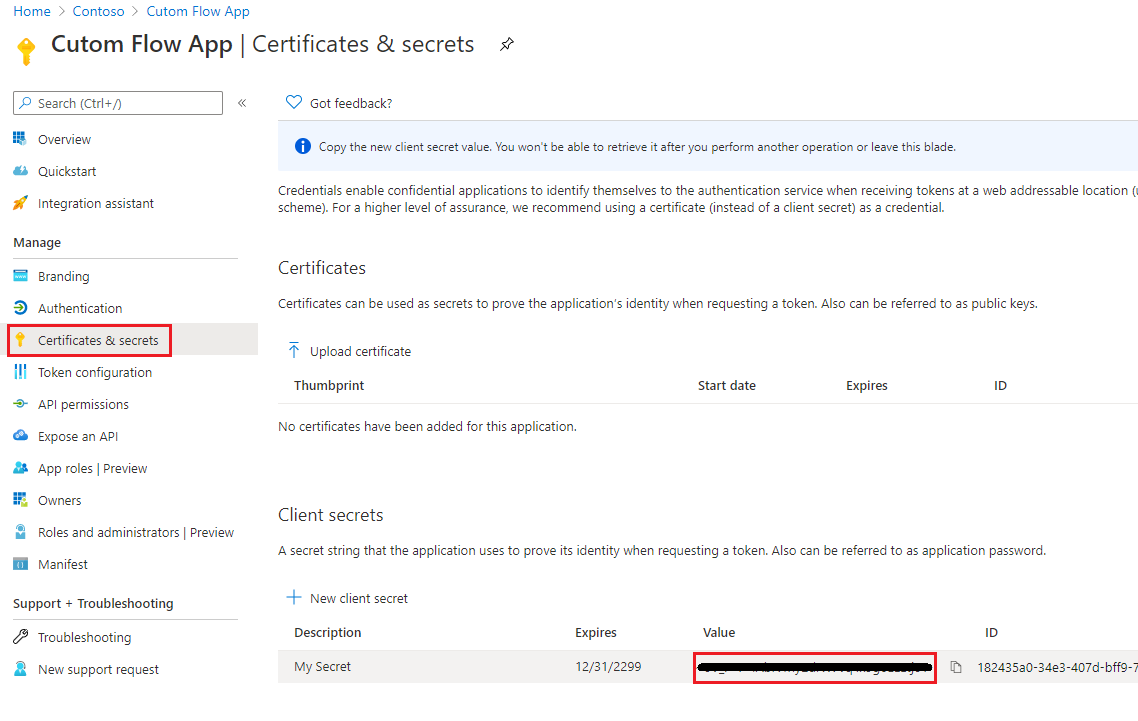
We now need to generate a secret and can do so from the Certificates & secrets experience. Make a note of this value and you will not be able to see this value once you leave this screen.
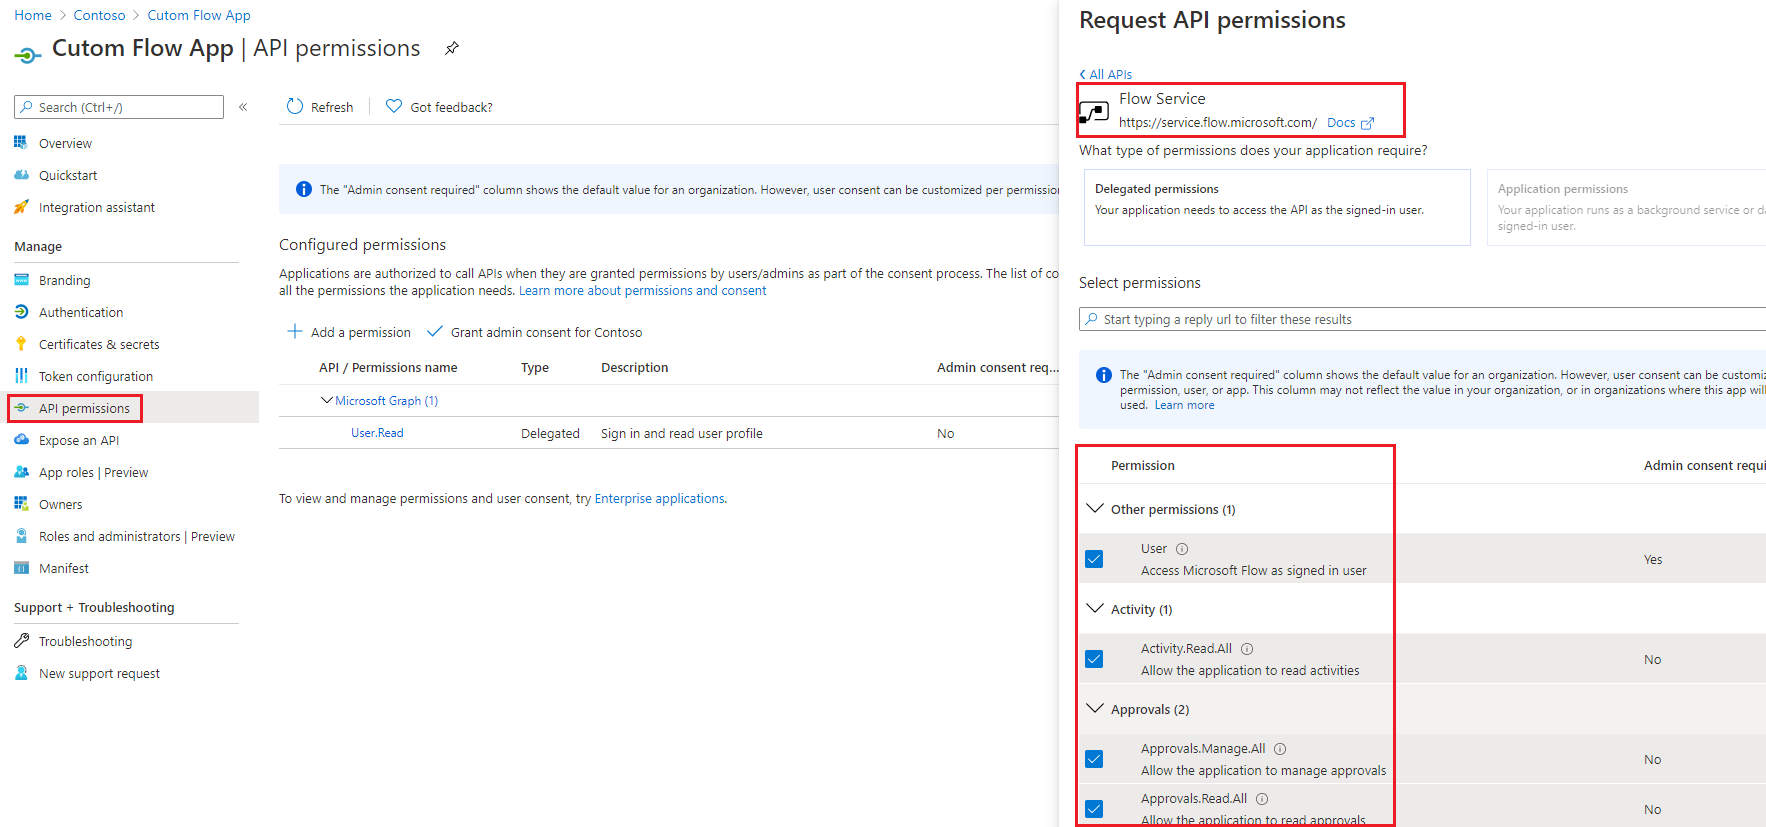
We now need to click on API permissions and Add a permission for the Flow Service. In addition, we need to provide permissions that our connector will need. Select all values.
Note: If you don’t find the Microsoft Flow service listed, then search for Microsoft Flow in the APIs my organization uses tab.
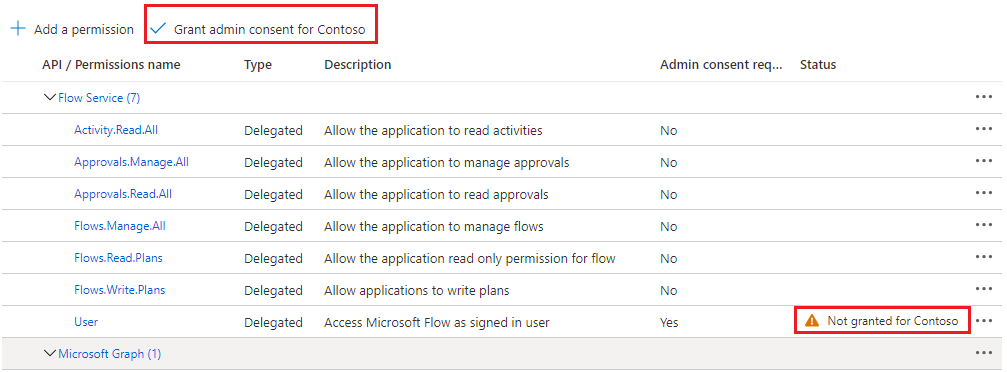
Notice we have a warning that is prompting us for admin consent. This is where an administrator needs to click the Grant admin consent for
Create Custom Connector
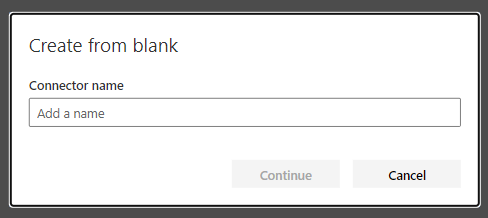
We will now create a custom connector from the Power Automate portal. We will create this connector using the ‘blank’ template.

Provide a meaningful name for custom connector.
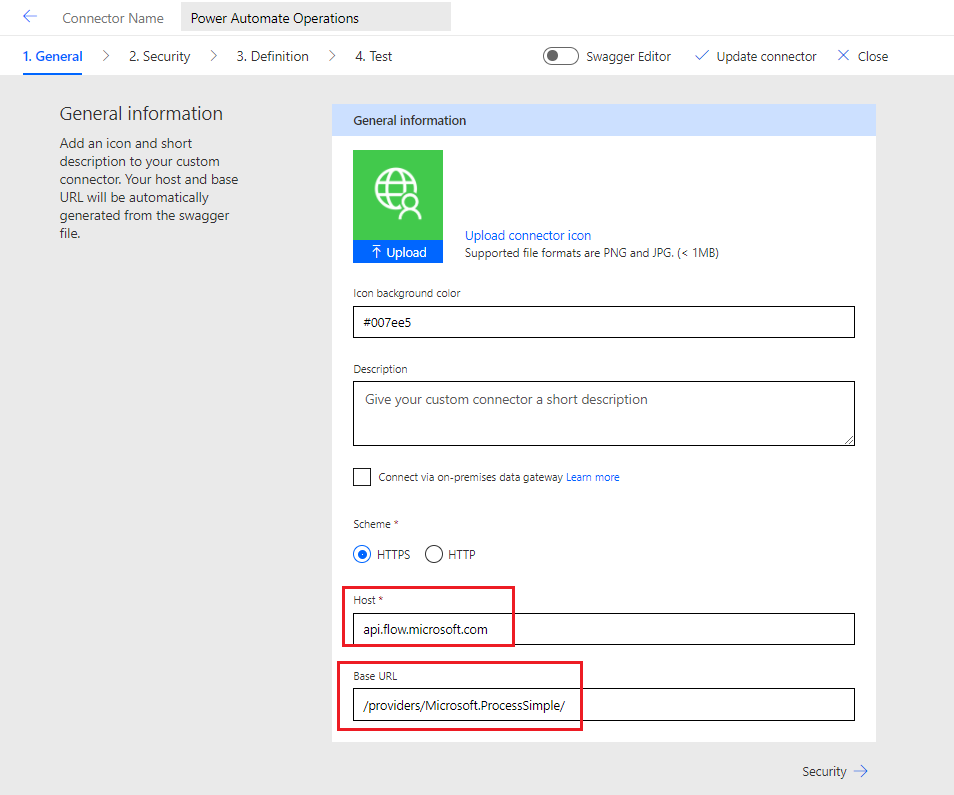
Provide the following values for your Host and Base URL.
• api.flow.microsoft.com
• /providers/Microsoft.ProcessSimple/
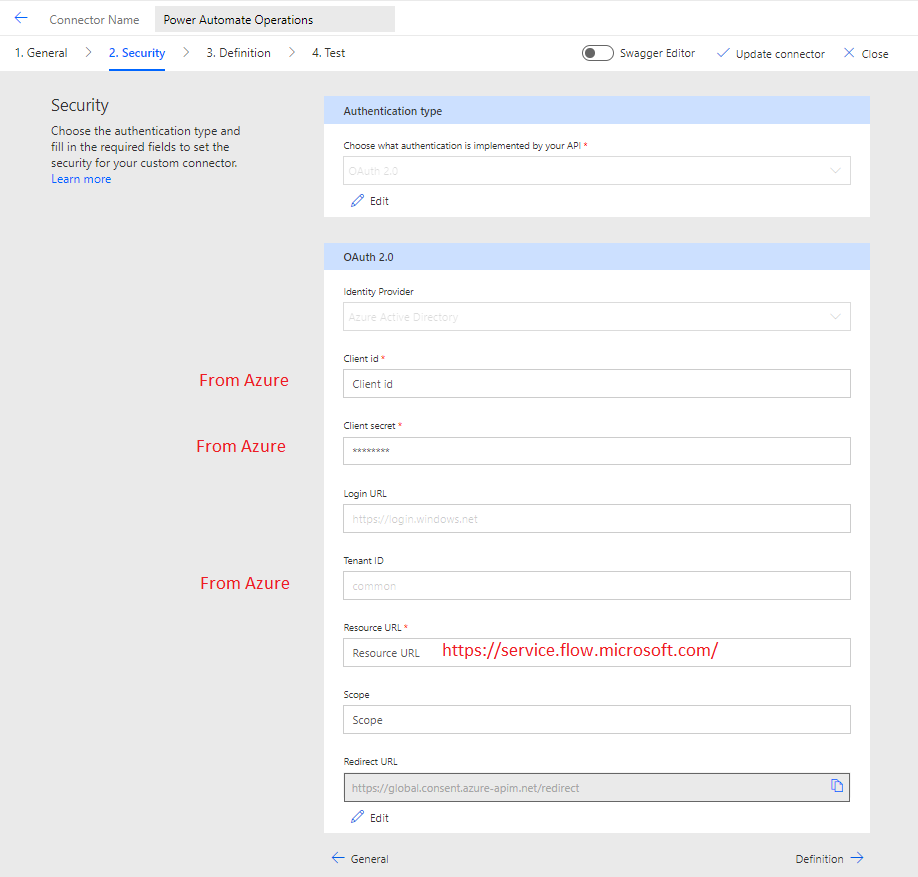
We can now proceed to our Security tab. Here we need to use our Client Id, Client secret, Tenant Id, Resource URL (https://service.flow.microsoft.com/) from our Azure app registration that we previously created.
Provide meaningful names for your cancel action.

Click on Import Sample and then provide the following value for your URL
/environments/{environmentId}/flows/{flowId}/runs/{runId}/cancel?api-version=2016-11-01
For Headers, you can include Content-Type: application/json
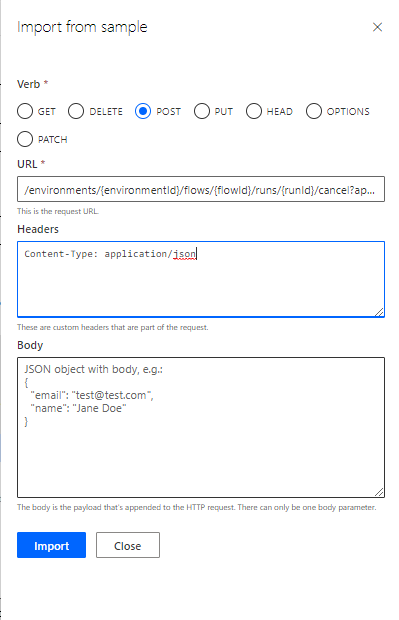
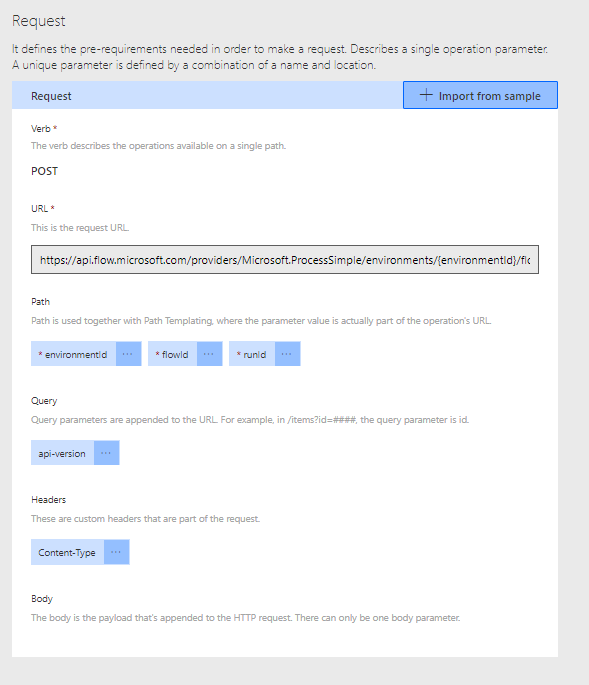
Once you click the Import button you should see a screen similar to below:
We can now test our connector by clicking on the Test tab. Before we test, we need to create a connection. When prompted, provide your email address and password that you are logged into Power Automate with.
Once you have a connection set, pass in the required parameters to cancel a running flow.
Note: The values below are samples.
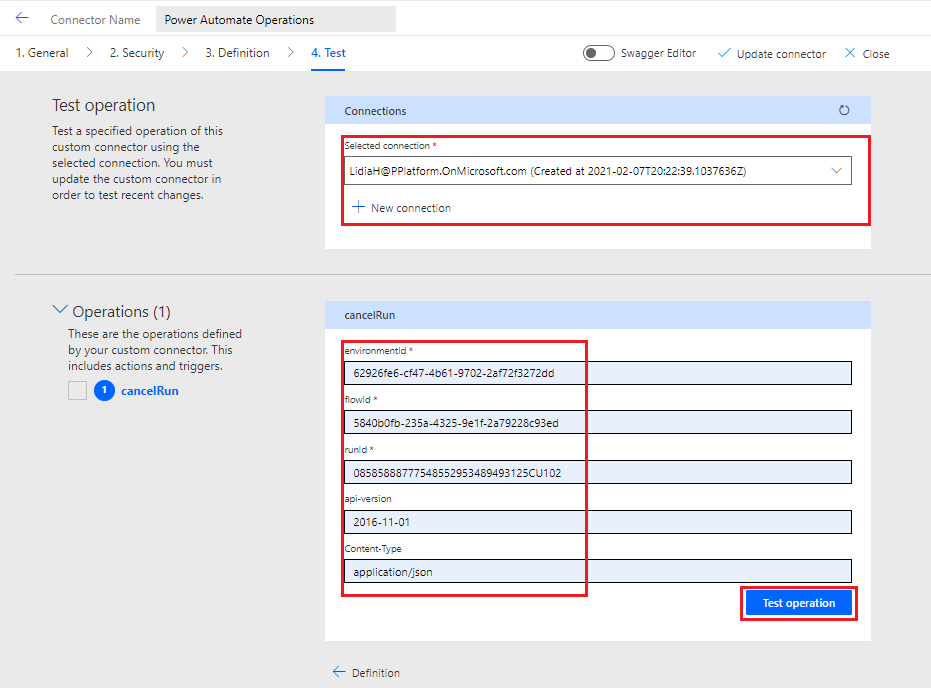
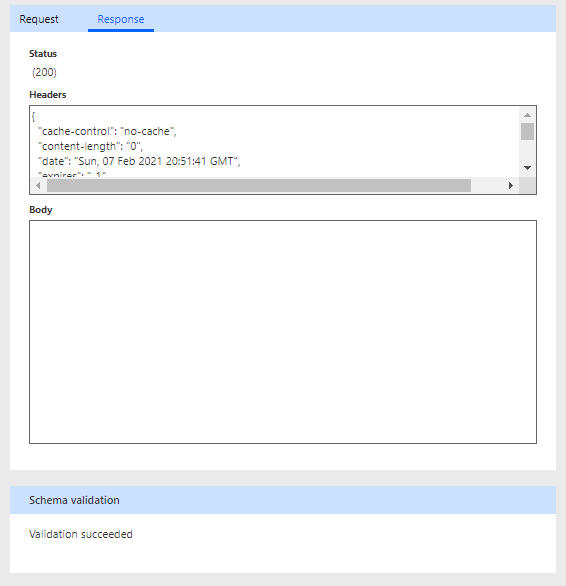
Once complete, we will see a successful response.
Embed Custom Connector in Cloud Flow
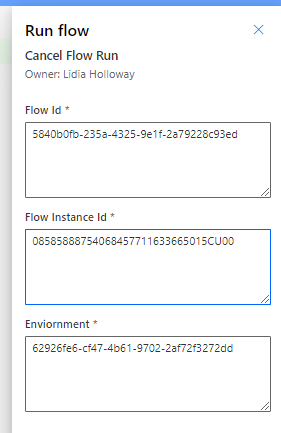
We can now create a flow that will cancel another flow. We can use the Manually trigger a flow trigger with inputs for our Flow Id, Flow Instance Id (run instance) and Environment. We can also browse for our Custom connector.
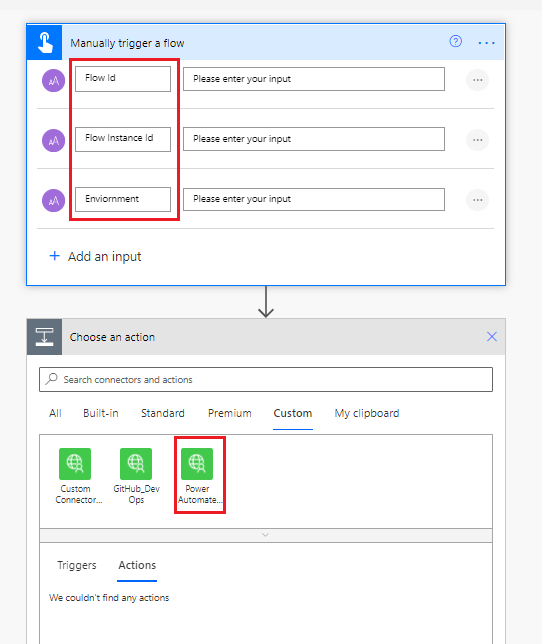
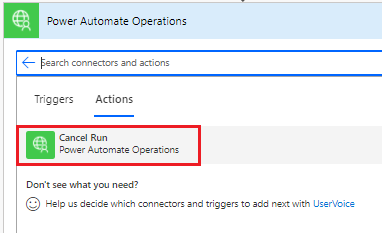
We can subsequently click on our action: Cancel Run.
We can now use our dynamic content from our trigger into our Cancel Run action.
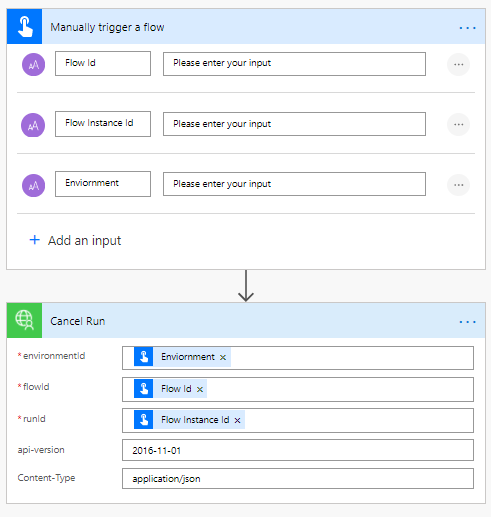
Save your flow.
Testing
We can now go ahead and test our flow. To test our flow we need an active flow that can be cancelled. Any flow can be used, if it is long running. As part of that running flow we need to obtain details from the running instance. This includes the Environment Id, Flow Id and Flow Instance Id (Run Id) respectively.

Notice that our flow will have a Running state.

We can now Test the flow that we recently built that includes our custom connector. We can now input these values from the flow that we want to cancel.
We will discover that our flow has now been Canceled.

Conclusion
We may run into situations where we need to cancel a running flow programmatically. We can use the APIs that are available in the (Power Automate) Flow Service to cancel a running flow.
Was this article helpful?