Restrict Azure VM SKU with Azure Policy
- Print
- DarkLight
- PDF
Restrict Azure VM SKU with Azure Policy
- Print
- DarkLight
- PDF
Article summary
Did you find this summary helpful?
Thank you for your feedback!
#ServerlessTips - Azure Functions
Author: Rahul Rai Microsoft MVP
Azure Policy is a powerful tool that allows you to enforce compliance and governance rules for your Azure resources. One way to use Azure Policy is to restrict the VM sizes deployed in your environment. This is particularly useful for controlling costs, as larger VM sizes can be more expensive.
To restrict VM sizes with Azure Policy, you can create a policy definition that specifies the allowed VM sizes. You can then assign this policy definition to your Azure subscription or resource group.
Here's an example policy definition that restricts VM sizes to a specific set of sizes:
{
  "mode": "All",
  "policyRule": {
    "if": {
      "allOf": [
        {
          "field": "type",
          "equals": "Microsoft.Compute/virtualMachines"
        },
        {
          "not": {
            "field": "Microsoft.Compute/virtualMachines/sku.name",
            "in": [
              "Standard_A1",
              "Standard_A2",
              "Standard_A3"
            ]
          }
        }
      ]
    },
    "then": {
      "effect": "deny"
    }
  }
}
This policy definition denies the deployment of VMs that are not of the allowed sizes. Using Azure Policy to restrict VM sizes, you can help control costs and ensure compliance with your organization's standards.
Next, we will discuss deploying this policy using the Azure portal. Begin by searching for "Policy" in the portal search box and selecting "Policy" from the results. Next, select the "Policy Definition" option from the menu and start the process of defining a new policy by clicking on the "Policy Definition" button as follows:
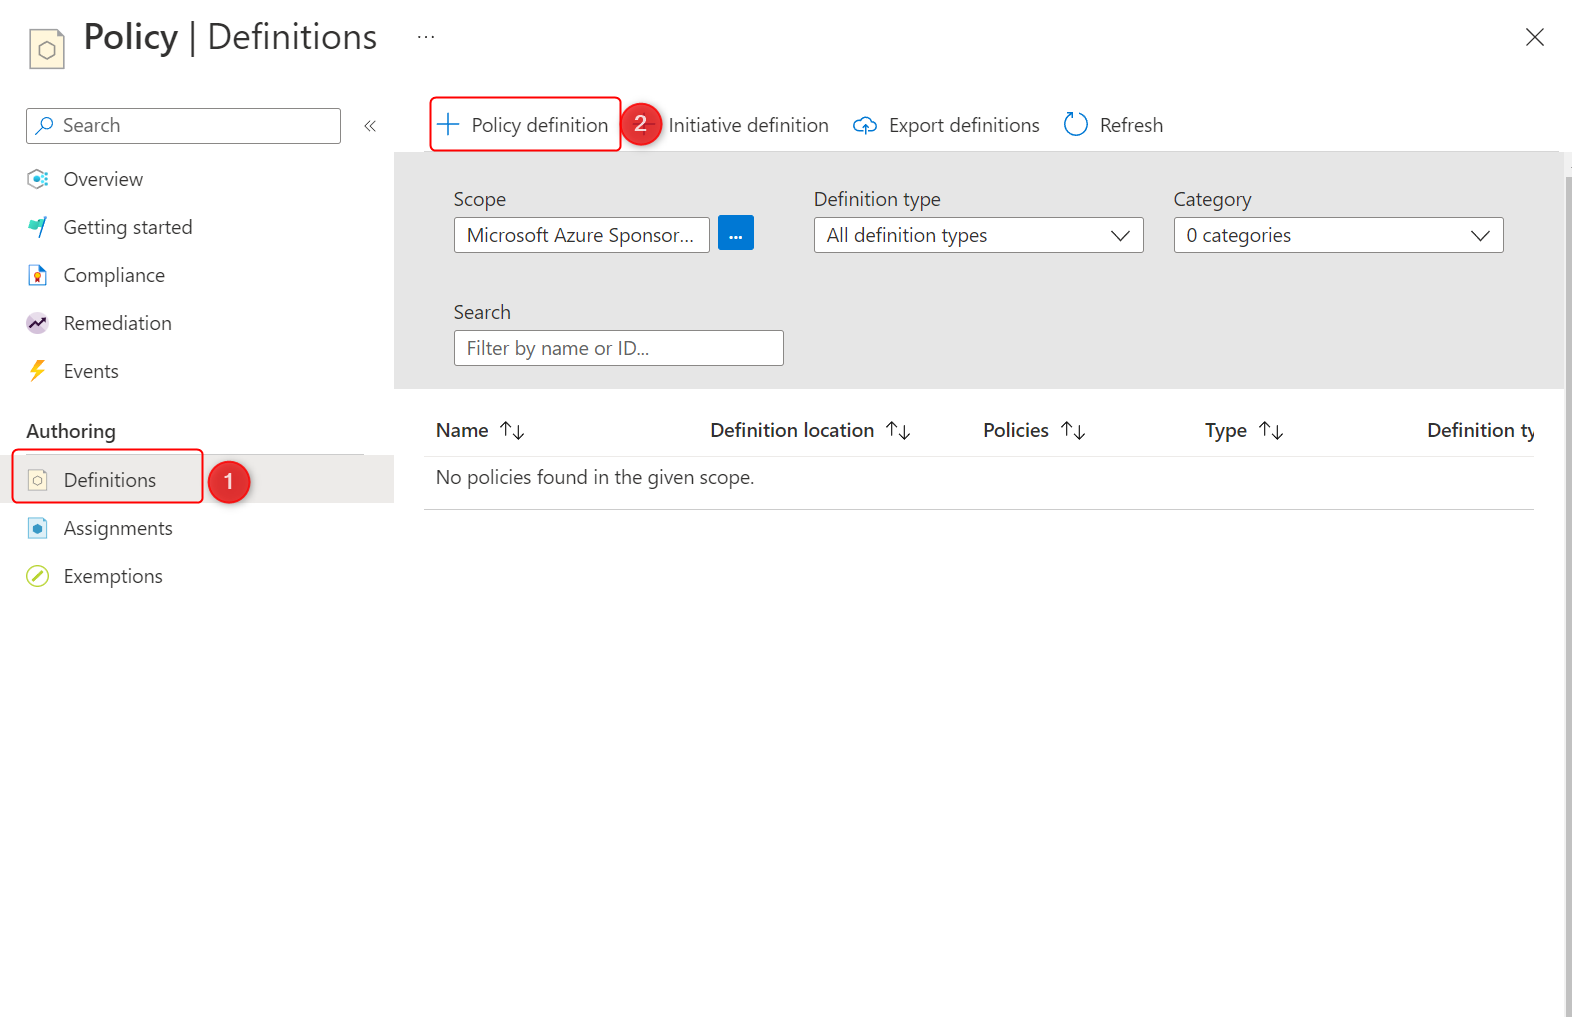
Figure 1 Start creating a policy definition.
Next, select the subscription in which the policy definition will be stored and enter the name of the policy. To make it easier to search the policy later, create a new category called "Custom.” In the policy rule text box, paste the policy text. Click "Save" to create the policy.

Figure 2 Define policy
We will now assign this policy to our subscription. Click on "Assign" after you have created the policy.
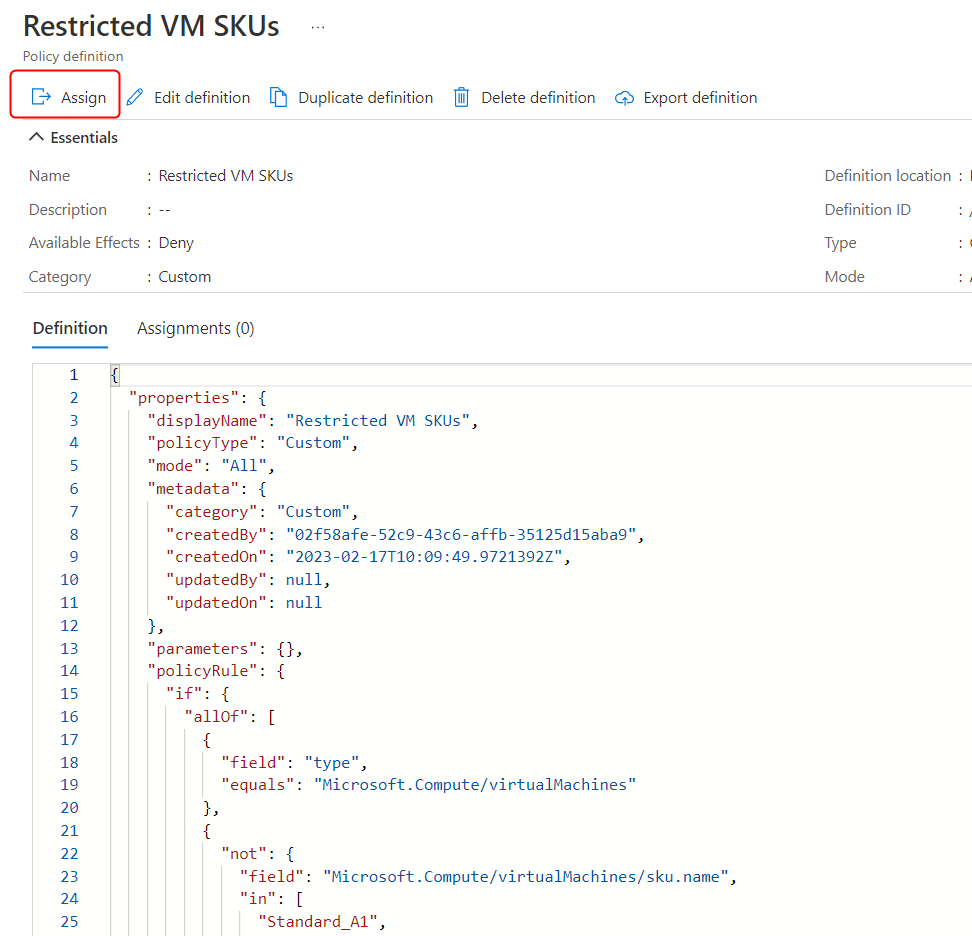
Figure 3 Start assignment operation
Specify the scope of your Azure subscription on the next screen and click the "Review + Create" button and then the "Create" button to complete the operation.
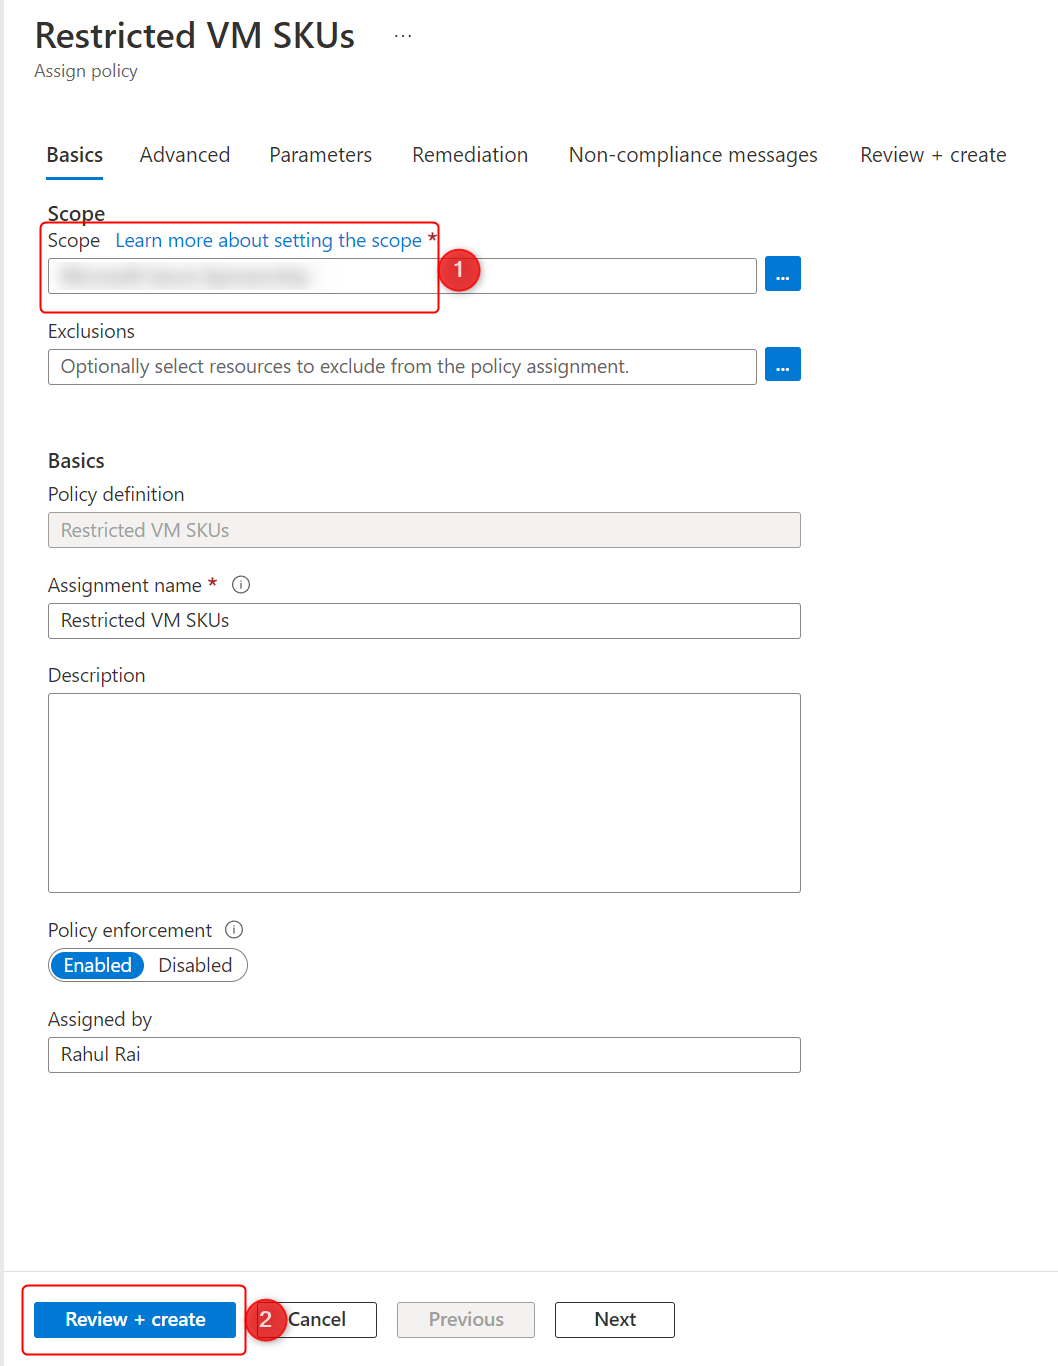
Figure 4 Assign the policy.
The Azure policy is now in effect. When creating a new Azure VM, you can test the policy by clicking the "See all sizes" link to enumerate the available VM SKUs as follows:
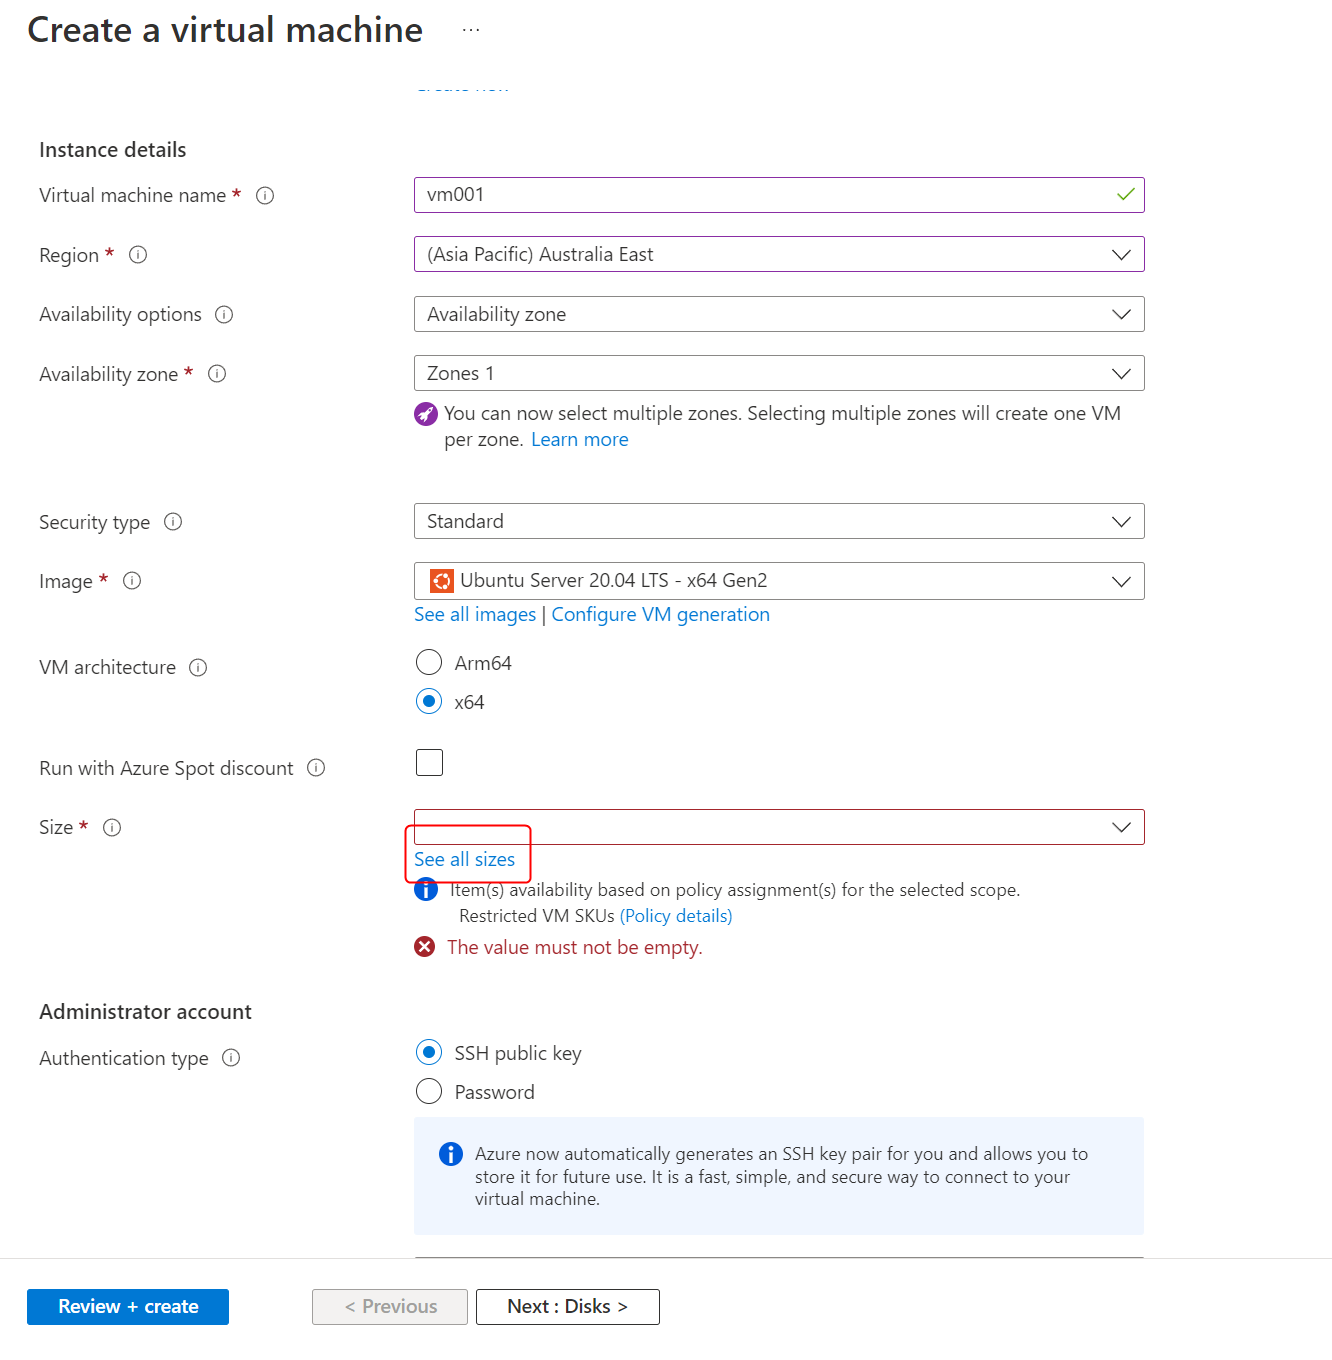
Figure 5 Enumerate the available VM SKUs
The next page shows you the available VM SKUs and the SKUs blocked by the policy as follows:
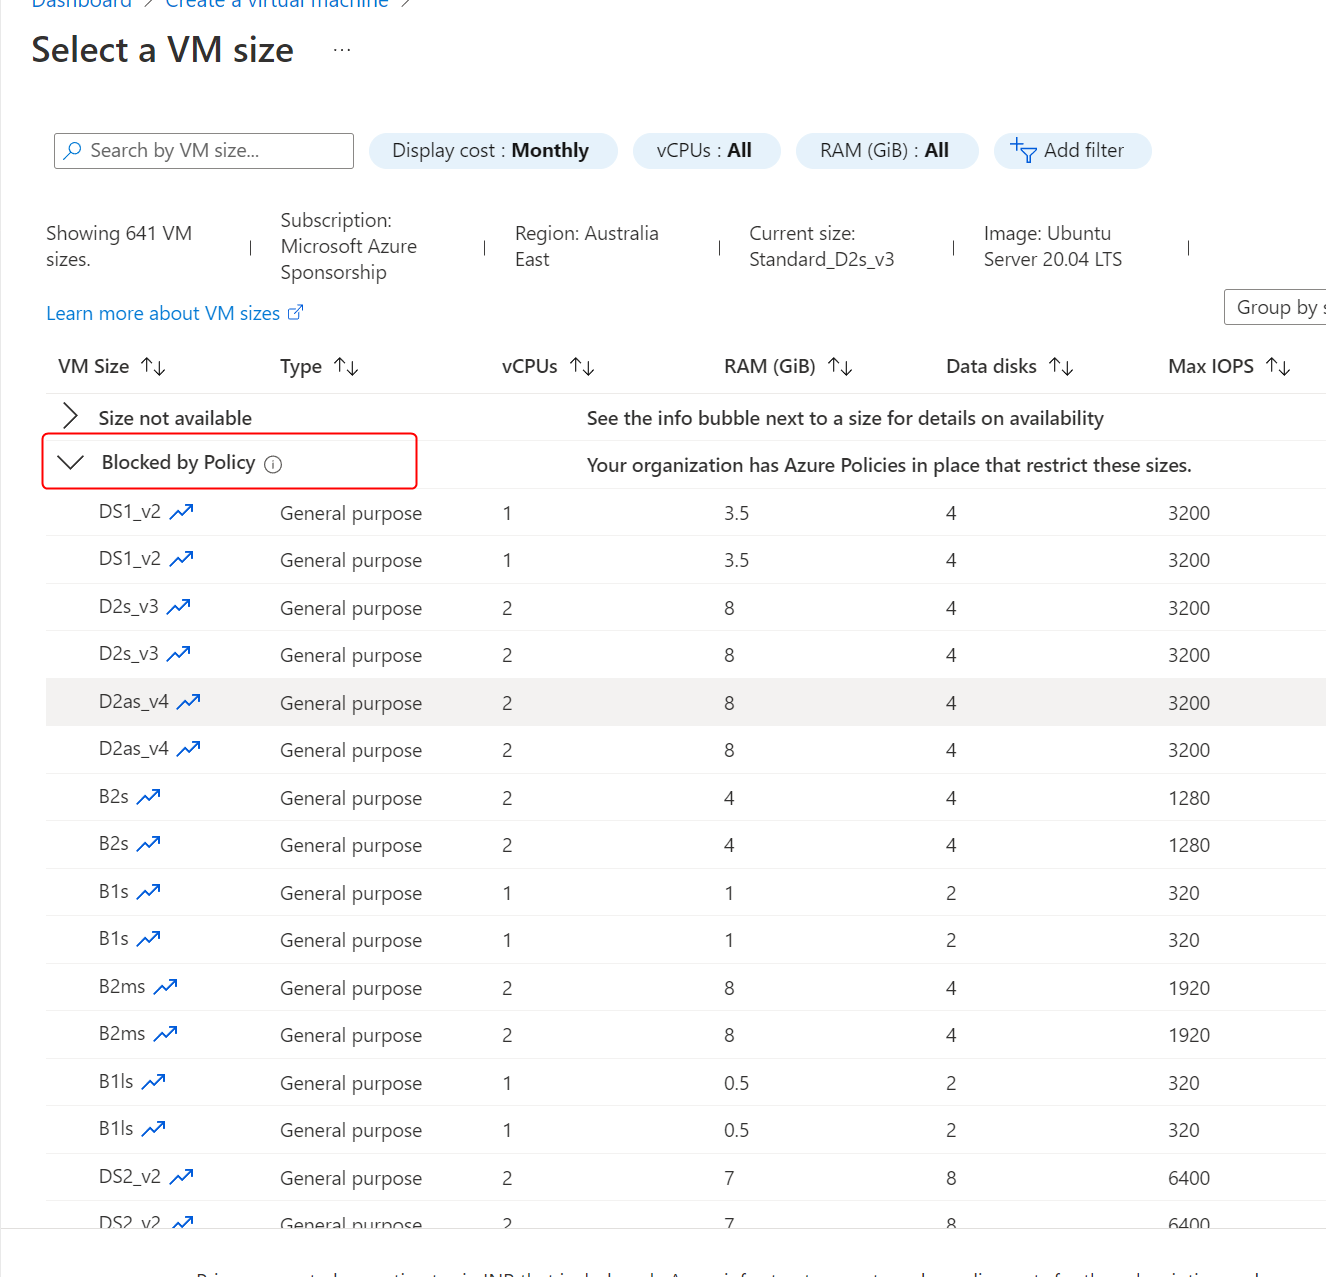
Figure 6 Restricted VM SKUs
To remove the VM SKU restriction, please delete or disable the policy after you have completed the demo.
In conclusion, Azure Policy provides a powerful and flexible way to manage and enforce compliance and governance rules for your Azure resources. By using Azure Policy to restrict the VM sizes deployed in your environment, you can help control costs and ensure that your organization's standards are followed. The policy definition provided in this article is just one example of how you can use Azure Policy to restrict VM sizes. Still, there are many other policy definitions and options available to you. If you still need to start using Azure Policy in your environment, it's worth exploring how it can help you better manage your Azure resources.
Was this article helpful?