Scheduling a Microsoft Teams Message
- Print
- DarkLight
- Download PDF
Scheduling a Microsoft Teams Message
- Print
- DarkLight
- Download PDF
Article summary
Did you find this summary helpful?
Thank you for your feedback!
#ServerlessTips - Azure Logic Apps
Author: Kent Weare Integration MVP
Microsoft Outlook has supported scheduling the sending of a message until a specific time for quite some time. This feature has been useful to get information compiled, but without distributing it to the recipients outside of core working hours such as evenings or weekends. Once the scheduled time is reached, only then will the recipients receive the correspondence.
Since Microsoft Teams is a prevalent communication tool in the enterprise, deferring sending non-time sensitive messages is also useful capability. However, within the Microsoft Teams client, this isn’t possible, at least not as of this writing.
But, we can create a solution using Azure Logic Apps (or Power Automate). For the purposes of this post, I will be using Logic Apps Standard, but it can just as well be the consumption SKU.
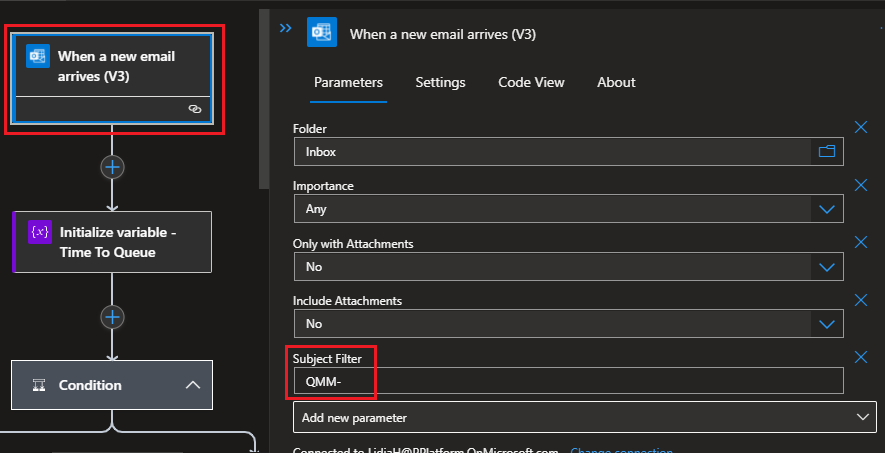
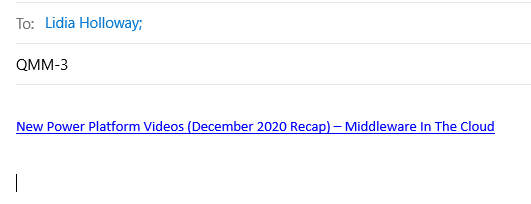
Our solution will involve sending an email to an inbox that we have access to (our personal inbox will work) using a specific Subject that includes the term QMM-
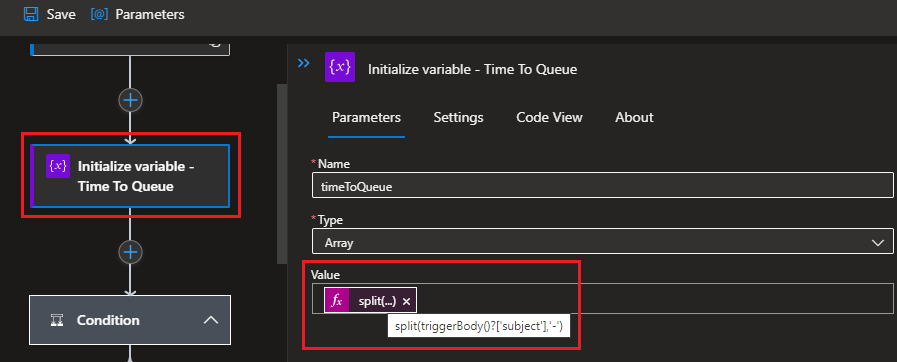
We can now add an Initialize variable action onto our canvas. We will call it timeToQueue and will set the Type to be Array. Our Value will be the result of the following expression: split(triggerBody()?['subject'],'-').
To ensure that our subject has been constructed correctly, we want to perform some validation on it using a Condition action. We will check to see if the email Subject contains a ‘-‘.
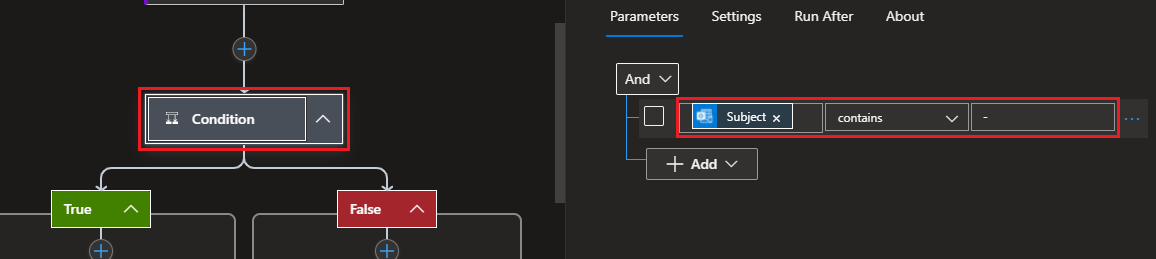
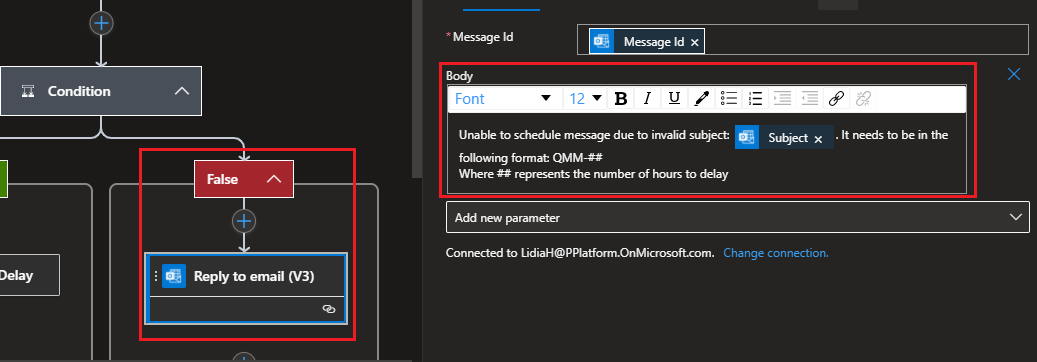
If the subject does not contain a ‘-‘, we will Reply to email and indicate that the message that was sent didn’t include the right format.
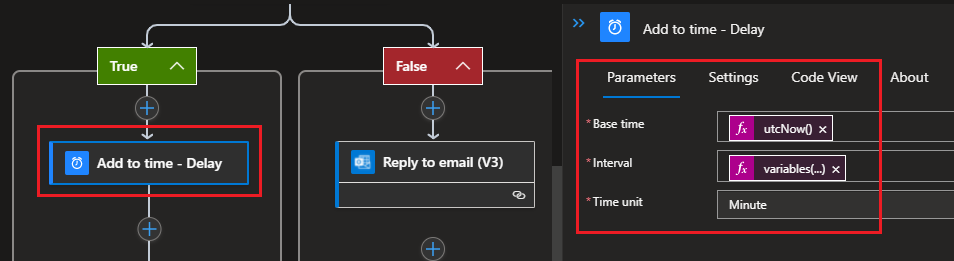
If the subject is valid, we will go down out the True path. Within this branch, we will calculate how much time we should delay using the Add to time action. For the Base time property, we will use the utcNow() expression. For Interval we will access the ‘1’ index from our timeToQueue variable that we previously created: variables('timeToQueue')[1]. We will also set our Time unit to Minute but if we wanted to have our delay measured in hours, we could set it to that.
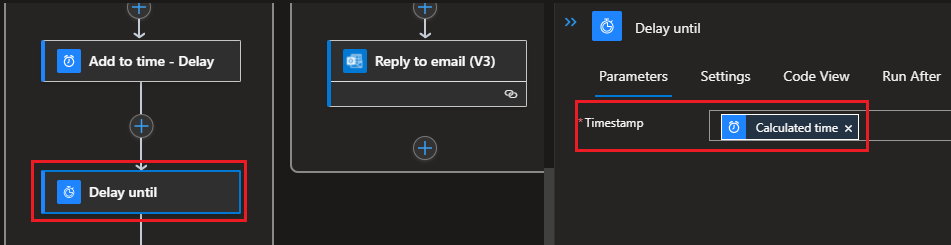
We now need to add a Delay until action and include the Calculated time output from our previous action.
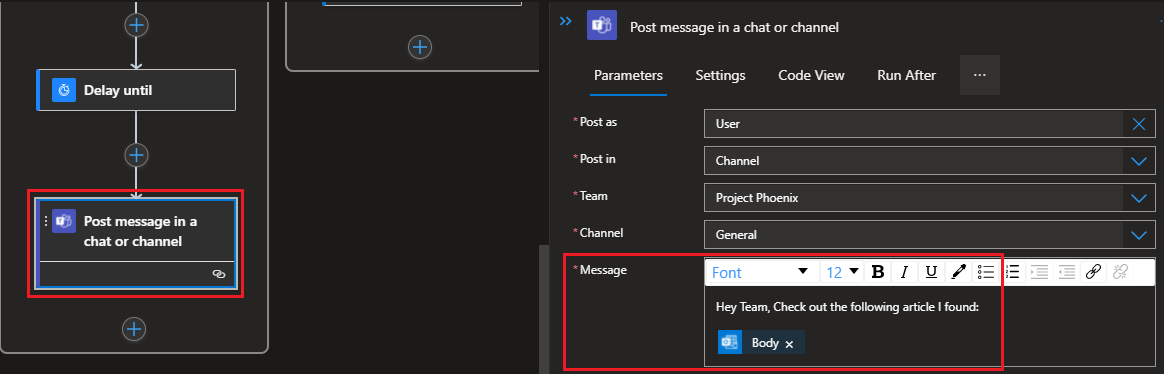
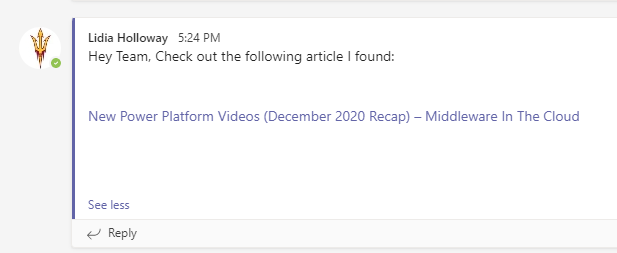
Lastly, we will go ahead and add a Post message in a chat or channel action and include the email Body from our original email.
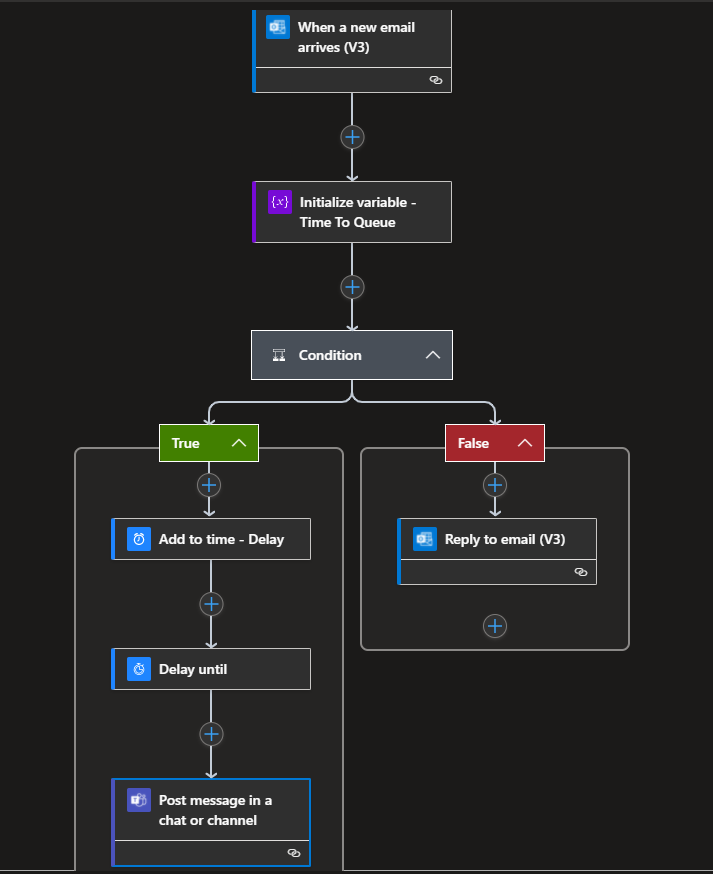
Our complete logic app looks like the following.
Testing
We can test our process by sending in an email and providing a link to content that we want to share with our team. We also need to ensure that we set our Subject correctly.
If we wait 3 minutes, we will see that our message has been sent to Microsoft Teams.
Conclusion
Using Azure Logic Apps, we can use it to queue up requests and subsequently send notifications after our prescribed wait period.

Was this article helpful?