Use Machine Groups for Power Automate Desktop Scalability and Redundancy
- Print
- DarkLight
- Download PDF
Use Machine Groups for Power Automate Desktop Scalability and Redundancy
- Print
- DarkLight
- Download PDF
Article summary
Did you find this summary helpful?
Thank you for your feedback!
Microsoft recently introduced a new way for Power Automate Desktop to connect to the Power Automate cloud service. Previously, used an on-premises data gateway, but now we can connect using Machine connectivity.
The On-premises data gateway can be clustered to allow for load distribution and redundancy. In this post we are going to discuss how we can achieve load distribution and redundancy through a feature called Machine Groups that also leveraged machine connectivity.
To illustrate this concept, we will provision 2 machines in Azure.
Note: Azure is not a pre-requisite I am using it as it is convenient.
We will simply call these machines Machine01 and Machine02. On each machine we will install Power Automate Desktop.
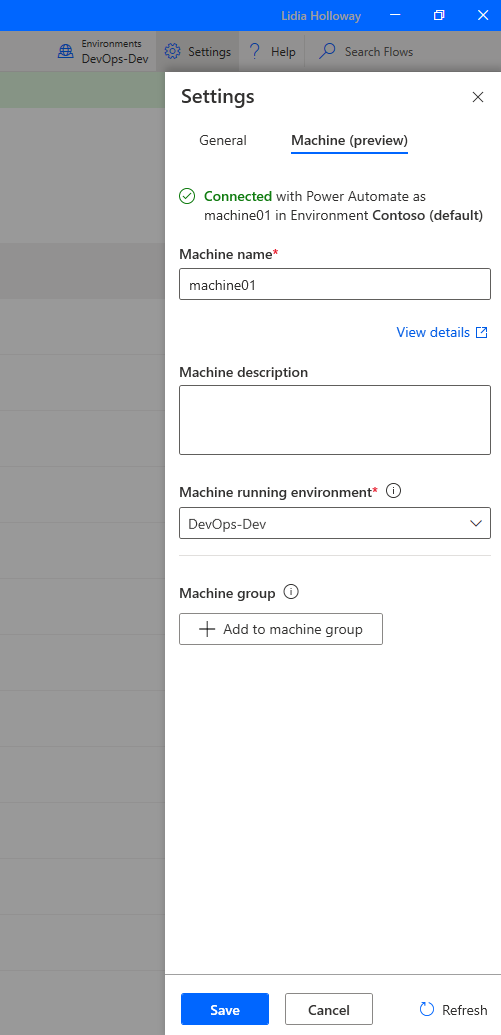
For each machine, we will register it in the target environment.
Note: that a machine can only be connected to 1 environment at a time.
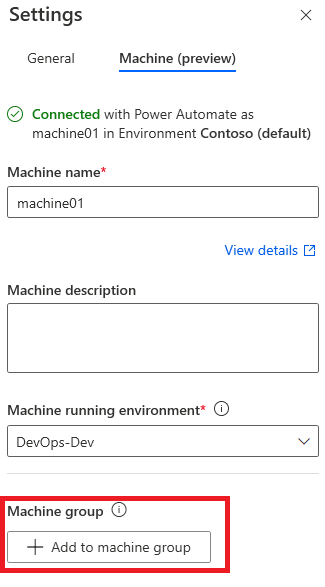
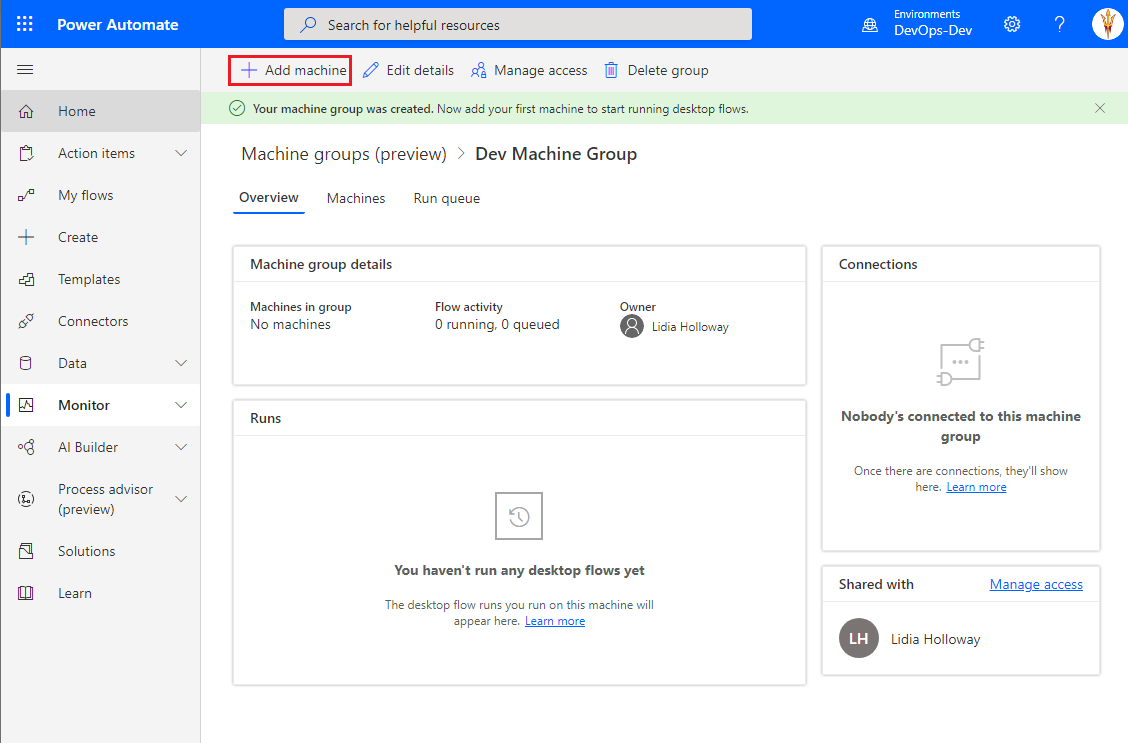
Once both machines have been configured, we can join them to a Machine group by clicking on the Add to machine group.
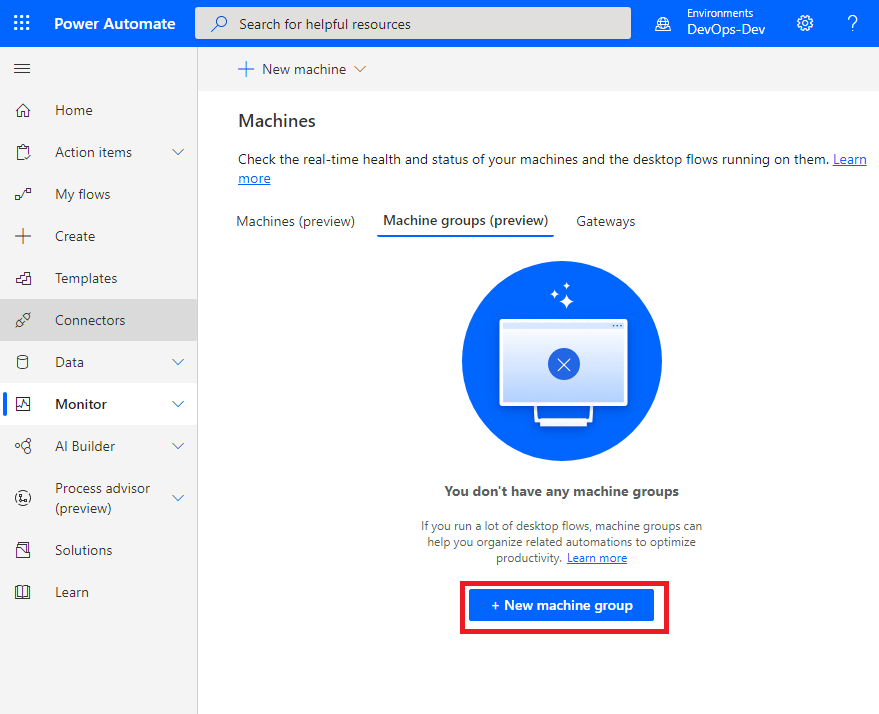
We will subsequently be redirected to the Power Automate Portal where we can create a Machine group by clicking on the New machine group button.
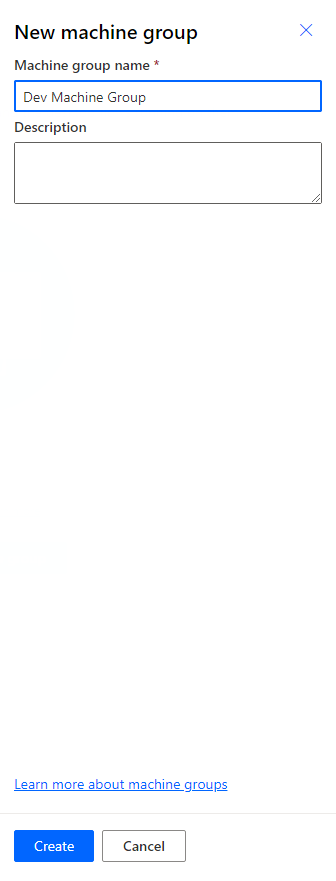
The next step is to provide a Name for our Machine Group and then we can click on the Create button.
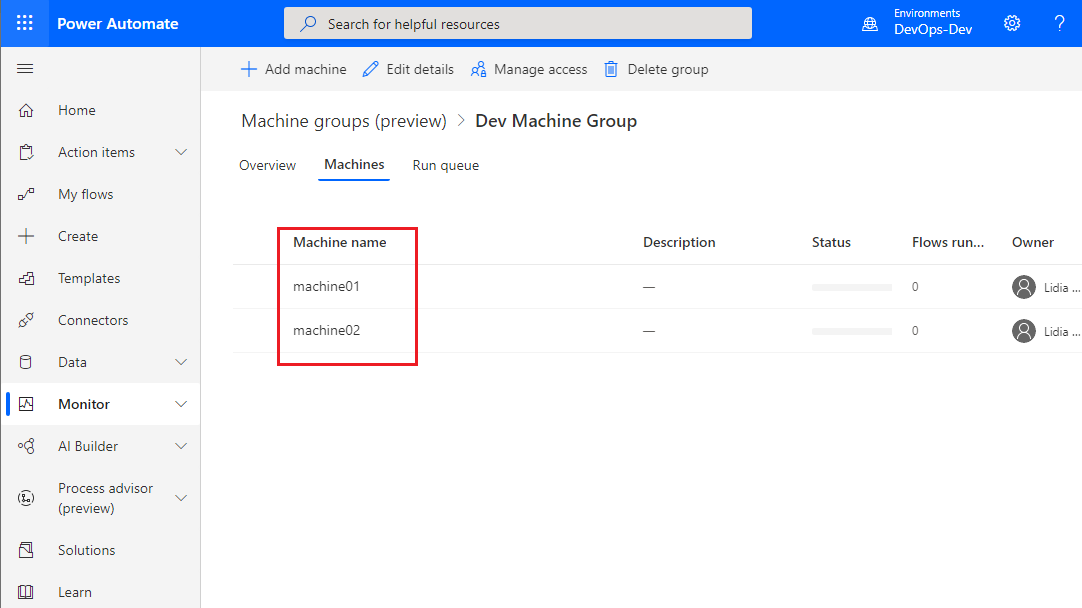
Our Machine group will be created, and we can subsequently Add machines to our group by clicking on the appropriate link.
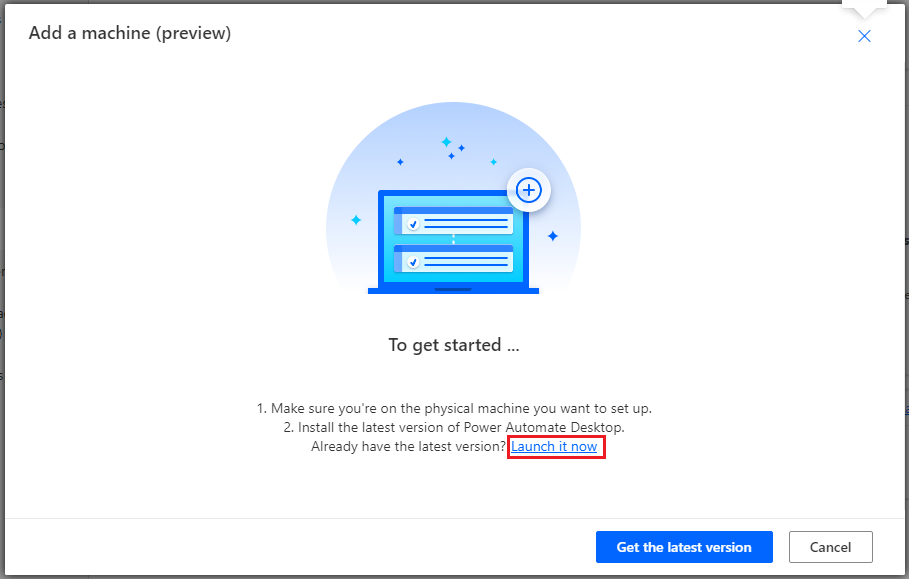
Since we just installed our Power Automate Desktop software, we know we have the latest version so we can click on the Launch it now link.
Important: We need to click this link on the machine where our Power Automate Desktop instance has been installed.
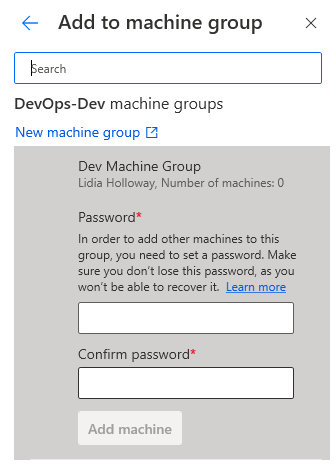
To join a machine to a Machine group, we need to create a password for that group. Specify a password that will be used to join this group. Once you have provided your password, click on the Add machine button.
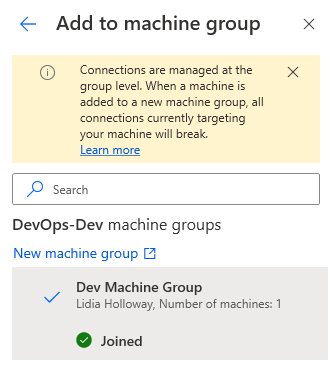
After a few seconds we should see a confirmation that our machine has been added.
Follow the same steps for your 2nd machine. After you have completed configuring the 2nd machine, we should see them both added to our Machine group.
Testing
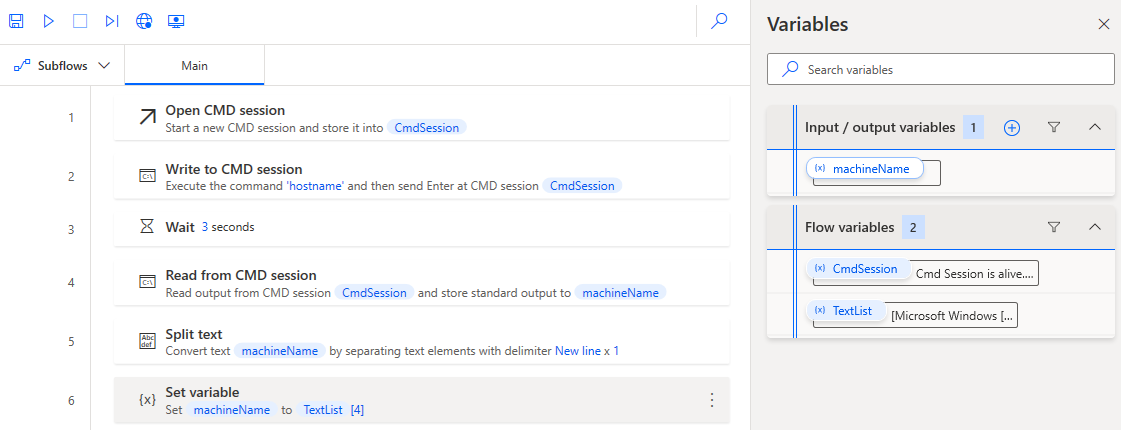
To test the Machine group functionality, I have created a simple Desktop flow that will run a CMD to get the hostname which we will use as an Output variable that will get sent back to our Power Automate cloud flow. This will help us determine which machine processed our request.
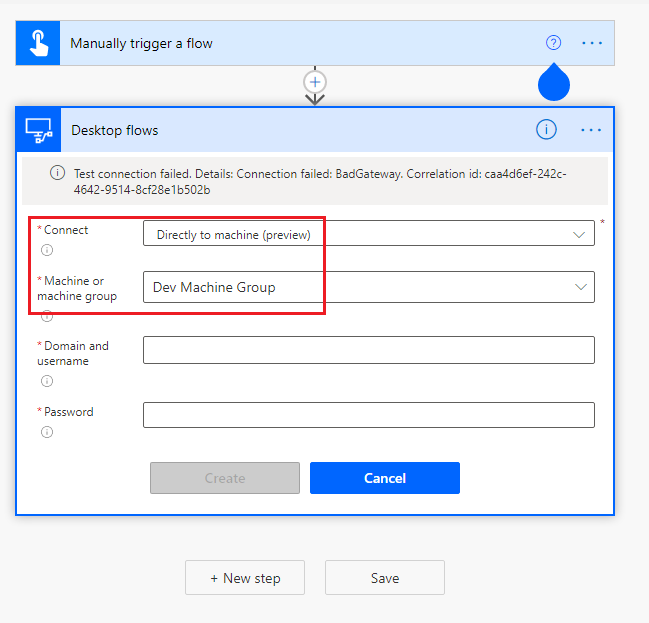
Inside our Cloud flow, we need to establish a connection to call this Desktop flow. When we create a connection, we want to use Directly to machine as our Connect mode. In addition, we need to select our Machine group and provide our credentials.
Note: The credentials that you use here need to be able to log on to both machines through remote desktop session.
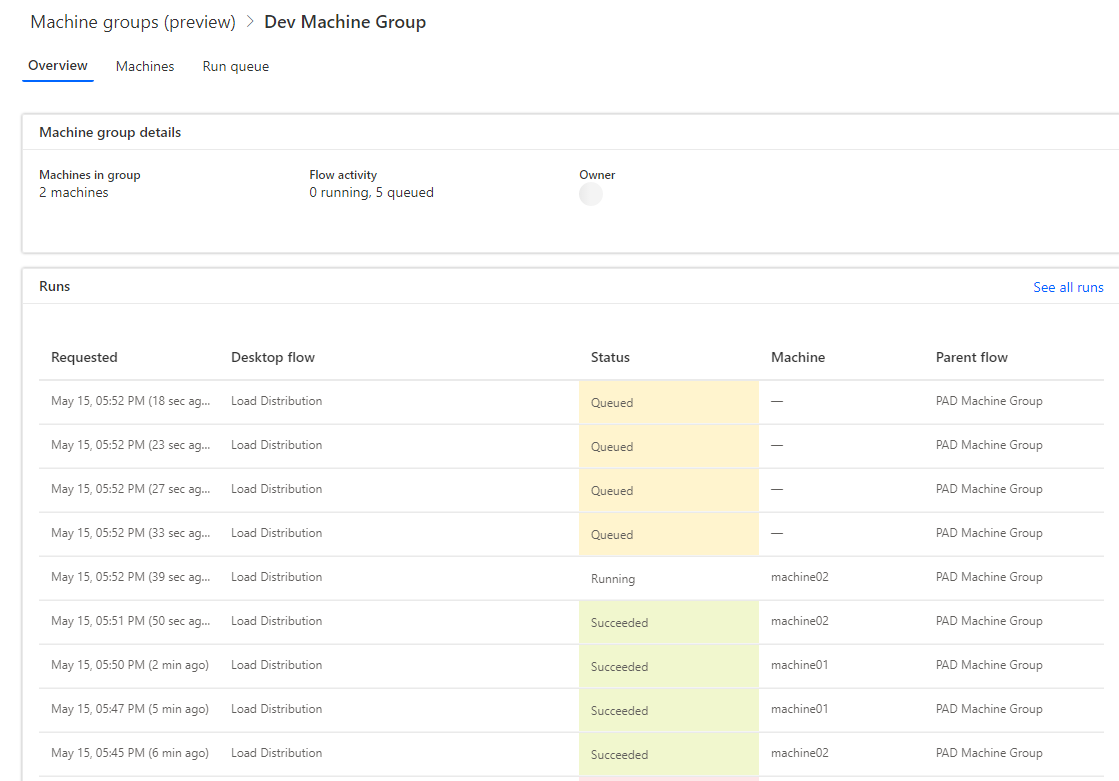
We can now queue up many requests by running our Cloud flow. As we can see, we have load being spread across our nodes as indicated by the response being sent back from our Desktop flow. In addition, we can see the name of the machine that processed the job.
Just for fun, let’s turn off one of our nodes and see what happens.
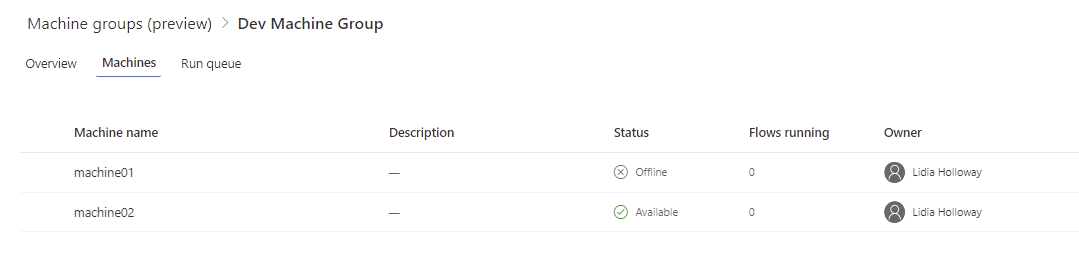
With only Machine02 online, we can see that it has successfully handled all the requests that have been subsequently sent its way.
Conclusion
As we saw in this post, Machine groups not only help us with load distribution so we can process more requests concurrently, but it is also an essential feature for redundancy and ensuring our workloads are highly available.
Was this article helpful?