Write Record to Excel using Power Automate Desktop
- Print
- DarkLight
- Download PDF
Write Record to Excel using Power Automate Desktop
- Print
- DarkLight
- Download PDF
Article summary
Did you find this summary helpful?
Thank you for your feedback!
#ServerlessTips - Power Automate
Author: Kent Weare Integration MVP
Both Power Automate and Power Automate Desktop provide the ability to write new records to an Excel Spreadsheet. However, there are some subtle differences between the two experiences:
• Power Automate – Cloud flows require the excel spreadsheet to be stored in SharePoint Online/One Drive folder. In addition, the file that will be written to must have data table exposed so that the Excel connector can infer a schema and make the corresponding fields available in the connector experience.
• Power Automate Desktop is going to assume the file is accessible through a file path; either Network share or local address. A data table is not required when writing or reading from this excel spreadsheet.
Let us take a quick look at how we can open a spreadsheet and insert a new record into it:
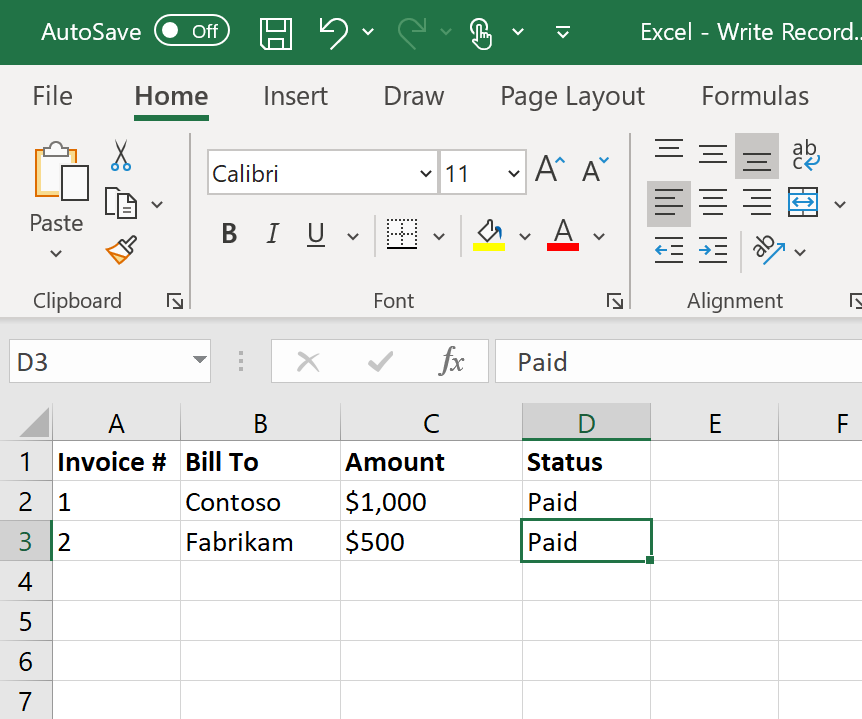
• Here is a picture of our existing spreadsheet, saved in a local folder that Power Automate Desktop has access to.

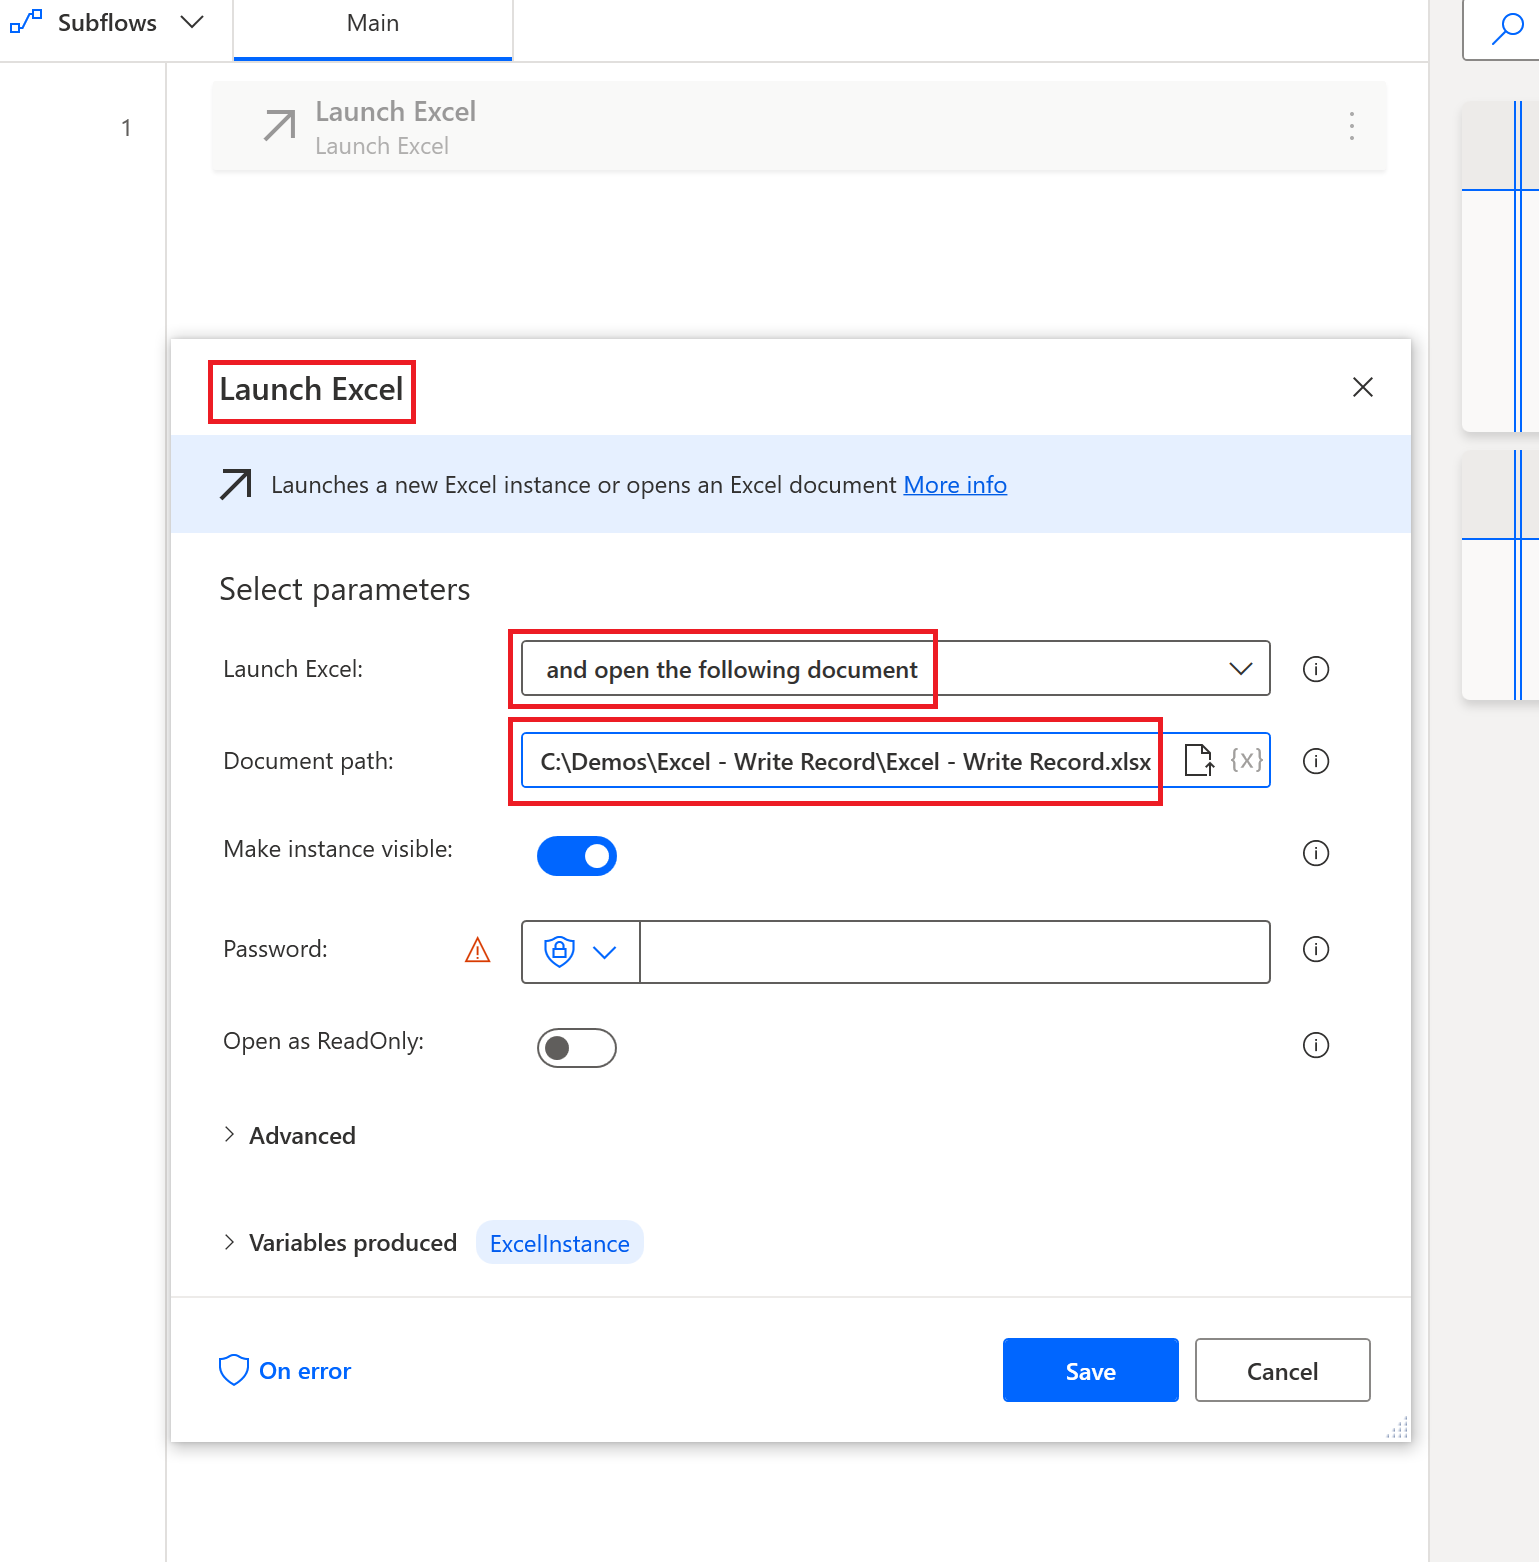
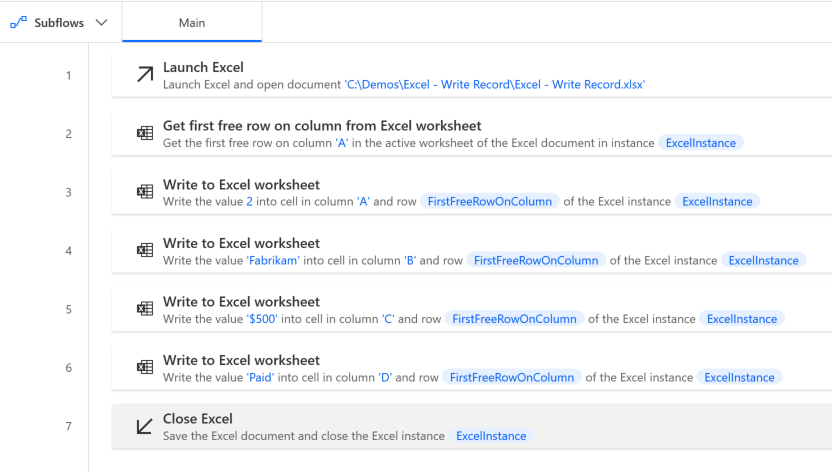
• Within our Desktop flow, the first action that we include is the Launch Excel action. This action will open our Excel spreadsheet so we can manipulate it. In our configuration, we need to open the following document and then populate Document path with the location of our excel file. We will also leave Make instance visible set to on.
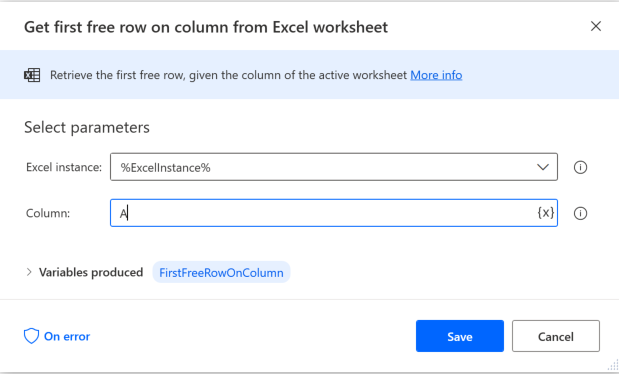
• Our next step is to determine our first free row. This allows us to continue to update our spreadsheet without worrying about overwriting data. To accomplish this task, drag the Get first free row on column from Excel worksheet. We need to specify which Column we want to target and will provide a value of A which represents our leftmost column.
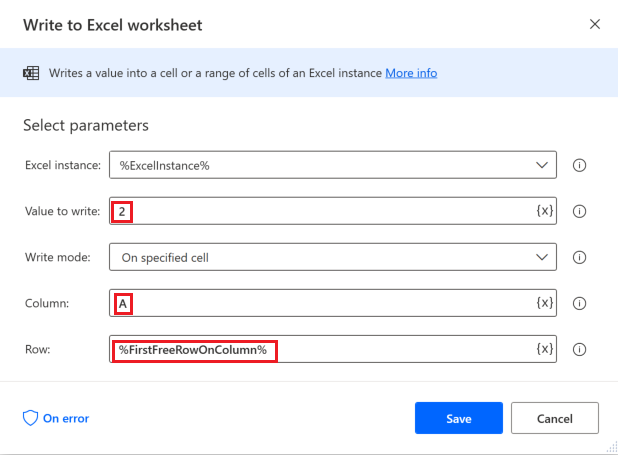
• We can now write data to our spreadsheet by using the Write to Excel worksheet action. As part of this action’s configuration, provide:
o Value to write: 2 (which represents our Invoice #)
o Column: A (which represents leftmost column)
o Row: %FirstFreeRowOnColumn% (which represents the first free row that was returned from our previous action)
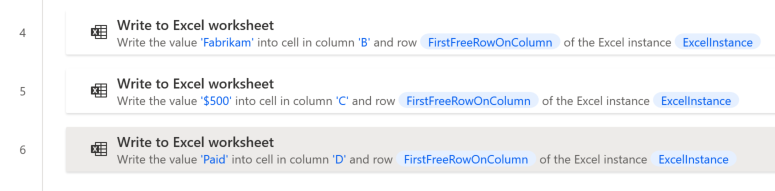
• We now need to repeat this step for the remaining columns.
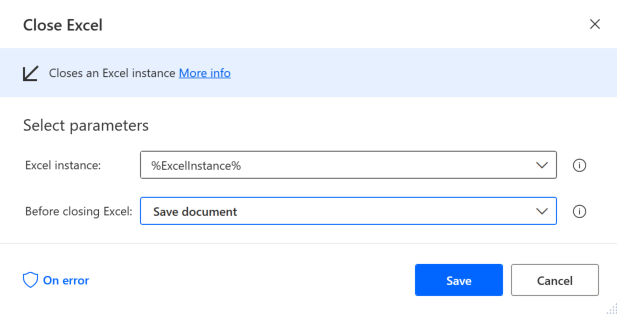
• Add a Close Excel action and ensure that we have selected Save document to ensure our changes are saved while document is being closed.
• Our Desktop flow should now look like the following:
Testing
We can now go ahead and run our Desktop flow. When we open our Excel document, we should discover the following:
Conclusion
In this post we learned about the differences between the Power Automate Cloud flow and Desktop flow capabilities when it comes to Excel documents. In addition, we also learned how we can write a new record to an Excel spreadsheet using Power Automate Desktop.
Was this article helpful?